


PSR-K1 Owner’s Manual 47
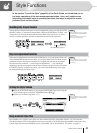
Style Functions
In the section “Try out the Style” (page 30) of the Quick Guide, we introduced you to
the basic operations of the auto accompaniment styles. Here, we’ll explain some
interesting and useful ways of sounding the styles, and ways to adjust the accom
-
paniment level and the chords.
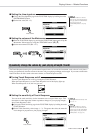
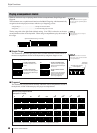
Sounding only the percussion
You can have just the percussion parts of the accompaniment play by pressing the [ACMP
ON/OFF] button—so that auto accompaniment is OFF (the ACMP display is unlit)—and
starting the style. Playing the keyboard sounds the Main Voice with no bass or chord
sounds, even when playing in the auto accompaniment section of the keyboard.
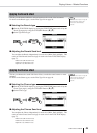
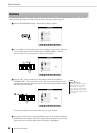
Stop Accompaniment function
When auto accompaniment is turned on (the ACMP display is lit) and Synchro Start is off
(the [START/STOP] button does not flash), you can play chords in the left-hand (accom-
paniment) section of the keyboard with the style stopped, and still hear the accompani-
ment chord. In this condition — called “Stop Accompaniment” — any valid chord
fingerings (page 48) are recognized and the chord root/type are shown in the LCD. Since
the PSR-K1 properly recognizes the chord, you can also use the Harmony effect (page
44) without having to play back a style.
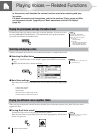
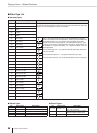
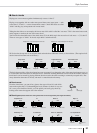
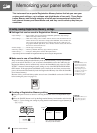
Setting the Style Volume
ᕡ Enter the FUNCTION display by pressing the [FUNCTION] button and call up the
Style Volume page by using the CATEGORY buttons [ ]/[ ].
ᕢ Set the style volume (range: 000 – 127).
Using external Style Files
Style number 136 is specially reserved for use with external Style Files, designated with the “.sty” file extension.
Save the desired Style File to SmartMedia card using a computer (with an appropriate SmartMedia reader/writer) and
load the Style File from the SmartMedia card to style number 136 on the instrument. For details, see page 63.
• The explanations here are applica-
ble only when the [STYLE] button
is turned on.
• The special Pianist styles do not
have any percussion parts.
NOTE
The ACMP display goes out.
• The explanations here are applica-
ble only when the [STYLE] button
is turned on.
NOTE
f
r
• The explanations here are applica-
ble only when the [STYLE] button
is turned on.
NOTE