http://www.accusys.com.tw
11
User’s Manual
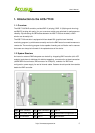
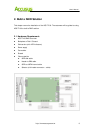
3. Set up the RAID solution
This chapter covers the configuration of the ACS-77100. Through an easy process, the
customers will be guided to configure the ACS-77100 through the following steps:
Step 1 3.1. Setting the RAID level – The ACS-77100 is per-configured at RAID level 5, but
you have the option of customizing your RAID level in this step
Step 2 3.2. Creating an Array – The disks in ACS-77100 will be used to create an array, by
which you can partition and use the storage.
Step 3 3.3. Setting the Date and Time – Configure your ACS-77100 for your local use.
Step 4 3.4. Connecting to a Host computer – Connecting the ACS-77100 to your host
computer through eSATA interface.
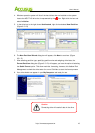
Step 5 3.5. Formatting and Partitioning the ACS-77100 – This section details the process for
formatting and partitioning the ACS-77100 on Windows operating system.
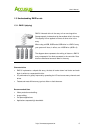
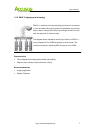
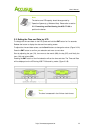
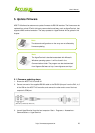
3.1. Setting the RAID Level
The RAID level of ACS-77100 is set using jumper heads on the RAID Configuration Interface
(Pin1, 3, 5, 7 of the CN8). The four possible combinations of the jumper position correspond to
the four available RAID settings: 0, 0+1, 5 and 5+spare.
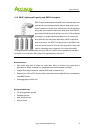
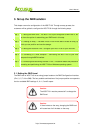
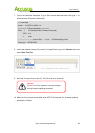
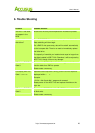
Caution
The ACS-77101 must be powered off to change the
RAID level.
Caution
If there is data on the array, chan
in
the RAID level
will cause loss of all the data on the array.