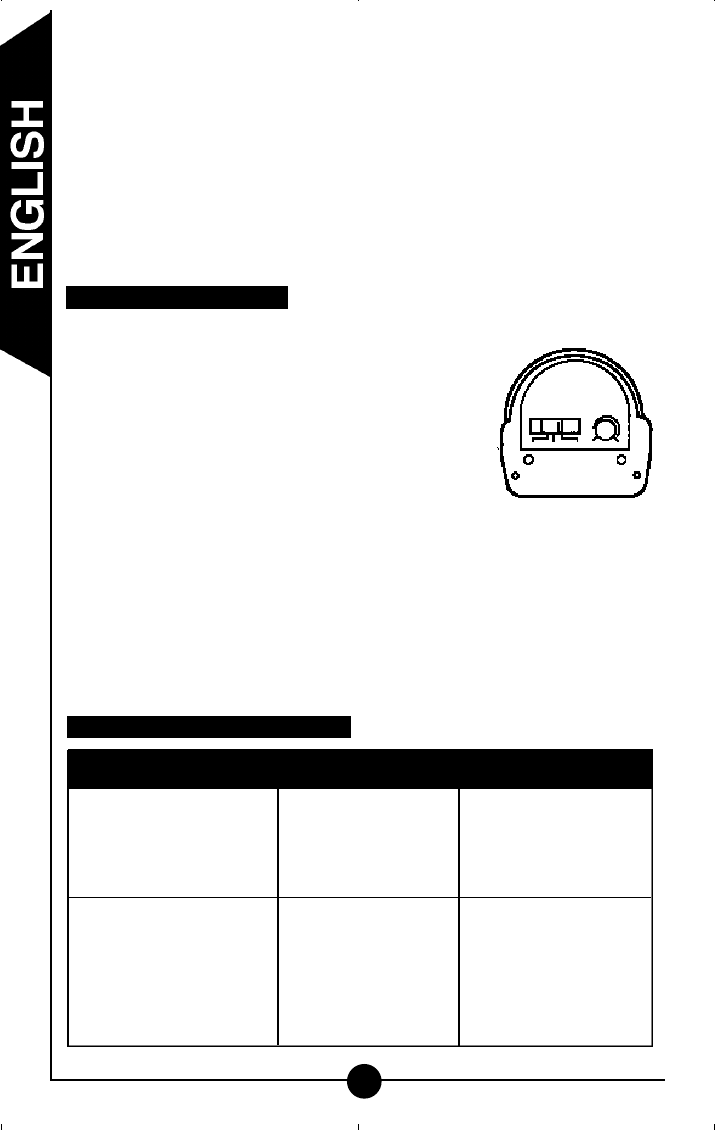
Step 5: Your motion sensor may be wall or ceiling mounted. Position motion
sensor a minimum of 3” away and below your existing light. Do not
pull the coiled cord too tight. Make sure sensor head is positioned
with control switches facing towards the ground and that the slots in
the mounting plate are also facing the ground. Attach the mounting
plate with the two screws provided.
Step 6: Plug the coiled cord connector into the bottom of the motion sensor.
Either slot may be used.
Step 7: Turn power on at the main fuse/breaker box.
NOTE: The motion sensor is equipped to control two adapters. If you are
connecting to a twin floodlight, another adapter may be added to
create a twin par motion-activated floodlight.
How to operate your fixture
Step 1: Move slide switch on bottom of the sensor to
“TEST”. Set sensitivity knob to medium
(halfway) (E).
Step 2: Turn on the power to fixture. Lights will turn on
for approximately 40 seconds, then lights will
blink off, on, off, on and off. The motion sen-
sor is now ready to detect motion.
Step 3: Aim sensor head in desired position. NOTE:
Maintain air spacing between lamps and
sensor head, at least 3”. Make sure sensor
head is positioned with control switches facing
towards the ground.
Step 4: Walk across the detection zone at the farthest
distance you wish your detector to detect motion.
Step 5: Adjust sensitivity until you get desired results. For more range, aim
sensor head slightly upwards. For less range, aim sensor head
slightly downward. Lights will turn off 4 seconds after all motion stops.
NOTE: For maximum range performance, allow fixture to operate in
any mode (with power to the unit) for at least 48 hours.
Step 6: Move slide switch to 4 MIN. or 12 MIN. (AUTO mode). At dusk, lights
will operate in the AUTO setting.
What to do if . . .
4
THIS IS THE
BOTTOM SIDE OF THE
MOTION DETECTOR
TEST
4 MIN
12 MIN
SENSITIVITY
E
AUTO Setting
(motion activated)
Lights should turn on with
motion only at night and
should turn off after
4 or 12 minutes.
AUTO 4
or
AUTO 12
Keep the power to
the fixture on.
Mode of
operation:
Set slide switch
on sensor to:
How to set
power switch:
Manual Override
Lights should stay on continu-
ously. It will then reset to
“TEST Setting”or “AUTO
Setting” after 8 hours or you
can reset manually by turning
power on and off twice within
3 seconds.
TEST
AUTO 4
or
AUTO 12
Turn power on and off
twice within 3 seconds.
How to select your desired feature
(continued)
MSRU180W spreads 300-1052 8/12/05 10:52 AM Page 4
