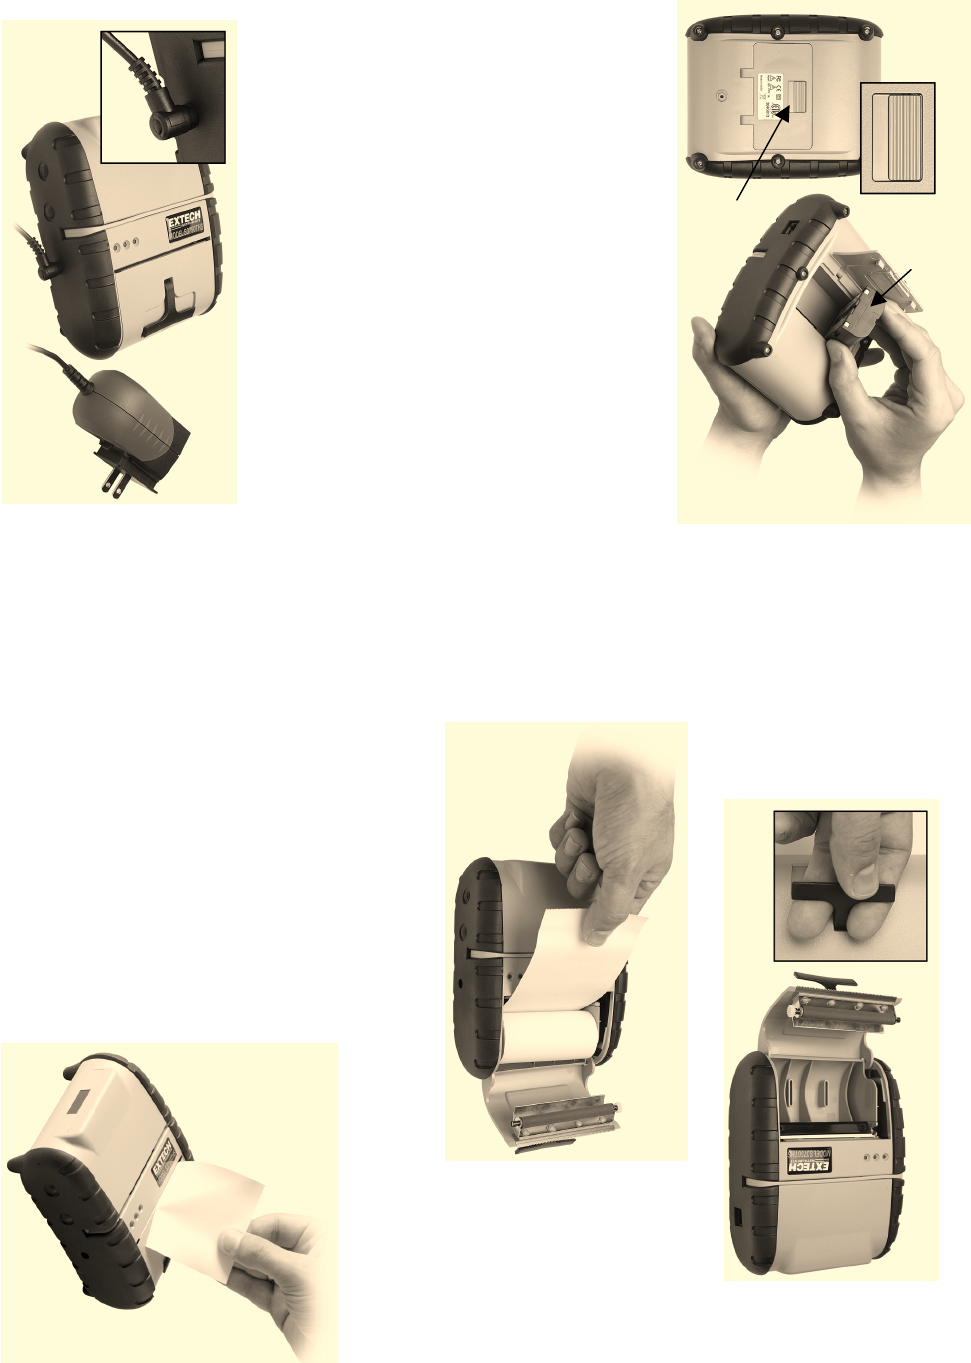
Installing the Battery
1. Unlock the battery door by sliding the locking tab down.
2. Open the battery door to an angle of about 90 degrees.
3. Insert battery as shown (non-contact end first and let the
contact end drop into place).
4. Close the battery door by sliding the locking tab up.
Charging the Battery
1. Plug battery charger adaptor output cable into the battery
charger connector.
2. Plug battery charger adaptor into the appropriate AC line
voltage socket.
3. LED will illuminate indicating that the battery is being charged.
4. The battery will be fast charged and after 180 minutes the LED
will turn off.
Installing the Paper Roll
1. Open the Paper Supply Cover by placing your fingers under
the “T” pull lever and pulling up firmly on the supply cover until
the lever stops moving. Cover should open to a 90° angle.
2. Install Paper Roll
3. Close Paper Supply Cover and press closed.
4. Turn on the printer by pressing Power button and test the paper
advance function by pressing the Paper Feed button. Verify that
paper advances correctly.
Tearing Paper
Li-Ion
Battery
Note: Pull paper roll
leader out of printer. Note
direction of paper travel.
Note: Ensure that battery side with 2 contact terminals are facing down
to make contact with the spring probes inside the battery compartment
Battery Door
Tab
Do not force o
en
The printer’s paper door acts
as tear bar. To tear paper pull
one edge of the paper against
the tear bar as shown, then
tear down and across against
the tear bar to tear the paper.
Note: Pulling paper up and/or sideways without
using the tear bar can cause a paper jam due to
paper misalignment in printhead mechanism.
Note: Do not pull too hard. Use enough
force to allow cover to unlock and lift freely
