2
68-2407-50
Rev. A
07 13
Extron Headquarters
+800.633.9876 Inside USA/Canada Only
Extron USA - West Extron USA - East
+1.714.491.1500 +1.919.850.1000
+1.714.491.1517 FAX +1.919.850.1001 FAX
Extron Europe
+800.3987.6673
Inside Europe Only
+31.33.453.4040
+31.33.453.4050 FAX
Extron Asia
+65.6383.4400
+65.6383.4664 FAX
Extron Japan
+81.3.3511.7655
+81.3.3511.7656 FAX
Extron China
+86.21.3760.1568
+86.21.3760.1566 FAX
Extron Middle East
+971.4.299.1800
+971.4.299.1880 FAX
Extron Korea
+82.2.3444.1571
+82.2.3444.1575 FAX
Extron India
1800.3070.3777
(Inside India Only)
+91.80.3055.3777
+91.80.3055.3737 FAX
© 2013 Extron Electronics All rights reserved. All trademarks mentioned are the property of their respective owners. www.extron.com
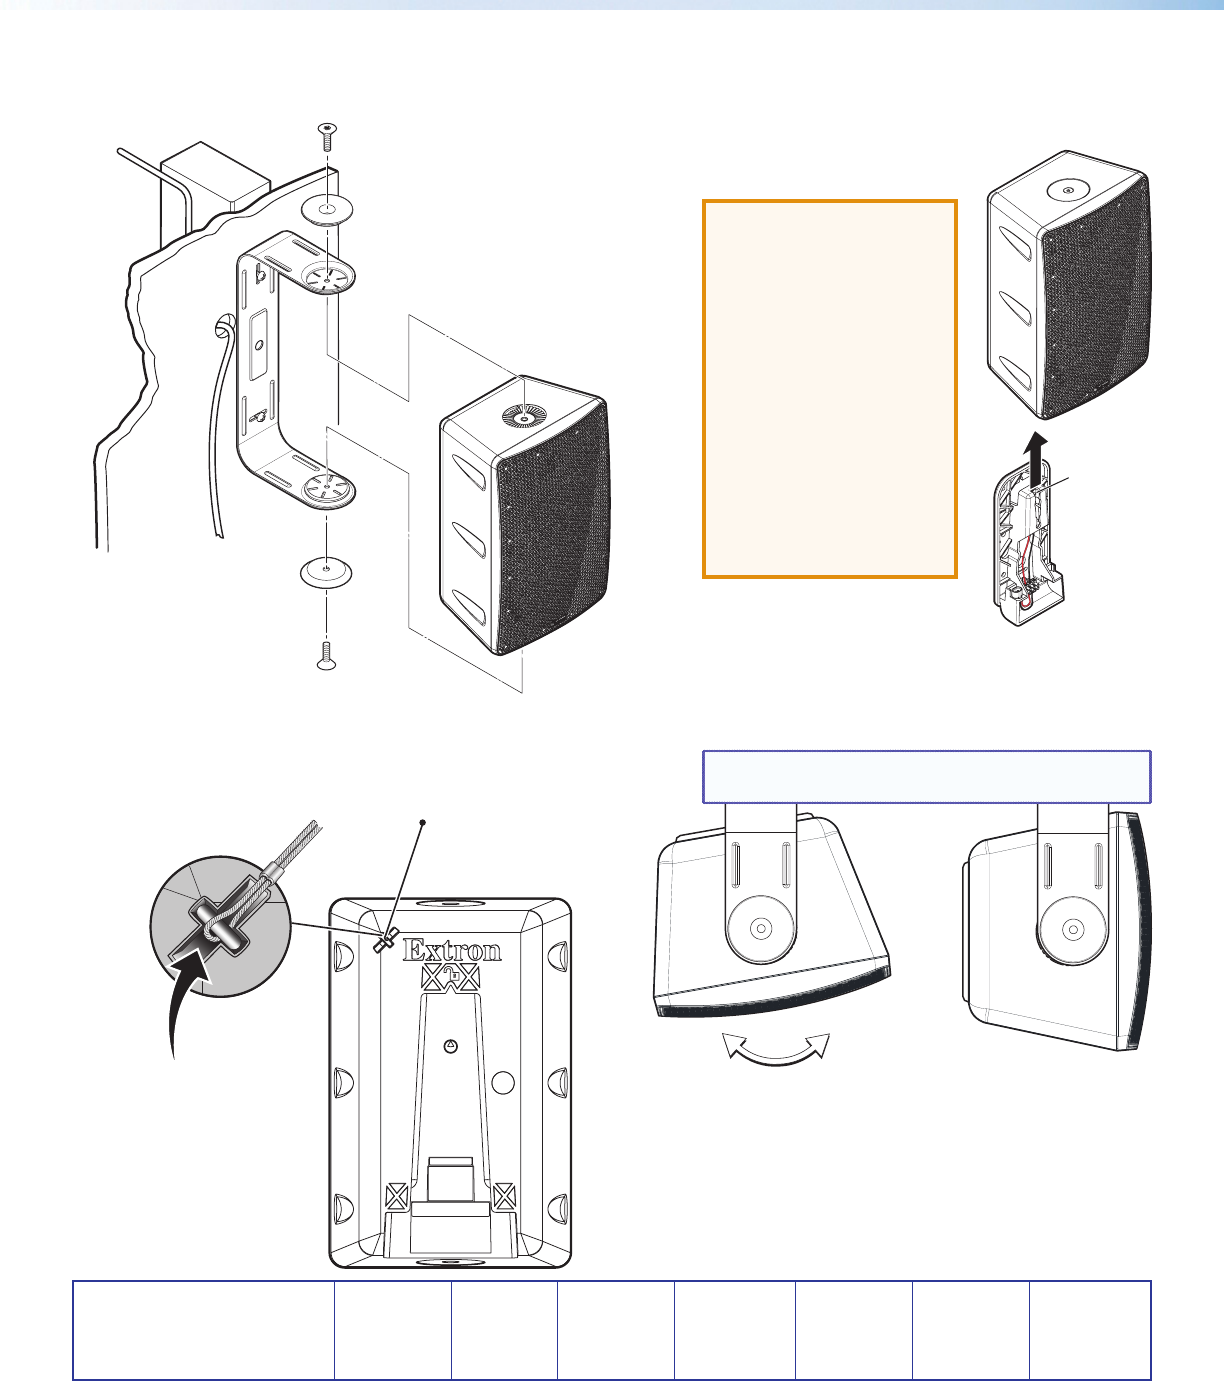
Catch Tab
7. Position the speaker on the yoke mount making sure
that the adjustment teeth of the yoke mount mesh with
the teeth on the speaker, as shown in the following
diagram.
8. Using the two end cap screws removed in step 6,
loosely attach the speaker to the yoke mount.
9. Attach a secondary support cable to the speaker.
10. Rotate the speaker on the yoke so that the rear channel
of the speaker is fully accessible.
11. Slide the mounting plate onto the speaker so that the
mounting plate is securely attached to the speaker, as
shown below right.
ATTENTION: By default,
the SM 26 speaker is
shipped unlocked. When
attaching the mounting
plate to the speaker, be
sure that the speaker
is unlocked. Failure to
place the speaker in the
unlocked position will
result in damage to the
speaker lock mechanism
should an attempt be
made to attach the
mounting plate to the
speaker. See the
SM 26 Setup Guide for
further details.
12. Position the speaker to the desired angle.
NOTE: Each adjustment tooth setting changes the
speaker angle by 10°, up to +/- 90°.
13. After the speaker is positioned to the desired angle,
tighten the end cap screws to set the speaker angle.
14. If installing the SM 26T, use a small screwdriver to set
the tap switch as needed (see the SM 26 Setup Guide
for further details).
Secondary
Attachment Cable
Anchor this end to a
suitable secure point.
Attach cable here
and secure.
