32
EXAMPLE: SETTING COMPONENT VIDEO
Setting must be done when connecting a color difference signal to the
COMPONENT VIDEO terminal.
INPUT SOURCE ADJUSTMENTS (VIDEO MODE)
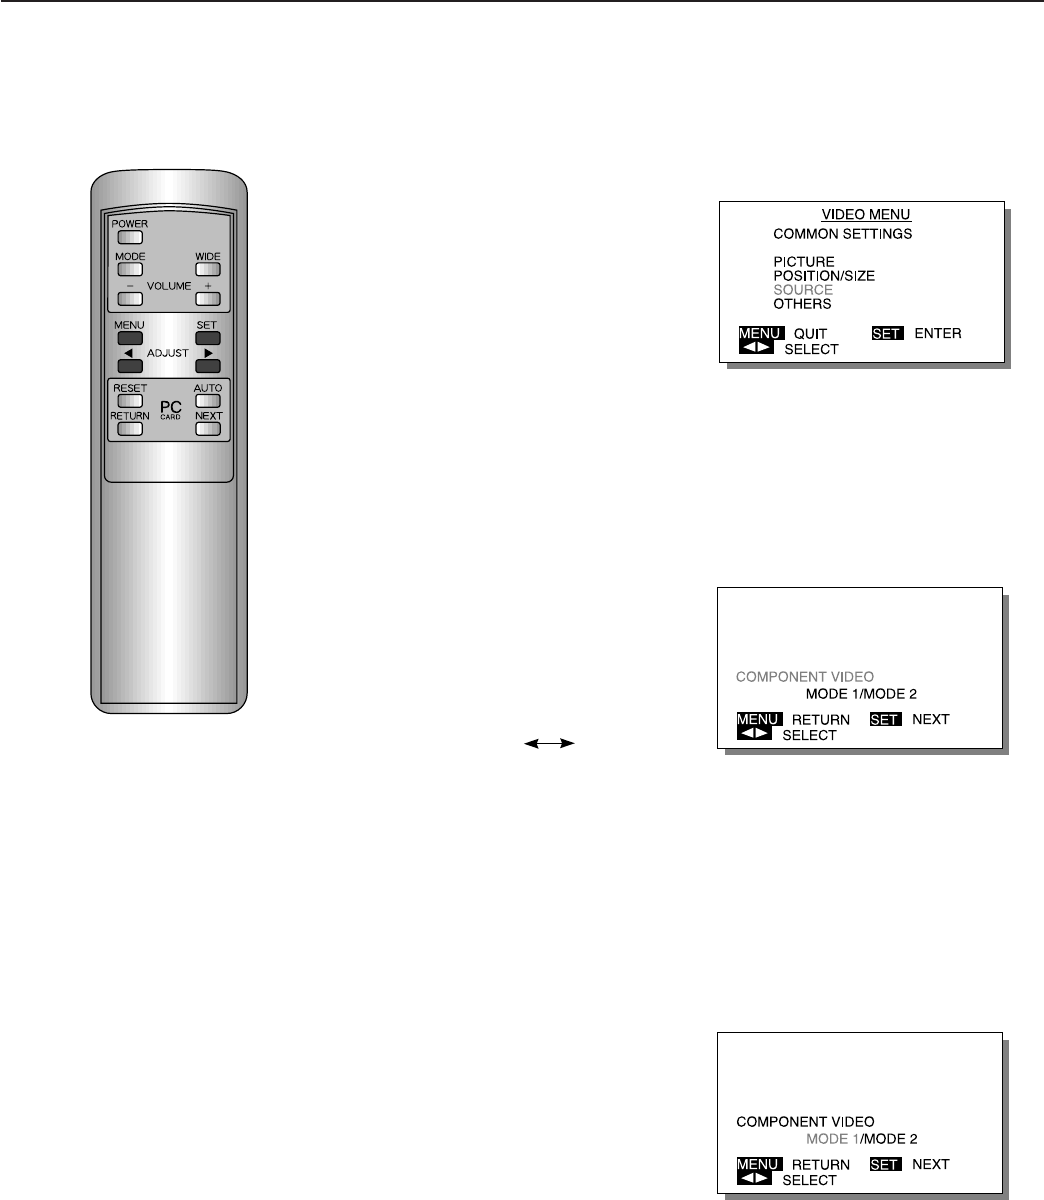
1
Select SOURCE from the
VIDEO MENU screen.
1) In COMPONENT VIDEO
mode, press the MENU
button.
2) With the ADJUST button,
select SOURCE.
3) Set by pressing the SET
button.
∗ This setting can be done in
COMPONENT VIDEO mode
only.
2
Select the adjustment
item.
With the SET button, select
COMPONENT VIDEO.
Pressing the SET button moves
the selection to the next item as
below.
∗ COMPONENT VIDEO and
CLAMP PULSE are set for
COMPONENT VIDEO mode.
VIDEO SYSTEM can be set for
VIDEO mode and S-VIDEO
mode.
3
Set the connected
equipment.
Select with the ADJUST button.
MODE 1: Use this mode for nor-
mal usage such as DVD,
BETACAM or other standard
component video signals.
MODE 2: Use this mode only for
MUSE signal
(Hi-Vision – Japanese
high definition video signal).
Example: When SOURCE is selected
Example: When MODE 1 is selected
∗ To complete adjustments
Press the MENU button to return to the VIDEO MENU.
Pressing the MENU button returns the display to the previous screen and closes
the adjustment screen.
∗ COMPONENT VIDEO and CLAMP PULSE can be set in COMPONENT
VIDEO mode only. VIDEO SYSTEM can be set in VIDEO mode and S-VIDEO
mode only.
∗ This operation can also be done
using the buttons on the Display’s
operation panel.
COMPONENT VIDE CLAMP PULSE
Example: When COMPONENT VIDEO is
selected


