Grandstream Networks, Inc. GXW40XX User Manual Page 5 of 38
Firmware 1.0.4.2 Last Updated: 06/2011
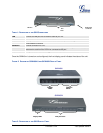
CONNECT YOUR GXW40XX GATEWAY
Connecting the GXW40XX gateway is easy. Before you begin, please verify the contents of the
GXW40XX package.
EQUIPMENT PACKAGING
Unpack and check all accessories. Equipment includes:
• one device unit
• one RJ45 Ethernet cable
• one 12V universal power adapter
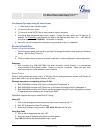
CONNECT THE GXW40XX
Follow these four (4) steps to connect your GXW40XX gateway to the Internet and access the unit’s
configuration pages.
1. Connect standard touch-tone analog phones to the FXS ports.
2. Insert an RJ45 Ethernet cable into the WAN port of GXW400X and connect the other end to an
uplink port (a router or a modem, etc.) Note: If the gateway is used in router mode, connect a PC
to the LAN port of GXW400X for initial configuration. In case of GXW4024, there is only one
Ethernet port.
3. Plug the power adapter into the GXW40XX gateway into a power outlet.
Follow the instructions from the topic “
Configuring GXW 400X with Web Browser” for initial configuration.
The GUI pages will guide you through the remaining steps to set-up your gateway. Examples of the GUI
Interfaces can be downloaded from:
http://www.grandstream.com/products/gxw_series/gxw40xx/documents/gxw40xx_gui.zip.
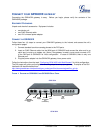
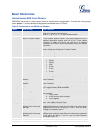
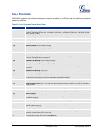
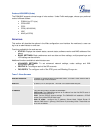
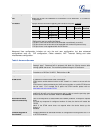
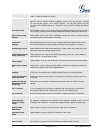
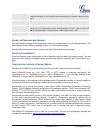
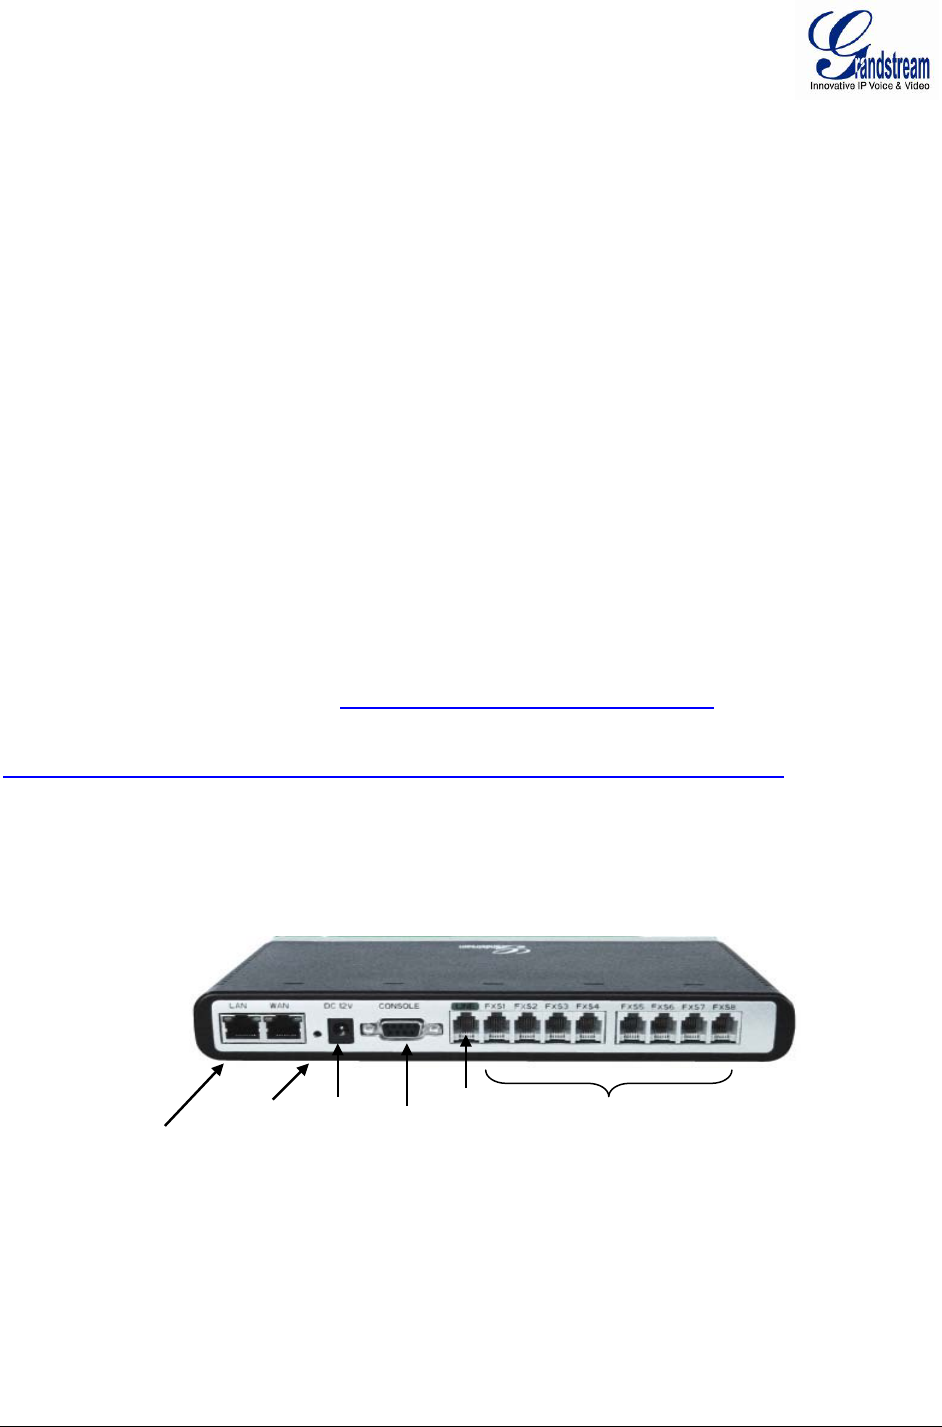
F
IGURE 1: DIAGRAM OF GXW4004-8 AND GXW4024 BACK PANEL
RJ-45 Ethernet
Ports
Ports
Console
Connection
(PC
connection)
Supply
Reset