Installing Additional Components
Front Grill and Top Cover
Chapter 3
23
Step 8. Pull the power supply from the server chassis by pulling the curved handle.
Step 9. Orient the replacement power supply such that the securing screws are aligned with the
corresponding holes in the server chassis. Gently push the power supply into position.
Step 10. When the power supply is fully inserted into the server chassis, tighten the two mounting screws to
secure the power supply in place.
Step 11. Press up on the two lower tabs on the terminal barrier strip cover to snap off the cover.
WARNING Always check that the power cable is not connected to a power source
before attempting to connect the power cable to power supply terminals.
Failure to heed this warning could result in injury.
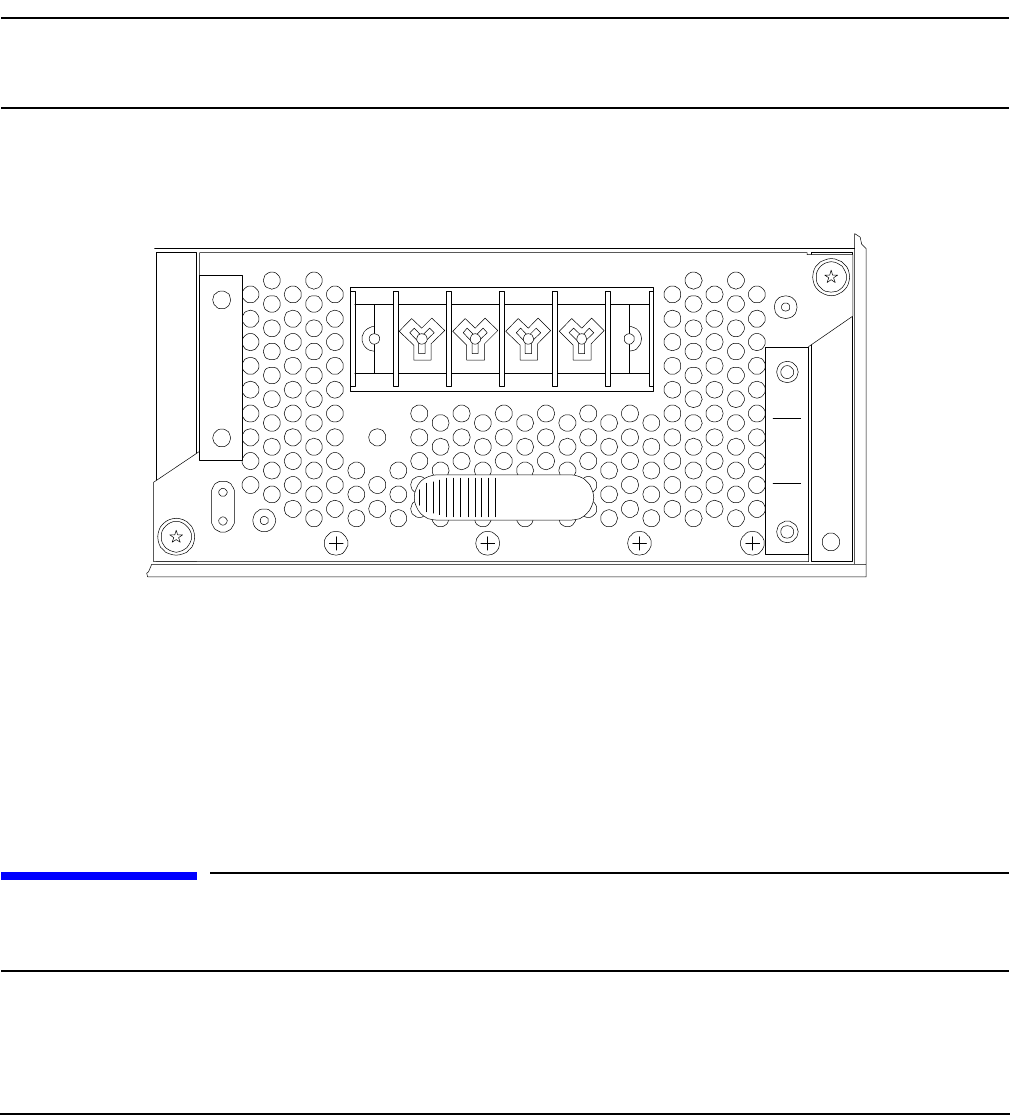
Step 12. Connect the power cable leads to the power supply terminals. (Connect the leads as shown in
Figure 3-6.)
Figure 3-6Power Supply Terminals
Step 13. Reinstall the terminal barrier strip cover (removed in step 11). Hang the cover on the upper tabs
and snap the cover into place.
Step 14. Route the power cable through the power supply cable clamp and tighten the two knurled knobs to
secure the cable in place.
Step 15. Connect the power cable to the DC power source.
Front Grill and Top Cover
CAUTION Operation of the HP Server without the front grill and top cover in place will make the server
susceptible to EMI and overheating problems, which can result in system failure. Keep the
front grill and top cover in place during normal operation.
Fault
DC Out DC In
++––
psrearpnl2


