2
Insignia NS-DPF8/NS-DPF10 Digital Picture Frame
www.insignia-products.com
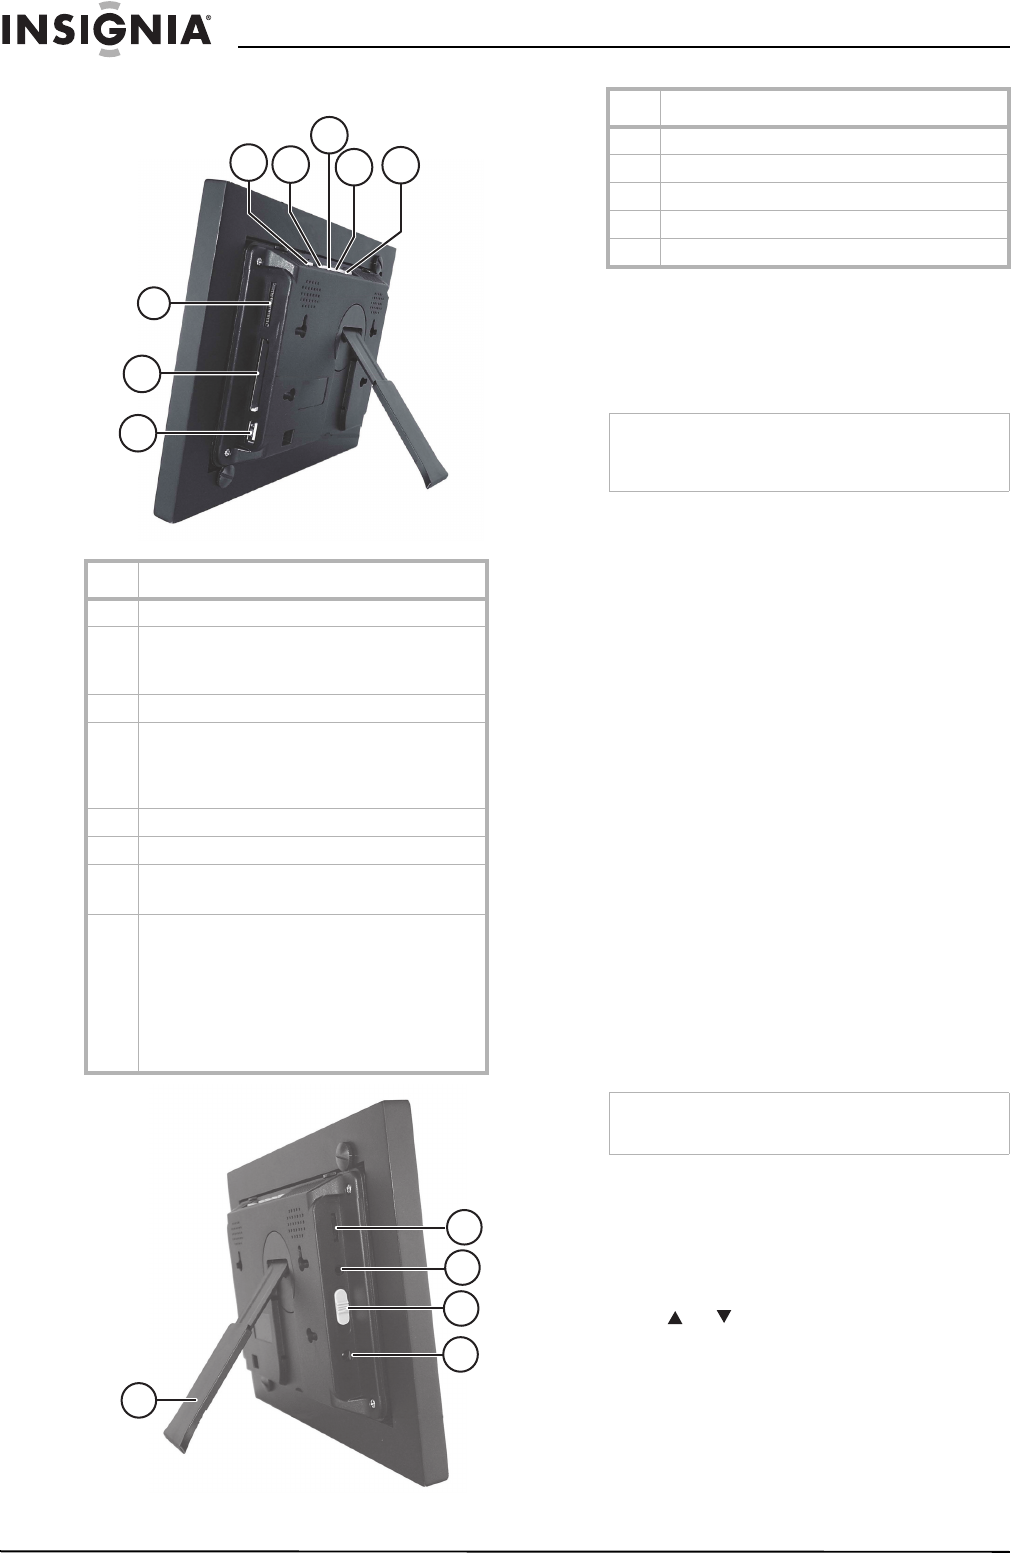
Identifying components
Setting up your digital
picture frame
Setting up the remote control
To install and replace the remote control
battery:
1 Hold the remote control with the control
buttons facing downward.
2 While pressing down on the ridged area of
the battery cover, pull the tray out.
3 Place a CR2025 lithium battery on the tray
with the positive + end facing toward you.
4 Close the tray.
Setting up the digital picture frame
This section describes the steps needed to
display your first slide show.
To set up the digital picture frame:
1 Extend the stand from the back of the digital
picture frame.
2 Place the digital picture frame on a flat
surface.
3 Plug one end of the AC power adapter into
the digital picture frame.
4 Plug the other end of the AC power adapter
into a wall outlet.
5 Insert a memory card into the appropriate
slot.
6 Move the power switch on the left side of the
digital picture frame to the ON position. The
digital picture frame automatically starts a
slide show of the photos on the card.
To display photos individually:
1 Press EXIT to open the
Thumbnails
screen.
2 Press or to choose a photo.
3 Press ENTER on the top of the digital picture
frame or ENTER on the remote control.
To restart the slide show:
• Press ENTER on the digital picture frame or
press SLIDE SHOW on the remote control.
Item Description
A SETUP—Display the Setup menu
BEXIT:
• Exit the current display
• Go back a screen
C Right arrow—Move the selection right
DENTER:
• Select the highlighted option
•Pause
•Play
E Left arrow—Move the selection left
F USB host port
G Memory card slot:
• Compact Flash™
H Memory card slot:
• Memory Stick™
• Memory Stick Duo™
• Memory Stick Pro™
• Memory Stick Pro Duo™
• MultiMedia Card™
• Secure Digital™
•xD Memory Card™
H
G
F
C
B
A
D
E
A
B
C
D
E
Item Description
A Brightness
BLine Out
C Power switch
DAC power
EStand
Note
Pull the plastic tab sticking out of the remote
control. It protects the battery. The remote control
cannot work unless it is removed.
Note
The card only fits in one direction. Do not force it.
The card should fit snugly when correctly inserted.
