No.51666
DLA-M4000LU
DLA-M4000LE
26
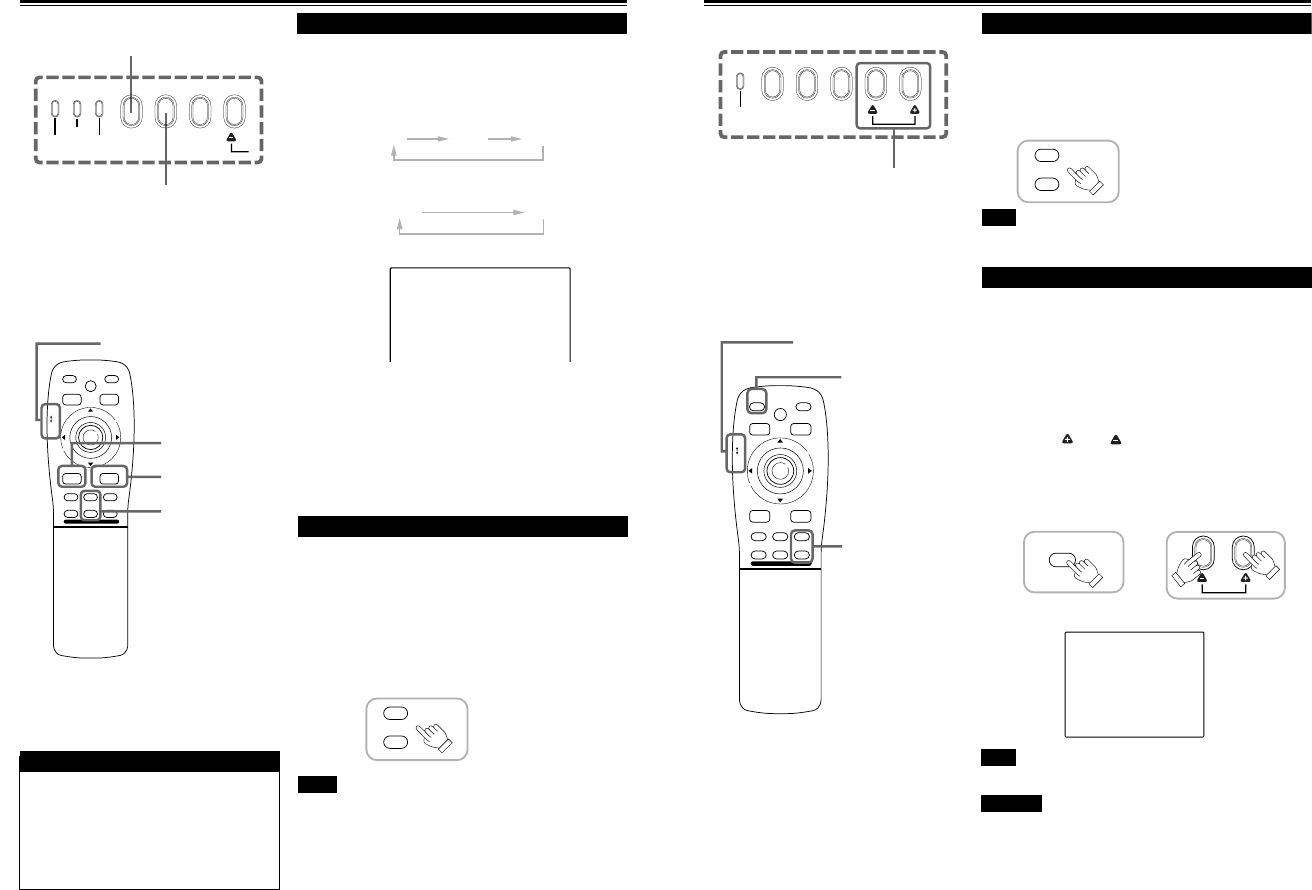
■ Remote control unit
RGB button
Basic Operations (Cont.)
■ Projector’s buttons
AV button
ZOOM (T/W) buttons
2.
Select the video input to be projected
Screen display
* When the input is switched, the line display and the source
display are shown on the upper part of the screen (they
disappear in about five seconds). However, they will not be
shown if LINE DISPLAY in “Setting and Adjusting Other
Functions (OPTIONS)” on page 41 is set to OFF.
(For setting the source, see page 44.)
3. Adjust the screen size
■ Adjust the screen size with the remote control’s ZOOM
(T/W) buttons.
When adjusting the screen size with the ZOOM buttons, set the
LENS LOCKÔUNLOCK switch to the UNLOCK position.
■ To enlarge the screen size:
Press the ZOOM (W) button.
■ To reduce the screen size:
Press the ZOOM (T) button.
Remote control unit
Notes
• The adjustment of the screen size (zoom adjustment) can also be made on
the setting menu.
For operating the setting menu, refer to “Making Basic Settings” on page 30.
• When a fixed-focus lens is used, you cannot operate the setting menu.
■ Press the AV button or the RGB button to switch the
input.
• Each time you press either button, the selected input changes as
follows.
■ When you press VIDEO:
Y/C
VIDEO
YPBPR
■ When you press COMPUTER:
RGB 1
RGB 2
ATTENTIONS
• DO NOT give any shock to this projector while
operating it; otherwise, the light-source lamp goes off
(the EMERGENCY indicator lights up).
If the shock turns off the light-source lamp —
Turn off the power by pressing the MAIN POWER
switch, then turn it on again. Then, when the
STAND BY indicator comes on, you can now
operate the projector as usual.
FOCUS
+
–
YPBPR
CH: 1
HDTV(1080i)
LAMP
EMERGENCY
AV
RGB
SETTING
Q
A
TEMP
AV button
RGB button
LENS LOCKÔ UNLOCK
switch
M
E
N
U
/
E
N
T
E
R
QUICK
ALIGN.
AV HIDE
OPERATE
PRESET
AV
SHIFT ZOOM FOCUS
LENS
UT
+
DW
–
RGB/COMPUTER
LENS
LOCK UNLOCK
PAGE BACK
27
Basic Operations (Cont.)
4. Adjust focus
■ Adjust focus with the remote control’s FOCUS (+/–)
buttons.
When adjusting the focus with the FOCUS buttons, set the LENS
LOCKÔUNLOCK switch to the UNLOCK position.
Remote control unit
Note
• Focus adjustment can also be made on the setting menu. For operating the
setting menu, refer to “Making Basic Settings” on page 30.
For Operating Other Functions
Remote control unit
■ Remote control unit
Screen display
ERGENCY
AV
RGB
SETTING
QUICK
ALIGN.
M
E
N
U
/
E
N
T
E
R
QUICK
ALIGN.
AV HIDE
OPERATE
PRESET
AV
SHIFT ZOOM FOCUS
LENS
UT
+
DW
–
RGB/COMPUTER
LENS
LOCK UNLOCK
PAGE BACK
QUICK
ALIGN.
QUICK
ALIGN.
QUICK ALIGNMENT
QUICK ALIGN.
button
■ Projector’s buttons
QUICK ALIGN.
button
LENS LOCKÔ UNLOCK
switch
FOCUS
+
–
Projector
■ To use the quick alignment function
The quick alignment function is used to automatically adjust (set)
the screen settings of “TRACKING, PHASE, H. POS. and V. POS.”
of computer system input video.
• Use either the remote control’s or projector’s button.
■ When using the remote control unit:
Press the QUICK ALIGN. button.
■ When using the projector:
Clear the menu display, and press the projector’s QUICK
ALIGN. “ ” and “ ” buttons at the same time.
* During the automatic adjustment, “QUICK ALIGNMENT” appears
on the screen and disappears automatically after the adjustment
is completed.
Note
• This function works only for computer system inputs.
CAUTION
•When performing automatic adjustment using the quick
alignment function:
Use a bright, still-picture screen. It may not function correctly on a
dark or motion-picture screen.
If the condition adjusted by using the quick alignment function is not
good, manually adjust TRACKING, PHASE, H. POS. and V. POS.
(see pages 30, 36 and 37).
FOCUS (+/–)
buttons


