Model 616-143 www.lacrossetechnology.com/support Page | 2
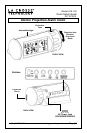
GET STARTED
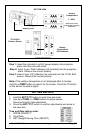
Step 1: Insert the included 5-volt AC power adapter into projection
alarm and then into wall outlet.
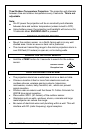
Step 2: Insert 3 new “AAA” batteries (not included) into the projection
alarm. Observe the correct polarity.
Step 3: Insert 2 new “AA” batteries (not included) into the TX141-BV2
sensor. Observe the correct polarity.
Note: If the outdoor temperature is not displayed after 3 minutes,
Hold the +/TEMP button to search for the sensor. Press the TX button
on the sensor to send a signal.
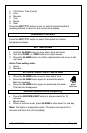
SET TIME AND DATE
1. Hold the SET/°F/°C button to enter time set mode.
2. Use the +/TEMP or -/TIME buttons to adjust values.
Press and hold for fast adjustment.
3. Press the SET/°F/°C button to confirm adjustments and move to
the next item.
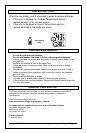
Time and Date setting order:
1. WWVB (ON/OFF)
2. Time Zone
3. DST Daylight Saving Time (ON/OFF)
Battery
Compartment
2-AA batteries.
Battery
Compartment
3 “AAA”
Observe the correct
polarity before inserting
the batteries