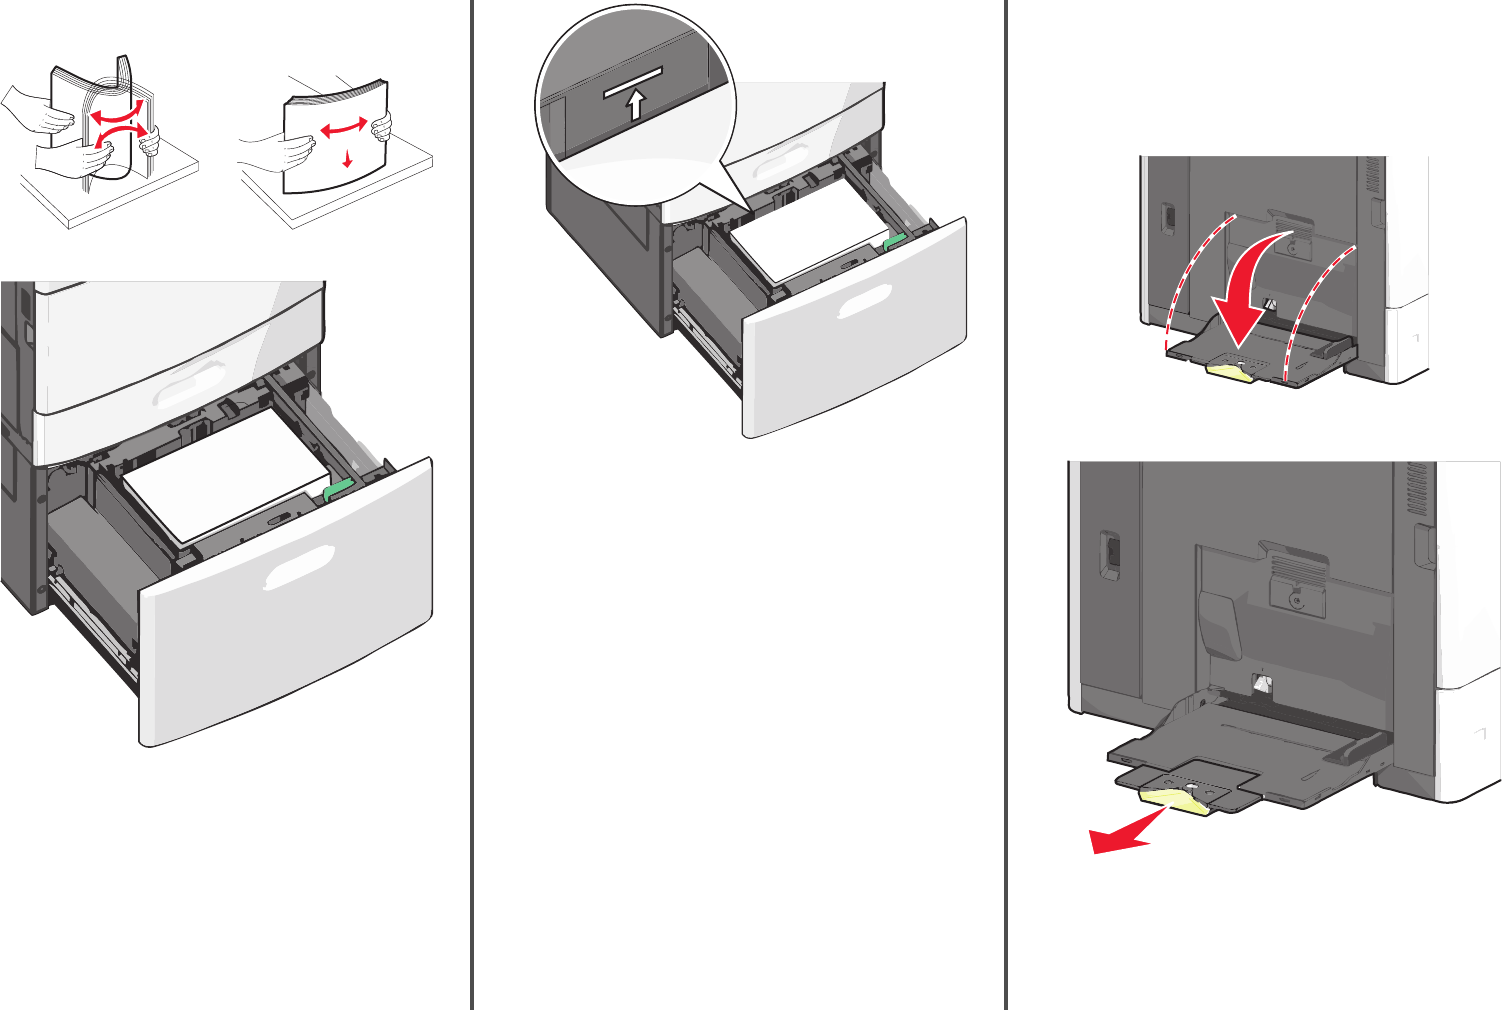
3 Flex the sheets back and forth to loosen them. Do not fold or crease
the paper. Straighten the edges on a level surface.
4 Load paper into the tray with the print side faceup.
ABC
Note: Make sure the paper is below the maximum fill line
located on the edge of the paper tray. Overloading the tray can
cause paper jams.
Notes:
• Place pre-punched paper with the holes toward the front of
the tray.
• Place letterheads faceup with the header on the left side of
the tray.
• Place letterheads facedown with the header on the right side
of the tray for duplex printing.
5 Insert the tray.
Loading the multipurpose feeder
The multipurpose feeder can hold several sizes and types of print
media, such as transparencies, labels, card stock, and envelopes. It can
be used for single-page or manual printing, or as an additional tray.
The multipurpose feeder can hold approximately:
• 100 sheets of 75‑g/m
2
(20‑lb) paper
• 10 envelopes
• 75 transparencies
The multipurpose feeder accepts paper or specialty media within the
following dimensions:
• Width—89 mm (3.5 in.) to 229 mm (9.02 in.)
• Length—127 mm (5 in.) to 1270 mm (50 in.)
Note: Maximum width and length can be applied only to short-edge
feeding.
Note: Do not add or remove paper or specialty media when the
printer is printing from the multipurpose feeder or when the printer
control panel indicator light is blinking. Doing so may cause a jam.
1 Pull down the multipurpose feeder door.
2 For paper or specialty media that is longer than letter-size paper,
gently pull the extension until it is fully extended.
3 Flex the sheets of paper or specialty media back and forth to loosen
them. Do not fold or crease them. Straighten the edges on a level
surface.
7
