Note: When Jam Recovery is set to On or Auto, the printer reprints jammed pages. However, Auto does not
guarantee that the page will print.
7
6
3
2
4
1
5
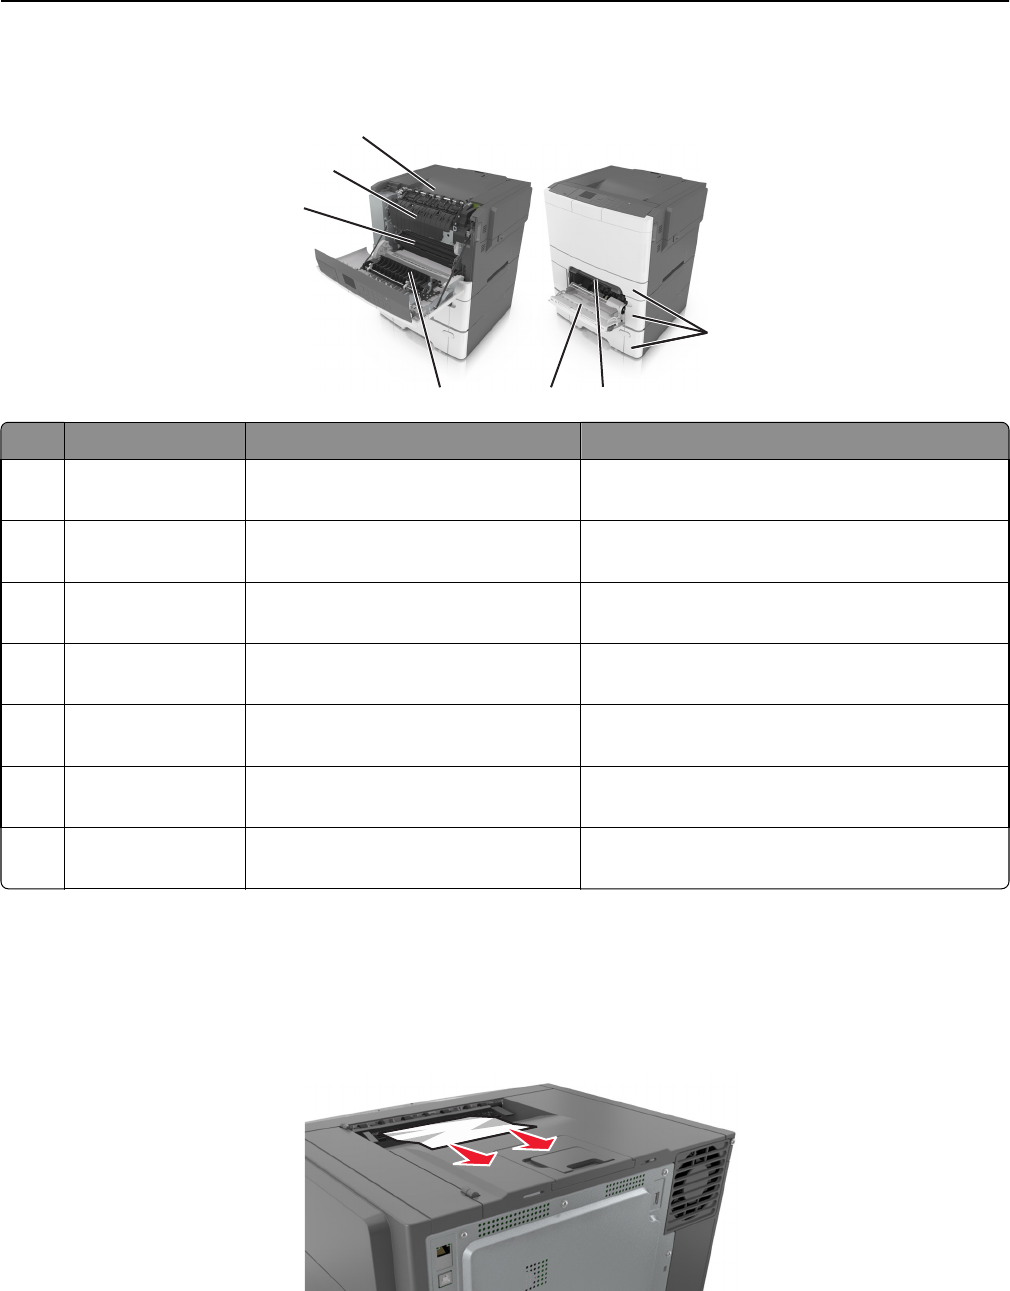
Jam location Message on the display What to do
1 Standard bin [x]‑page jam, clear standard
bin. [203.xx]
Remove the jammed paper.
2 Fuser [x]‑page jam, open front door to clear
fuser. [202.xx]
Open the front door, pull the tab and hold the fuser
cover down, and then remove the jammed paper.
3 Front door [x]‑page jam, open front door. [20y.xx] Open the front door, and then remove the jammed
paper.
4 Duplex [x]‑page jam, open front door to clear
duplex. [23y.xx]
Open the front door, and then remove the jammed
paper.
5 Tray [x] [x]‑page jam, open tray [x]. [24y.xx] Pull the indicated tray out, and then remove the
jammed paper.
6 Manual feeder [x]‑page jam, clear manual
feeder. [251.xx]
Remove the jammed paper.
7 Multipurpose feeder [x]‑page jam, clear multipurpose
feeder. [250.xx]
Push the paper release lever to lift the paper rollers,
and then remove the jammed paper.
[x]‑page jam, clear standard bin.
1 Firmly grasp the jammed paper on each side, and then gently pull it out.
Note: Make sure all paper fragments are removed.
Clearing jams 143
