11
5 SWITCHING THE PROJECTOR ON AND OFF
WARNING: Connect the projector to a power supply with a
nominal voltage within the following values: 100-240 V AC,
50/60 Hz. It must be earthed (Fig. 12).
GRAPHICS RGB
HV
S-VIDEO
AUDIO OUT
HDMI 1
REMOTE
2
S-VIDEO
MENU
ESC
INPUT
1
5
4
0
I
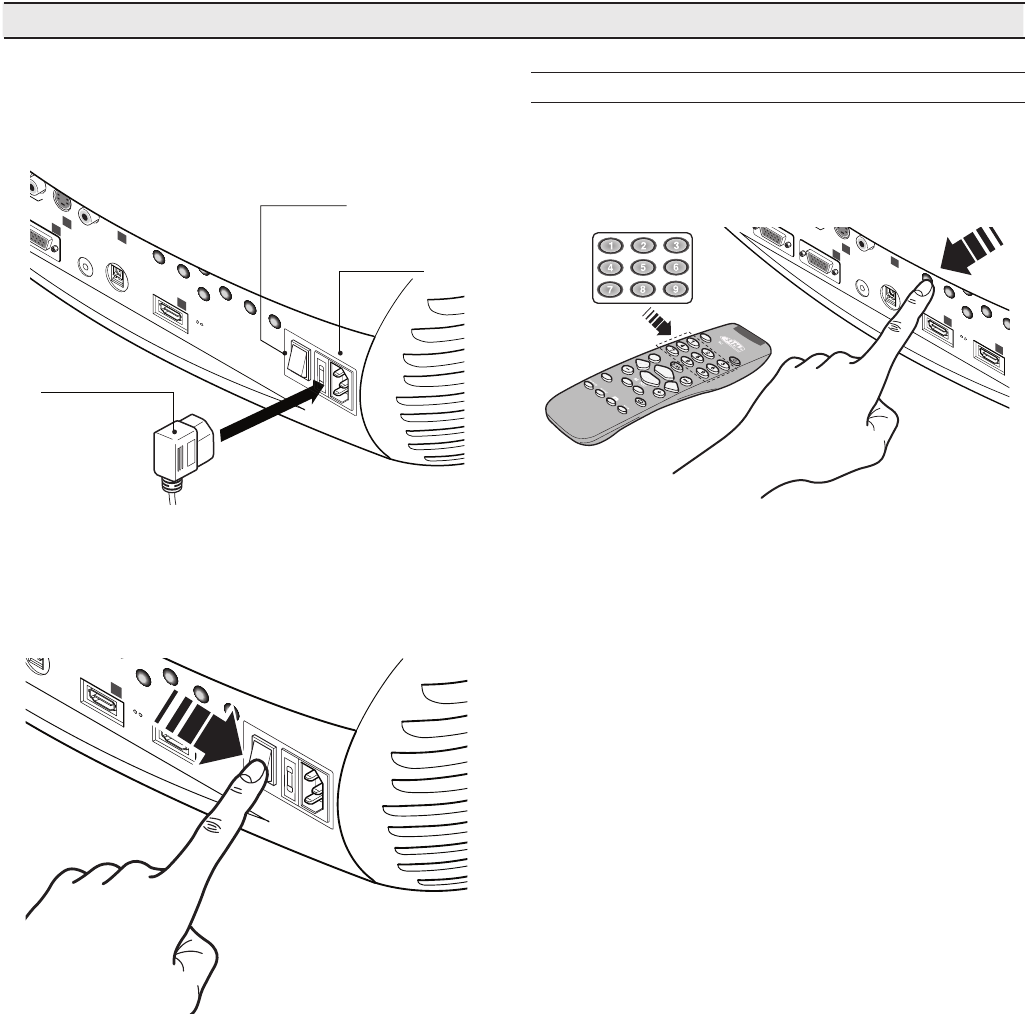
Power Switch:
Position I: On
Position 0: Off
Fused
Power Socket
Power Plug
Fig. 12
In position I the projector will initialise itself (red and green leds
on) and then goes into standby mode (red led on) (Fig. 13).
SWITCH ON FROM STANDBY
With the remote control press one of the keys (Fig. 14):
- 0 to select the last imput selectet after last switching off.
- 1-9 to select the correspondent imput.
With the keypad: press the ON/OFF button.
S-VIDEO
AUDIO OUT
HDMI 1
REMOTE
2
S-VIDEO
MENU
ESC
1
5
4
HDMI 2
6
When the unit is switched on from standby the lamp switches
on; after a brief period of warming up, the image displays
(blue led on).
If a very short time has passed since the unit was last switched
off, the lamp may not switch on beause it is too hot.
Just wait a few minutes for the lamp to cool down sufficiently.
Note:
At power ON the picture could be displayed with a wrong
orientation; this is not a fault.
Fig. 13
Fig. 14


