OVERVIEW
Congratulations. You have just purchased one of the most reliable and up-
to-date Wireless Security Systems on the market today. Skylink’s innovative
rolling code technology provides increased security and trouble free wireless
connections. It guarantees that the Audio Alarm will only recognize radio
waves from it’s remote sensors, (Door/Window Sensors and the Keychain
Transmitter).
This manual is divided into 6 categories:
1. Planning
- explains how to plan a security strategy.
- recommended locations to install you Door/Window Sensors.
2. Installation and Testing
- how to install the Audio Alarm and the Door/Window Sensors.
- once everything is installed, explains how to test each device.
3. Lights and Sounds
- explains the functions of all the lights on the Audio Alarm.
- describes all the sounds emitted from the Audio Alarm.
4. Activate/Deactivate the System
- explains how to activate and deactivate the Audio Alarm.
- introduces the Panic Button.
5. Program Sensors and Transmitters to the Audio Alarm
- how to program the Door/Window Sensors.
- how to program the Keychain Transmitter.
6. Battery Maintenance
- explains how to change batteries in all sensors and transmitters.
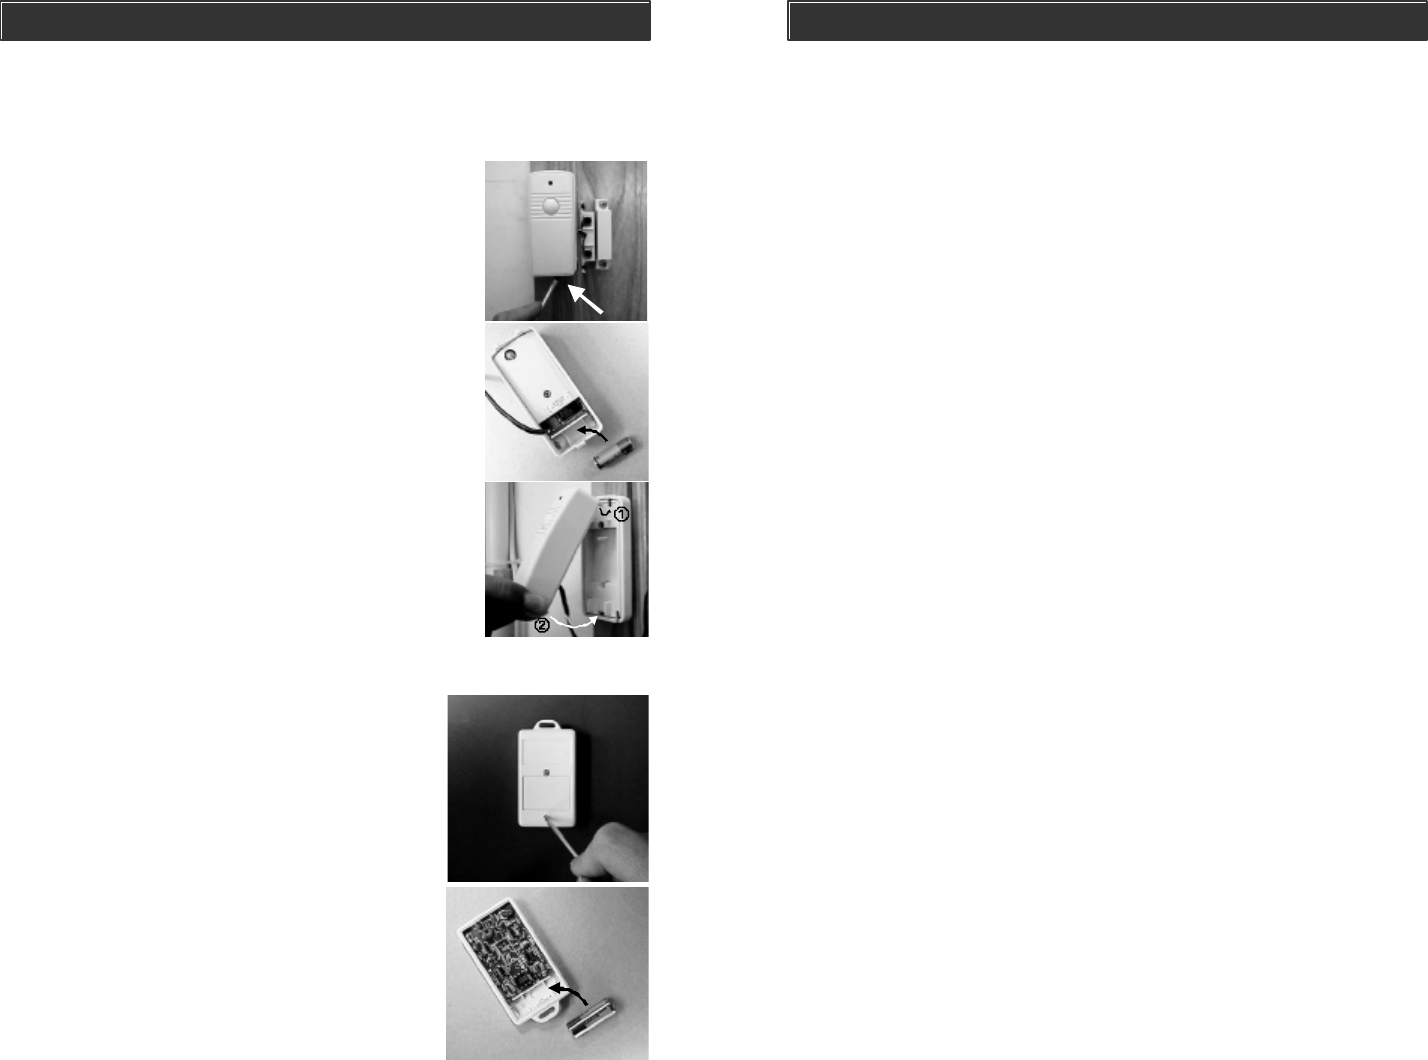
BATTERY MAINTENANCE
DOOR/WINDOW SENSOR BATTERY
Each Door/Window Sensor operates on a 12 volt alkaline battery that is in-
side the transmitter. The sensors come with the batteries already installed.
To replace the Door/Window Sensor batteries:
1. Push the clip on the bottom of the trans-
mitter case with a sharp object, (such as a
paper clip or pen knife) and pull away from
backplate.
2. Pry out the old battery from one end.
3. Push the new battery back into place. A dia-
gram beside the battery well indicates which
end is positive and which is negative.
4. Snap the transmitter back onto the backplate.
KEYCHAIN TRANSMITTER BATTERY
The Keychain Transmitter operates on a 12 volt alkaline battery which has
been installed at the factory.
To replace the Keychain Transmitter battery:
1. Undo the two screws on the back cover of
the transmitter. The back will then come off.
2. Using a small screwdriver or pen knife, pry
out the old battery from one end.
3. Place the new battery into position. A dia-
gram beside the battery well indicates which
end is positive and which is negative.
4. Close the back cover with the two screws.
+
-
+
-
