38
Replacing the hard disk
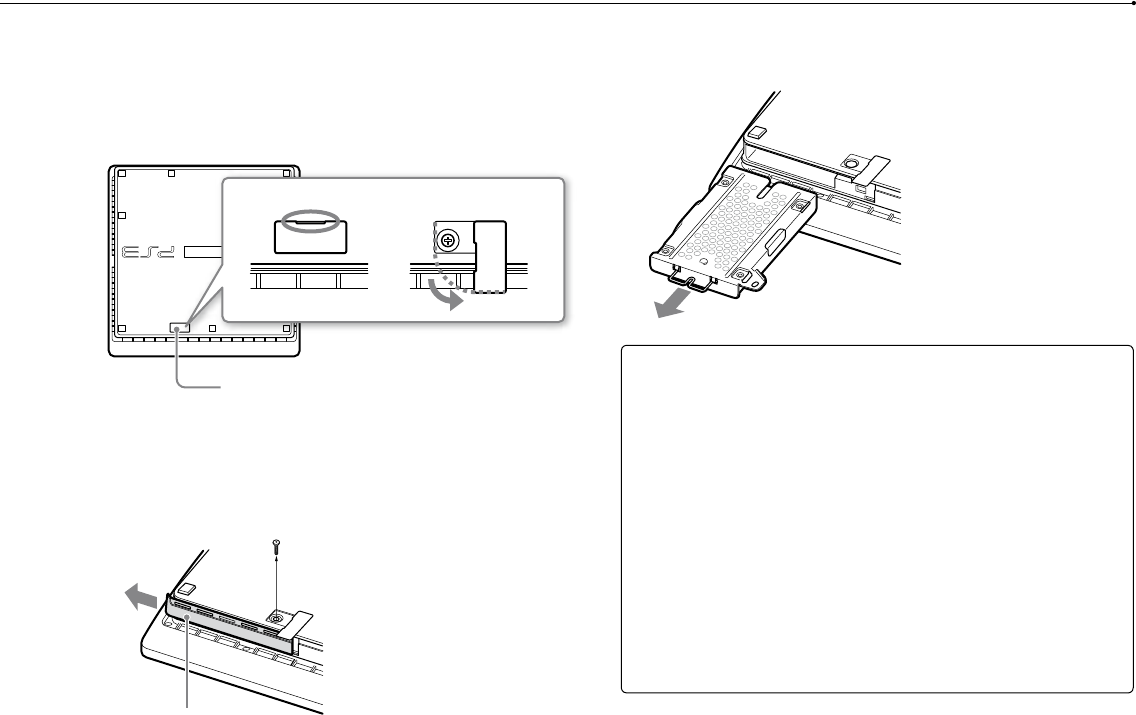
3 Place the system upside down on a soft, dry cloth, and then
open the screw cover.
Use the notch located above the screw cover to slightly pull up the cover.
Then rotate the cover as shown in the diagram. If the cover is hard to pull up,
insert a tool such as a flathead screwdriver in the notch and gently pull the
cover up.
Screw cover
4 Remove the screw that fastens the hard disk in place, and then
remove the HDD bay cover.
Remove the blue screw with an appropriate crosshead screwdriver.
Slide the HDD bay cover to the left, and then remove the cover.
HDD bay cover
5 Remove the hard disk.
Pull the handle upwards, and then pull out the hard disk from the system.
Notices
The hard disk is a sensitive piece of equipment and should be handled with
care at all times. To help prevent software or data loss or corruption, or
damage to the hard disk, carefully follow the precautions listed below:
Do not drop the system or hard disk, or subject either device to physical
shock or vibration.
Do not allow liquid or small particles to get into the system or hard disk.
Do not touch the connectors or insert foreign objects into the connectors.
Do not place the system or hard disk close to magnetic fields such as those
produced by magnets or loudspeakers. Also, do not place devices that
may be sensitive to magnetic forces (such as a wrist watch or a credit card)
near the hard disk.
Do not put heavy objects on the hard disk.
When handling the hard disk, hold it only by the edges or metal frame.
The hard disk is sensitive to static electricity. Ensure that proper handling
methods are used when installing the hard disk.
Store in a cool, dry location.
