11
GB
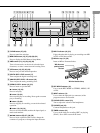
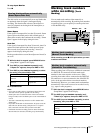
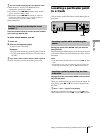
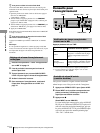
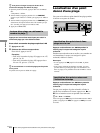
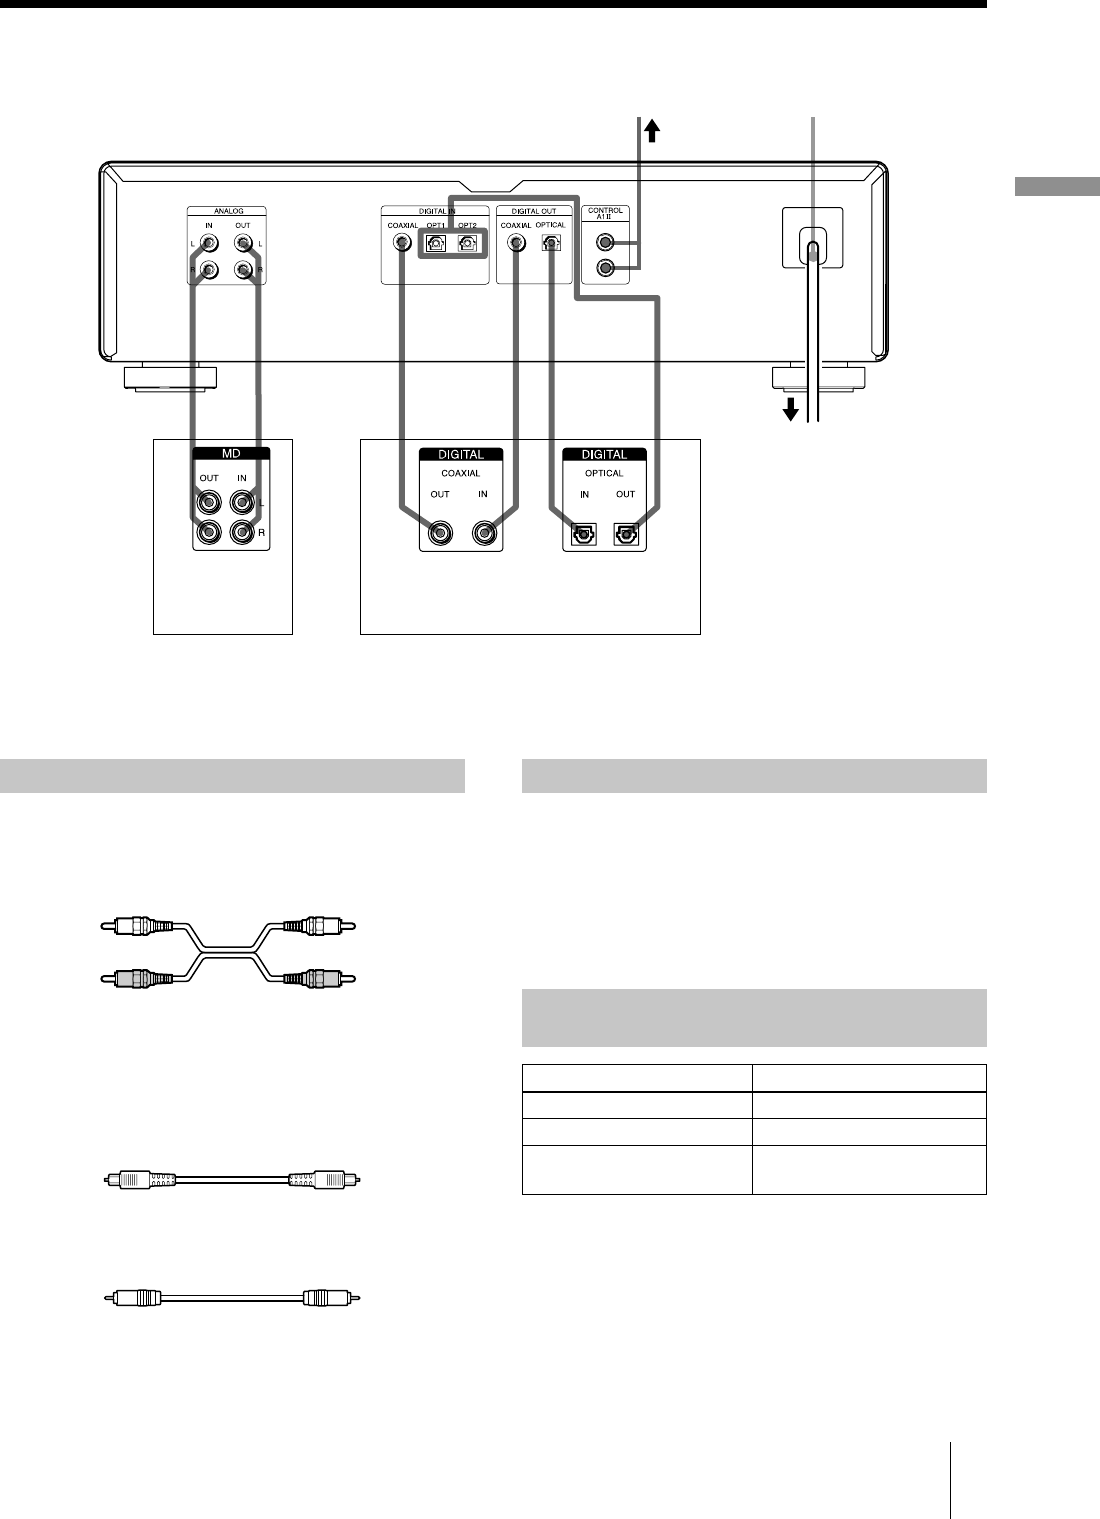
Hooking up the audio components
Getting Started
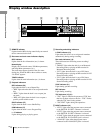
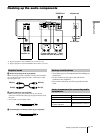
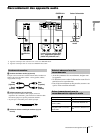
Hooking up the audio components
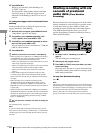
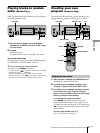
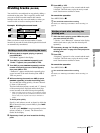
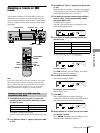
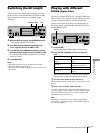
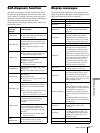
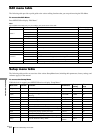
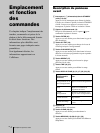
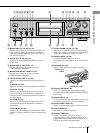
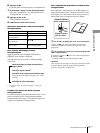
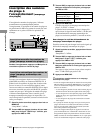
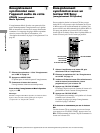
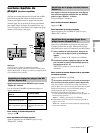
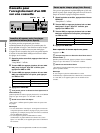
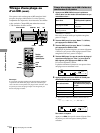
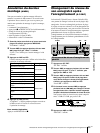
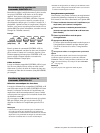
A
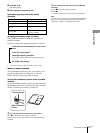
Audio connecting cords (2) (supplied)
When connecting an audio connecting cord, be sure to match the
color-coded pins to the appropriate jacks: white (left) to white
and red (right) to red.
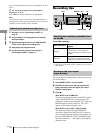
B
Optical cables (3) (not supplied)
•
When connecting an optical cable, take the caps off the
connectors and insert the cable plugs straight in until they click
into place.
•
Do not bend or tie the optical cables.
C
Coaxial digital connecting cables (2) (not supplied)
•
Turn off the power of all components before making any
connections.
•
Do not connect any AC power cord until all the
connections are completed.
•
Be sure the connections are firm to prevent hum and
noise.
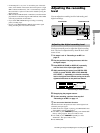
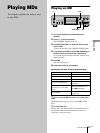
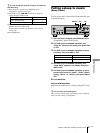
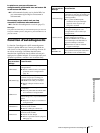
A
CB
D
CONTROL A1
ΙΙ
AC power cord
1) Digital equipment with a DIGITAL OUT connector only
2) Digital equipment with both DIGITAL IN and OUT connectors
Amplifier, etc. CD player, DBS tuner, etc.
1)
,
Digital
amplifier, DAT deck, MD deck, etc.
2)
to a wall outlet
Required cords
White (L)
Red (R)
White (L)
Red (R)
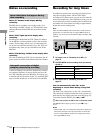
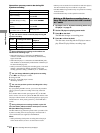
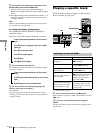
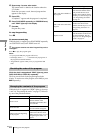
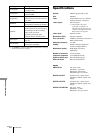
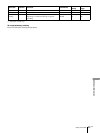
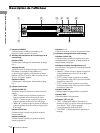
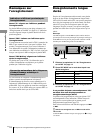
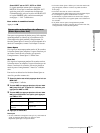
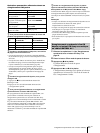
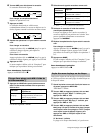
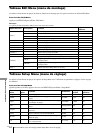
Hookup considerations
Jacks (connectors) for connecting audio
components
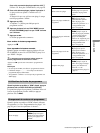
Connect To the
Amplifiers ANALOG IN/OUT jacks
CD players or DBS tuners DIGITAL IN connector
Digital amplifiers, DAT decks,
or another MD deck
DIGITAL IN/OUT connectors