60
Before Recording/Editing
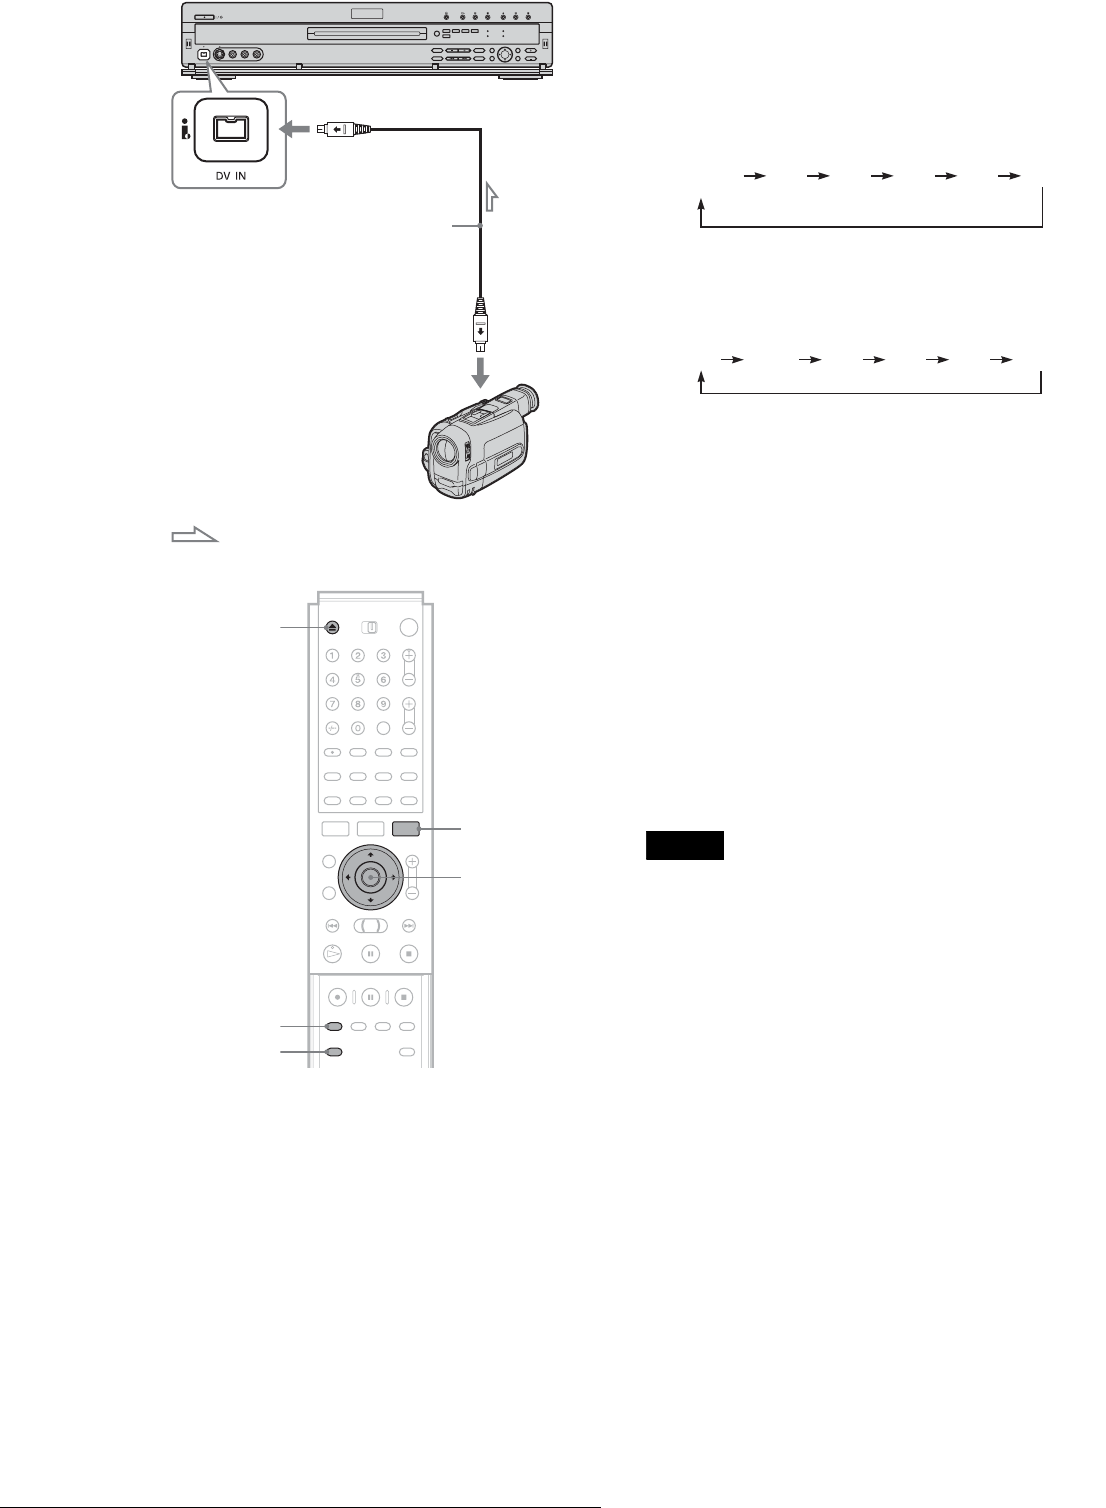
Hookups
a Turn on your TV and this recorder, then set
the TV to the connected channel (“VIDEO”
etc.).
b Press Z, and place a recordable disc on the
tray.
If you plan to do additional editing, use a DVD-RW.
c Press Z to close the disc tray.
Wait until “LOAD” disappears from the front panel
display.
If you inserted a blank DVD-RW in step 2, format
the disc in VR mode.
d Insert the source DV/Digital8 format tape
into the digital video camera.
For the recorder to record or edit, the digital video
camera must be set to video playback mode.
e Press INPUT SELECT repeatedly to select
“DV.”
The front panel display changes as follows.
f Press REC MODE repeatedly to select the
recording mode.
The recording mode changes as follows:
g Select the audio input for the digital video
camera using the Tool menu.
A Press TOOL.
B Press M/m to select “DV Audio Input,” then
press ENTER.
C Press M/m to select the item, then press
ENTER.
• Stereo1 (default)
• MIX (both stereo 1 and stereo 2)
•Stereo2
You are ready to start recording.
z Hint
You can adjust the settings for the recording picture before recording.
See “Adjusting the Recording Picture Quality and Size” (page 30).
Notes
• You cannot connect more than two pieces of digital video equipment
to the recorder.
• Depending on the digital video equipment, you may not be able to
control the equipment.
• You cannot control the recorder using another device or another
recorder of the same model.
• You cannot record date, time or the contents of the cassette memory
onto the disc.
• If you record from a DV/Digital8 format tape with a sound track that
is recorded in multiple sampling frequencies (48 kHz, 44.1 kHz, or 32
kHz), no sound will be output when playing back the switched point on
the disc.
• In order to use this recorder’s Auto Chaptering feature, be sure to
correctly set the clock on your digital video camera before shooting.
• The recorded picture may be momentarily affected if the picture size
of the source image changes, or if there is nothing recorded on the tape.
The following functions are available
◆One Touch Dub (page 61)
Records the entire contents of a DV/Digital8 format tape to a
disc of your choice with a single touch of the ONE TOUCH
DUB button.
◆Program Edit (page 62)
Allows you to select scenes from a DV/Digital8 format tape, and
then automatically records the selected scenes to a disc of your
choice.
DVD recorder
To DV IN
i.LINK cable
(not supplied)
DV output
Digital video camera
: Signal flow
TOOL
M/m, ENTER
REC MODE
Z
INPUT SELECT
L2L1 L3 L4 DV
Programme
position
HQ SP LP EPHSP SLP
