© Copyright 2012 TRENDnet. All Rights Reserved.
TRENDnet User’s Guide
TEW-731BR
22
Access Control Filters
Access control basics
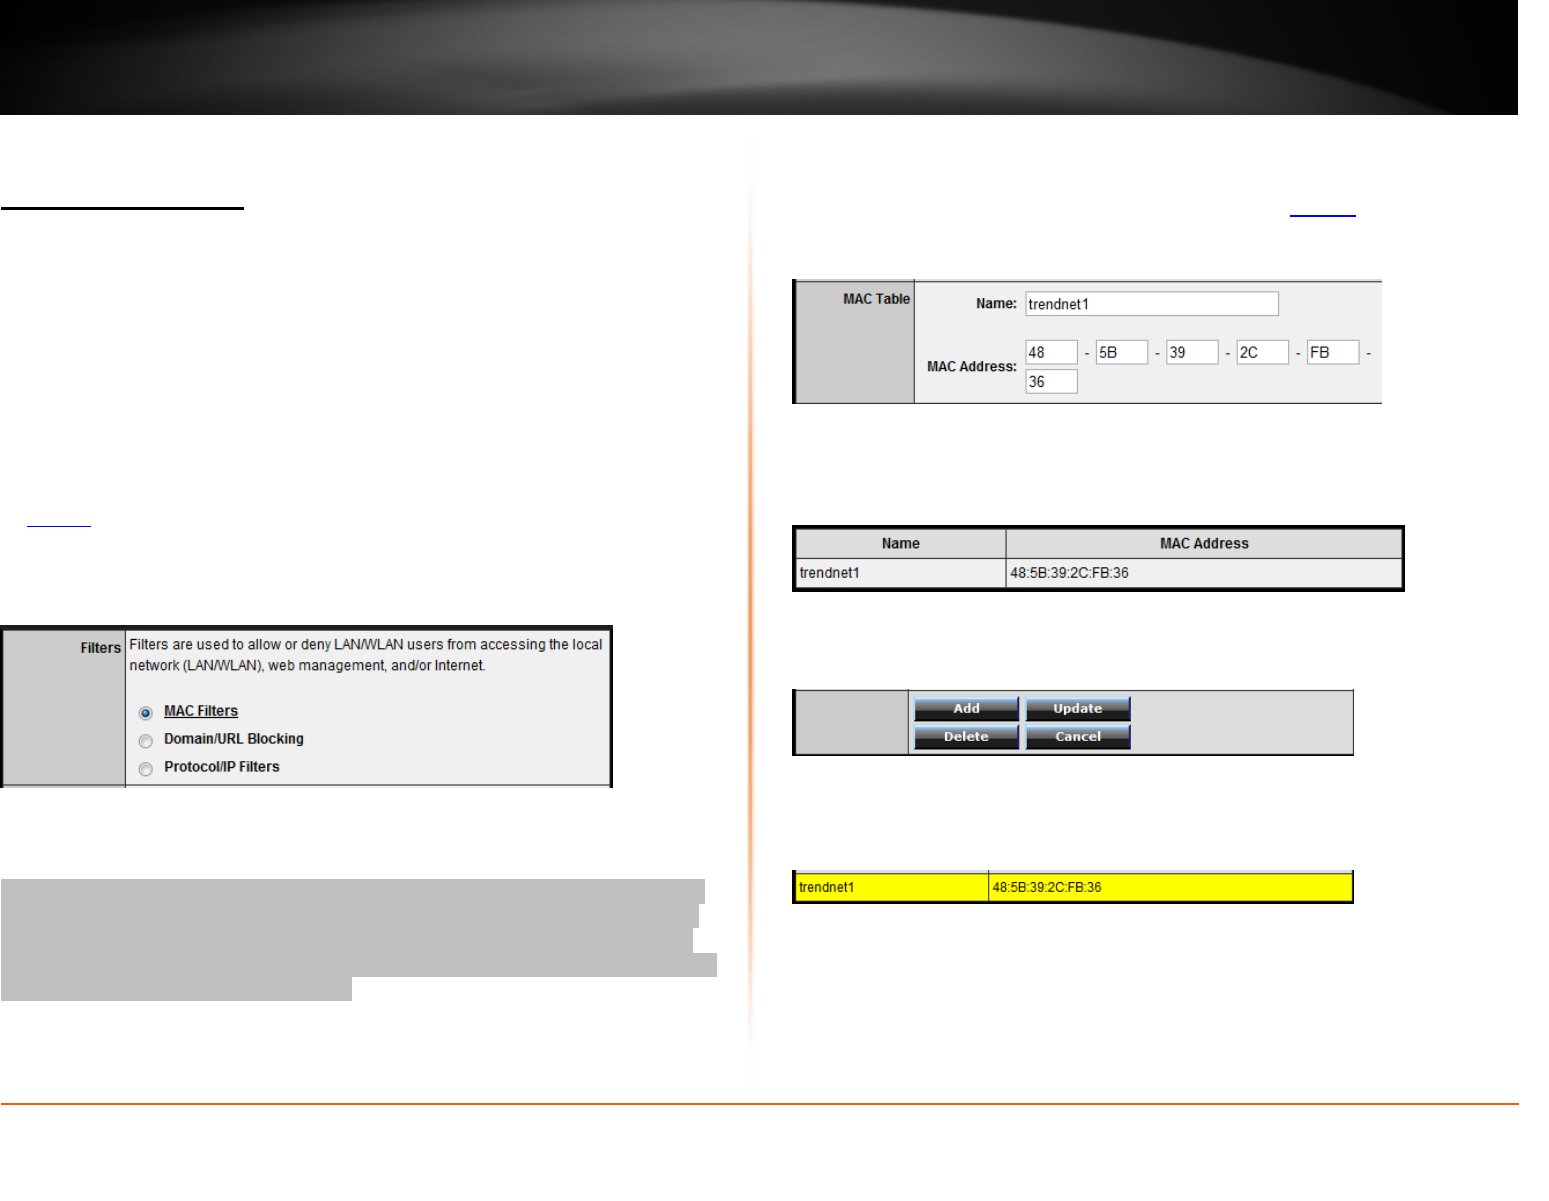
Access > Filter
MAC address filters
Access > Filter > MAC Filters
Every network device has a unique, 12-digit MAC (Media Access Control) address. Using
MAC filters, you can allow or deny specific computers and other devices from using this
router’s wired or wireless network.
1. Log into your router management page (see “Access your router management page”
on
page 27).
2. Click on Access, click on Filter, and click on MAC Filters.
3. Add the MAC addresses to the MAC Table first before applying the MAC filter
function.
Note: MAC filter can be configured to allow access to the listed MAC address and deny
all others unlisted or vice versa. The recommended function is to choose to only allow
access to the MAC addresses listed and deny all others unlisted because it is easier to
determine the MAC addresses of devices in your network then to determine which MAC
addresses you do not want to allow access.
• Name – Enter a name for the MAC address entry.
• MAC Address – Enter the 12-digit MAC address.(e.g. 00-11-22-AA-BB-CC)
Note: You can check the Dynamic DHCP List for the MAC addresses of the devices on
your network, see “Setup the DHCP server on your router” on
page 30 or refer to your
computer or device documentation to find the MAC address.
Click Add to save the new MAC address entry to the MAC Table. After clicking Add, the
MAC address entry will appear in the list below. Repeat for each device.
• Add – Saves a new MAC address entry.
To modify an existing MAC address entry, click on the entry in the MAC Table. When
selected, the entry will be highlighted.
• Delete – Removes an existing MAC address entry.
• Update – Modifies an existing MAC address entry.
• Cancel – Discard changes to an existing MAC address entry.


