10
3. Operation (continued)
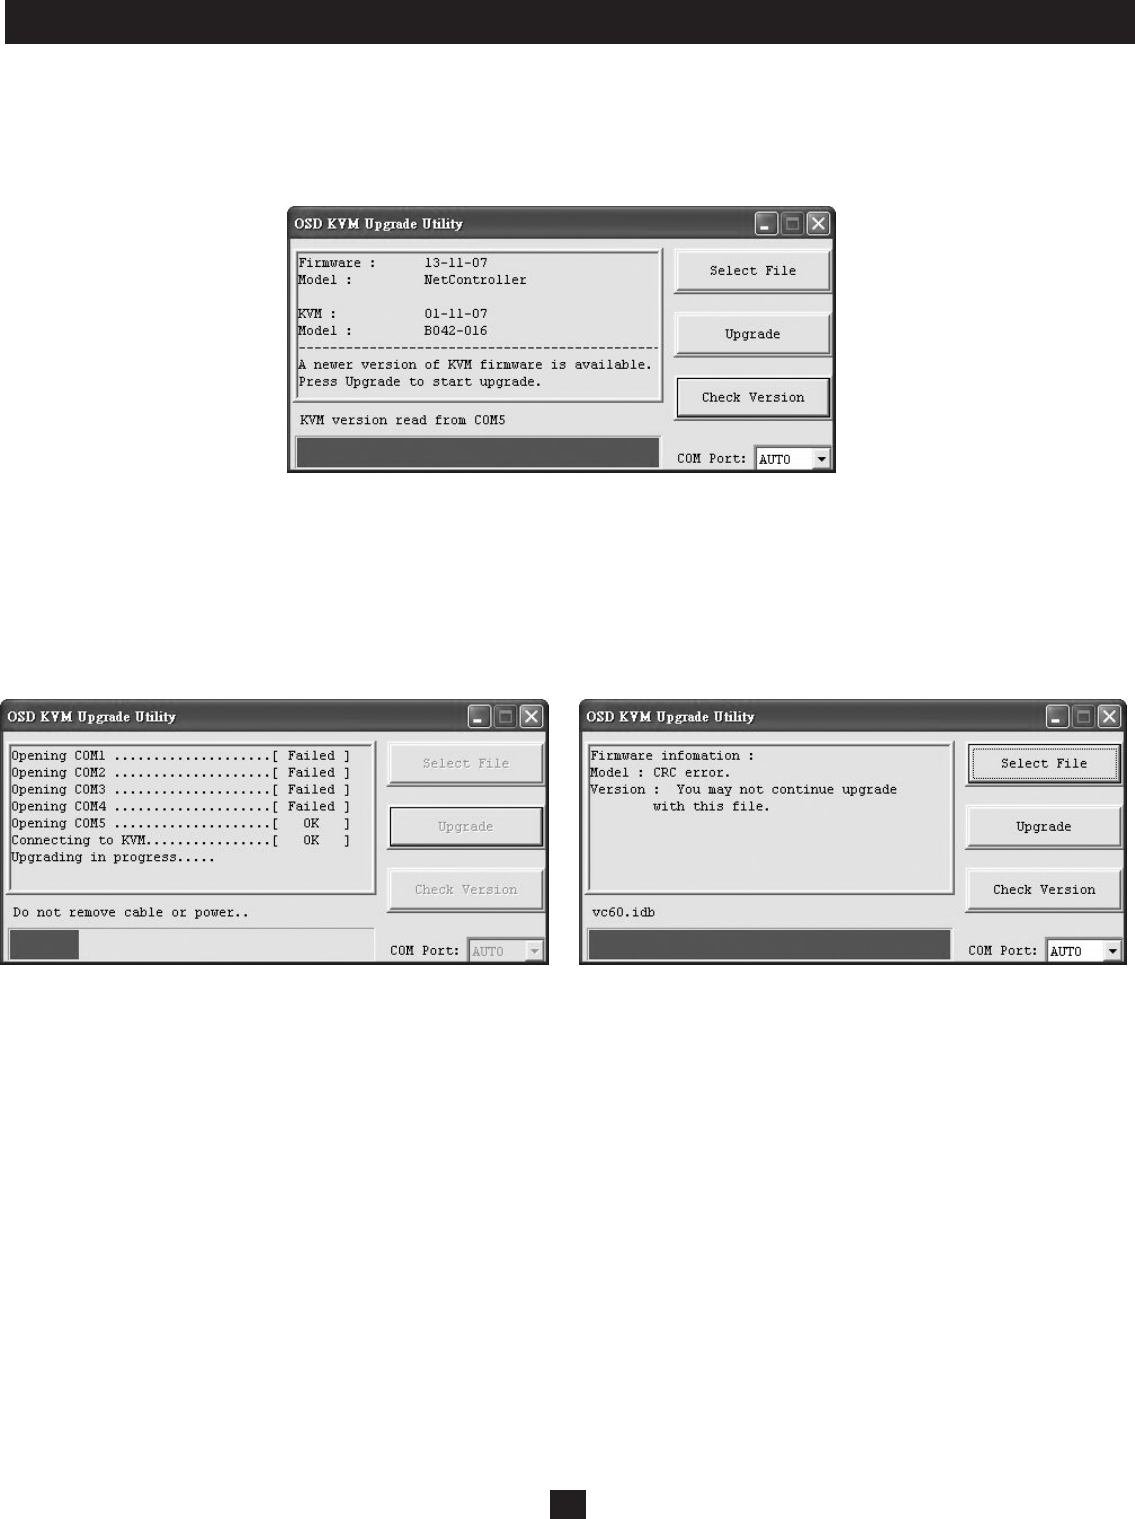
Step 5: Click the Select File button and nd the rmware upgrade le that you just downloaded.
Step 6: If you have not yet veried your KVM Switches rmware version number via the OSD Status page, click the Check Version button. This will
compare your KVM Switches rmware to the rmware upgrade le you just downloaded. If your KVM has more recent rmware, the Firmware
Upgrade Utility will ask you if you wish to continue.
If so, click the Upgrade button to start the upgrade. If not, close out of the Firmware Upgrade Utility. If your KVM Switch has older rmware
than the downloaded le, click on the Upgrade button to start the upgrade. (Upon clicking the Upgrade button, you will be notied that the video,
keyboard and mouse will be locked up during the upgrade process. Click yes to continue or no to exit.)
Step 7: During the rmware upgrade process, your KVM switch console will go blank and you will not be able to use the keyboard or mouse. Functionality
will return upon rmware completion. The Firmware Upgrade Utility will notify you if the update was successful or not. If the upgrade fails, see
the Troubleshooting section below.
Firmware Upgrade Troubleshooting
If the rmware upgrade fails due to timeout, stalls at any point for a long period of time or fails due to power outage, check to make sure all running
programs (anti-virus, system monitoring, etc.) are turned off. When you have determined all programs are disabled, unplug and re-plug the rmware
upgrade cable and try the upgrade procedure again.
If you nd that your keyboard and mouse are no longer working during a rmware upgrade failure, temporarily connect them to the host PC until you can
nish the upgrade. Once completed, your KVM console should again be working properly.
If you nd you have continued problems, please contact Tripp Lite Technical Support at (773) 869-1234 for assistance.
Figure 3-6: Firmware Comparison Window
Figure 3-7: Firmware Upgrade Window Figure 3-8: Firmware CRC Error


