Gateway Installation and Support Guide
9
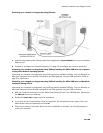
Installing the Gateway and USB Driver on Macintosh Computers Running OS 10.2
Before making your USB connection to the gateway, you must install the 2Wire gateway USB driver on your
computer. The following instructions are for USB installation on Macintosh computers running OS 10.2.
1. With your computer powered on and the 2Wire Setup Wizard CD still in the CD-ROM drive, double-click
the
2Wire CD icon on your desktop.
2. Double-click 2Wire USB to begin the driver installation.
3. If you have set up an administrator name and password, the Authenticate screen opens. Enter your
administrator name and password and click
OK.
4. Follow the on-screen instructions. When the driver installation is complete, you will be prompted to
restart your computer.
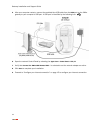
5. After your computer restarts, connect the provided blue USB cable from the USB port on the 2Wire
gateway to your computer’s USB port. A USB port is identified by the following icon:
6. Open the network Control Panel and select the Apple icon > System Preferences… > Network.
7. Verify that Ethernet Adaptor (en1) is selected in the Show field. If not, select it from the pull-down menu.
When the New Port Detected message displays, click
OK.
Your Macintosh computer usually names the gateway USB port as (en1) automatically. If your computer
has more than one Ethernet-like network device installed, the USB port may be named (en2) or higher.
8. Click Save to complete your installation.
9. IMPORTANT: Restart the 2Wire Setup Wizard to resume your installation process:
− Double-click the
2Wire CD icon.
− Double-click the
2Wire Setup Wizard icon and follow the on-screen instructions to configure your
gateway to the Internet.


