


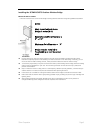

3Com Corporation Page 9
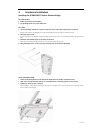
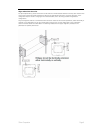
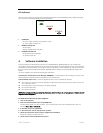
LED Indicators
After the correct connection, the Power LED and the Ethernet link LED of the 3CRWE920G73 indoor bridge should light
up. On the front of the Wireless Bridge you will find three LEDs
POWER
WIRELESS
ETHERNET
1 POWER LED
Off: Power supply connection not available or broken
On: Power supply connection OK
2 WIRELESS activity LED
Off: No activity
Blinking: Sending and receiving data
3 ETHERNET LAN link LED
Off: No LAN connection available
On: LAN connection OK
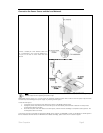
4. Software Installation
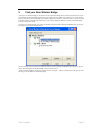
Insert the installation CD-ROM delivered with the 3Com WLAN Building to Building Bridge into your CD-ROM drive
The installation wizard starts automatically and will guide you through the rest of the installation process. If the installation
wizard does not start automatically, run ‘‘setup.exe’’ from the root directory of the installation CD. Then choose to install
the 3Com Wireless Infrastructure Device Manager (WIDMAN) utility for helping you find the Bridge and configure its IP
address.
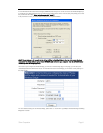
The 3Com Installation CD contains the following tools and utilities:
3Com Wireless Infrastructure Device Manager (WIDMAN)
– an administration tool that helps you selects 3Com
wireless LAN devices and launches their configurations in your Web browser.
3Com 3CDaemon Server Tool --- a firmware upgrade tool that can act in four different capacities:
As a TFTP Server, necessary for firmware upgrades, and backup and restore functions. Use this option if you do not
have a TFTP server set up.
As a SysLog Server, which is necessary to view SysLog messages.
As an optional TFTP Client.
As an optional FTP Server.
[NOTE: It is recommended that you install the 3CDaemon Server tool if you do not already have a firmware tool for
upgrades on your computer.]
To install one of the tools on your computer:
1 Turn on the computer;
2 Insert the 3Com Installation CD in the CD-ROM drive;
The setup menu appears. If it does not appear, you can start the setup menu from the Windows Start menu. For
example: Start > Run > d:setup.exe .
3 In the menu, click Tools and Utilities.
4 In the next screen, click the tool you want to install.
5 Follow the instructions on the screens to complete the installation.
Reboot the computer if prompted to do so.
6 Launch the tool from the Windows Start menu.