


ENGLISH
Go to
Main Menu
Go to Operator Guide
Table of Contents
7
3M 9800 Operator’s Guide
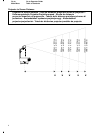
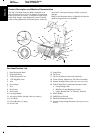
Operating The Projector
Read the Important Safeguards before operating the
9800 projector.
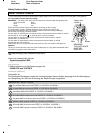
1. Position projector in front of projection screen. The
distance from the screen controls the size of the
projected image.
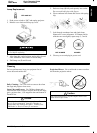
2. Uncoil power cord and plug into electric outlet.
3. Push power switch “On” to illuminate lamp.
| =ON
O = OFF
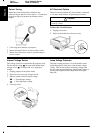
4. Rotate projector (1) until projected light beam is
perpendicular (90_) to the screen surface. The
height at the left and right sides of the projected
image should be equal.
5. Adjust angle of projection mirror (2) to raise or
lower the image on the screen.
6. For best results, tilt projection screen (3) toward
projector until the width of the projected image is
equal at both the top and bottom.
7. Place LCD projection panel or film transparency in
the center of stage glass (4).
8. Set lamp brightness to “High” or “Low” position.
See “High/Low Lamp Control” below.
9. Rotate focus knob (5) for sharpest image.
10. Rotate magnifier lens (6) under projector lens to
enlarge LCD projection panel or transparency film
image size by 1.3X. Adjust focus knob (5) for
sharpest image.
Note
The magnifier lens glass and metal frame get
warm to the touch during use. Grasp the
insulated tab to rotate the lens.
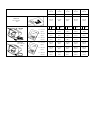
Lamp Changer
If the selected lamp (position 1 or 2) is burned out or
missing, a red X appears through the window in the
control panel door.
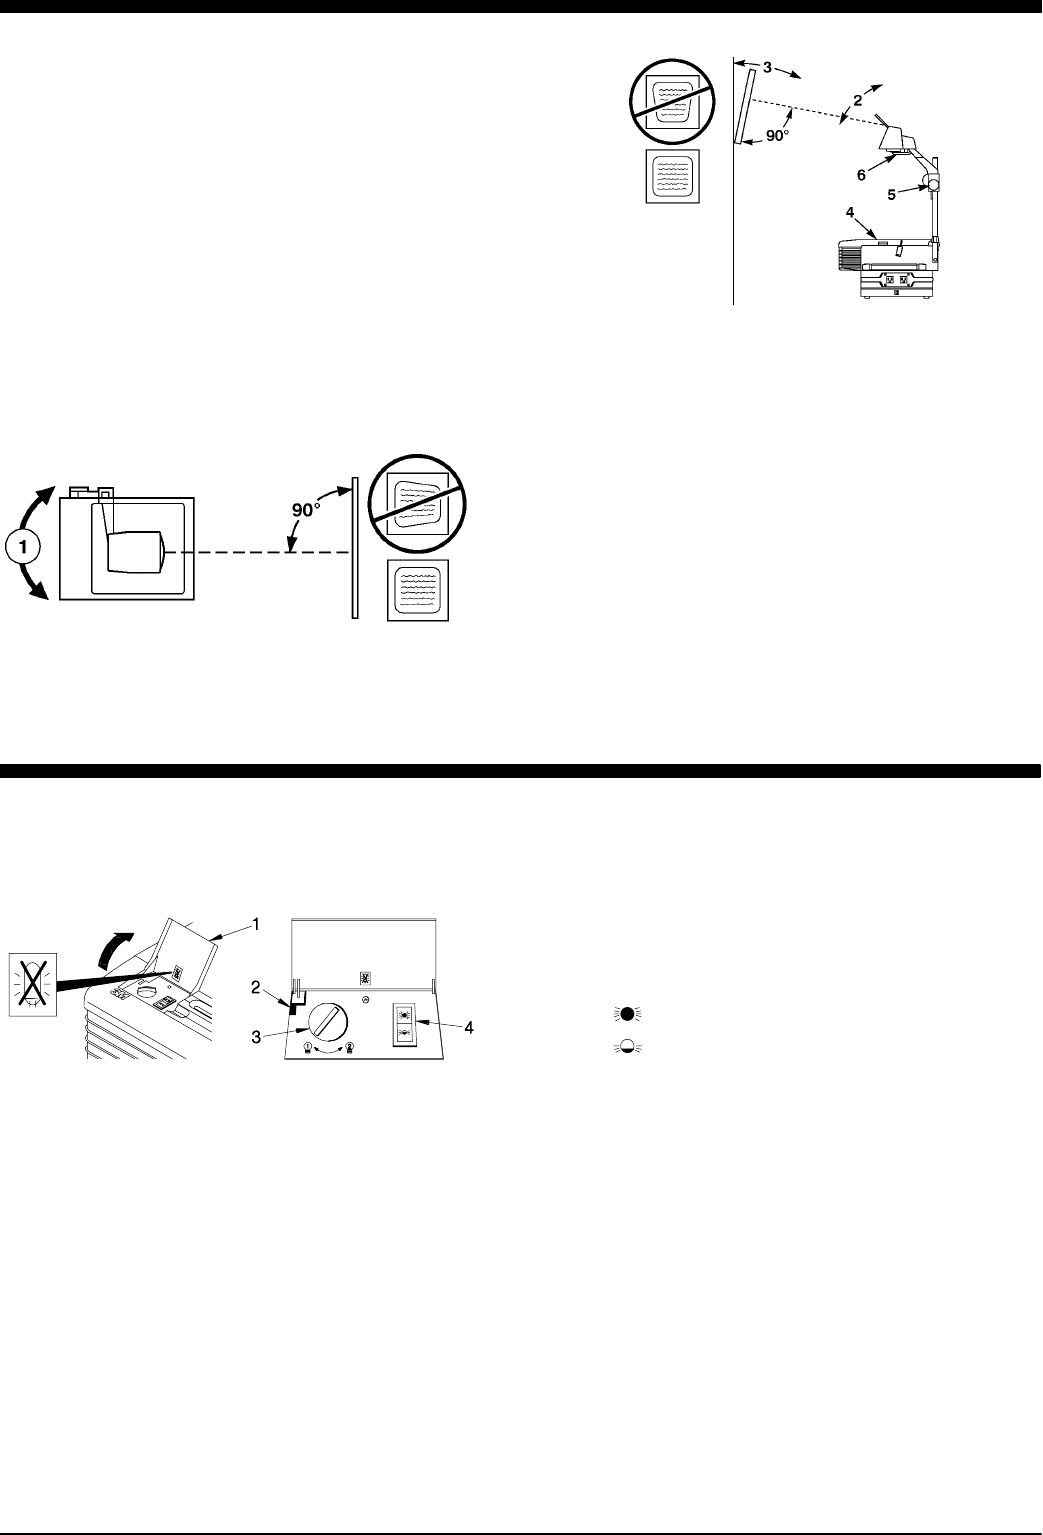
1. Open control panel door (1).
2. Lamp interrupt switch (2) cuts power to lamps.
3. Rotate lamp changer dial (3) to select alternate
lamp. Turn dial fully until it stops.
4. Close control panel door to illuminate lamp.
Note
Replace burned out or missing lamps to remove
red “X” from control panel door.
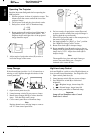
High/Low Lamp Control
Activate High/Low switch to select High (brightest) or
Low (normal) lamp illumination. See diagram to left.
1. Open control panel door (1).
2. Lamp interrupt switch (2) cuts power to lamps.
3. Press High/Low switch (4) to set desired
brightness.
a.
= Brightest image, shorter lamp life
b.
= Normal image, longer lamp life
4. Close control panel door to illuminate lamp.
Important
Lamp will not illuminate unless Control
Panel door is closed.