


11
3M
™
Multimedia Projector MP7640
© 3M IPC 2000
MENU
SELECT
STANDBY/ON VIDEO
POSITION
MAGNIFY FREEZE VOLUME
MUTE
BLANKTIMERAUTO
RGB
MENU RESET
Section 2: Product Description
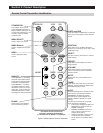
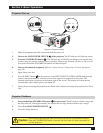
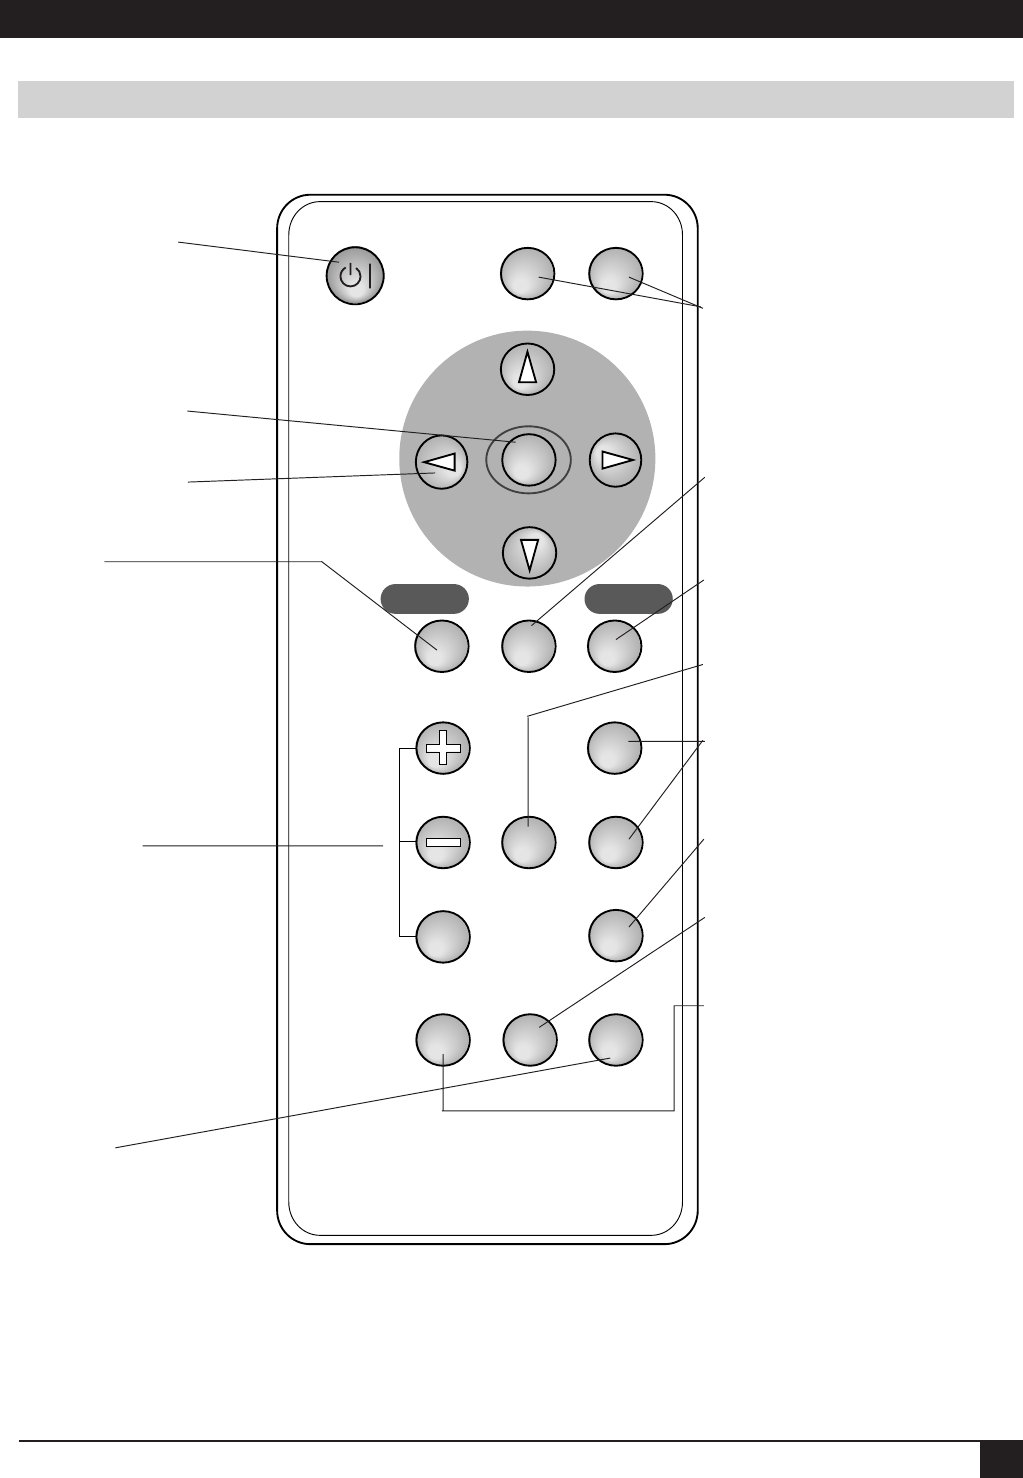
STANDBY/ON
Turn on Main Power switch.
Press STANDBY/ON button to
begin projection mode (lamp on)
or press and hold button for one
second to switch to standby
mode (lamp off).
MENU SELECT
Press to select menu items.
MENU Buttons
Press to navigate among menu
items.
MENU
Press to display the menu
screen.
MAGNIFY*
Press MAGNIFY (+) to enlarge
the center of the display image.
Press again to enlarge image to
maximum of 4x magnification.
Press MAGNIFY (-) to reduce
the display image size. Press
third button to return to normal
image size. (Can be used with
the POSITION button to select
the image area being magnified.)
BLANK
Press button to turn ON/OFF
the screen blanking function.
VIDEO and RGB
Press the VIDEO or RGB button to select the
input source. Press again to select the next
source.
POSITION*
Press button, then use Menu directional
buttons to move image up, down, left or right.
(RGB signal only).
RESET*
For menu screens, press button to return to
initial settings.
FREEZE*
Press button to turn ON/OFF the freeze
image function.
VOLUME*
Press upper button to increase speaker
volume. Press lower button to decrease
speaker volume.
MUTE*
Press button to turn the speaker sound
ON/OFF.
TIMER*
Press button to turn the menu screen timer
ON/OFF.
The timer does not display when
the BLANK function is active.
AUTO*
Press the AUTO button to activate the auto
sync function. The message “AUTO IN
PROGRESS” will display for several
seconds as the projector adjusts the V.
POSIT, H.POSIT. H.PHASE, & H. SIZE
settings.
The Auto Sync function will not operate
under the following conditions:
• Initial screen message NO INPUT IS
DETECTED or SYNC IS OUT OF
RANGE is displayed.
• FREEZE and MAGNIFY functions
have not been turned off prior to
pressing AUTO button.
• Software application running on your
computer is not set to maximum
screen size prior to pressing AUTO
button.
*This button will not function if the
messages “NO INPUT IS DETECTED”
or “SYNC IS OUT OF RANGE” are displayed.
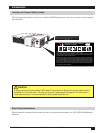
Remote Control Transmitter Identification
Figure 2.3 Basic Remote Control Transmitter