60 Chapter 3
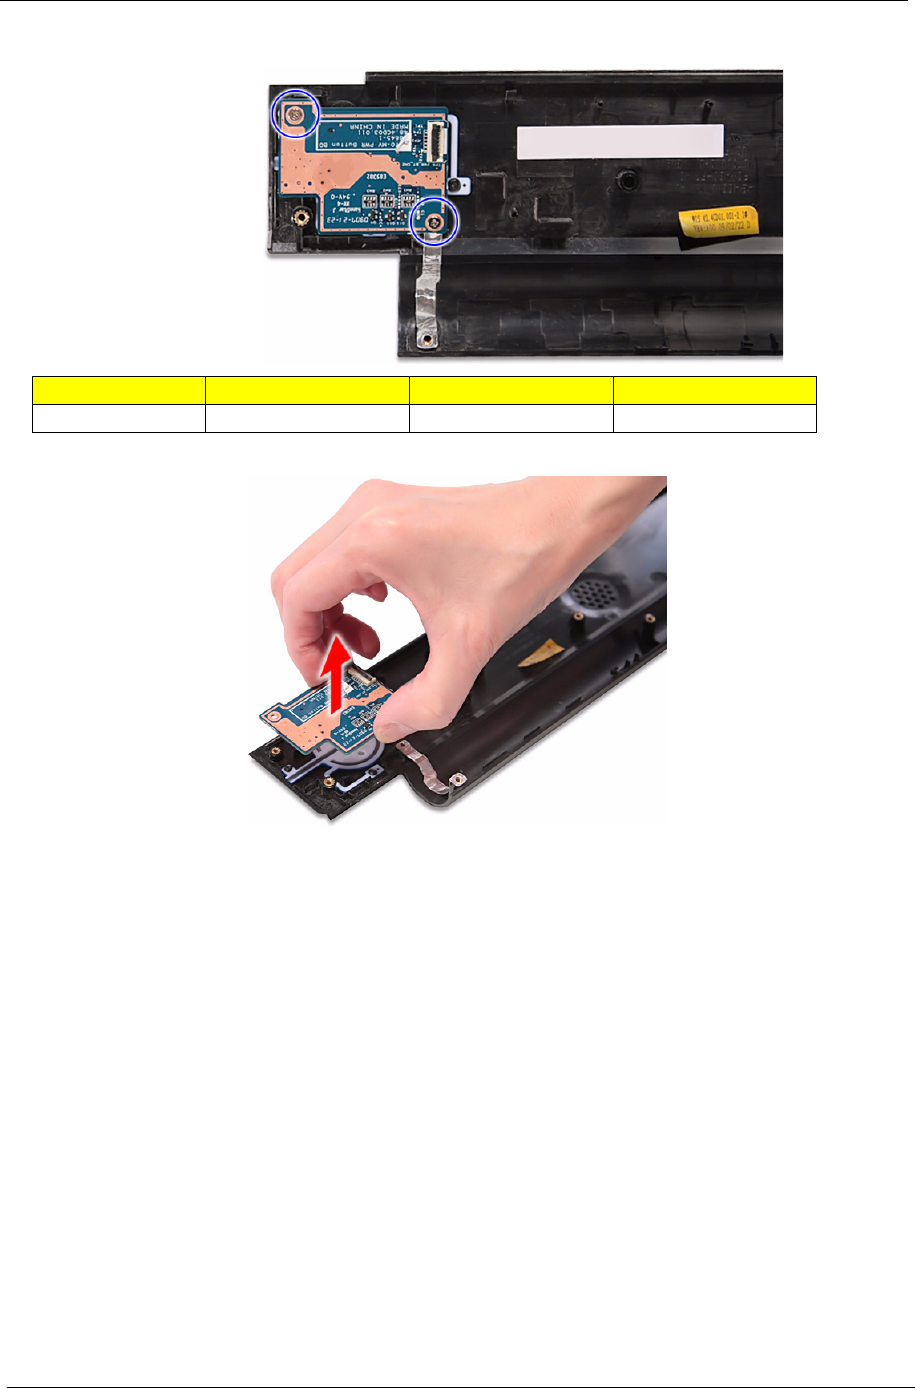
18. Remove the two screws (F) securing the power button board to the middle cover.
19. Detach the power button board.
Removing the Keyboard
1. See “Removing the Battery Pack” on page 44.
2. See “Removing the SD Dummy Card” on page 45.
3. See “Removing the Hard Disk Drive 2 (HDD2) Module” on page 46.
4. See “Removing the Back Cover” on page 48.
5. See “Removing the Hard Disk Drive 1 (HDD1) Module” on page 48.
6. See “Removing the TV Tuner Card (for certain models only)” on page 50.
7. See “Removing the Wireless LAN Card” on page 52.
8. See “Removing the DIMM Module” on page 53.
9. See “Removing the Optical Drive Module” on page 54.
10. See “Removing the Middle Cover” on page 57.
Size (Quantity) Color Torque Part No.
M2 x L4 (2) Silver 1.6 kgf-cm 86.9A552.4R0


