


© Copyright 2009 Acnodes, Inc.
All rights reserved. Product description and product specifications
are subject to change without notice. For latest product information,
please visit Acnodes’ web site at www.acnodes.com.
PC 5150
15-inch touch panel PC
661 Brea Canyon Rd., Suite 3
Walnut, CA 91789
tel: 909.598.7388, fax: 909.598.0218, www.acnodes.com
4
KD 6176
1U Rackmount Console Server
(for KVM switch or server)
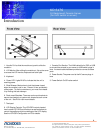
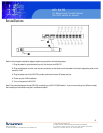
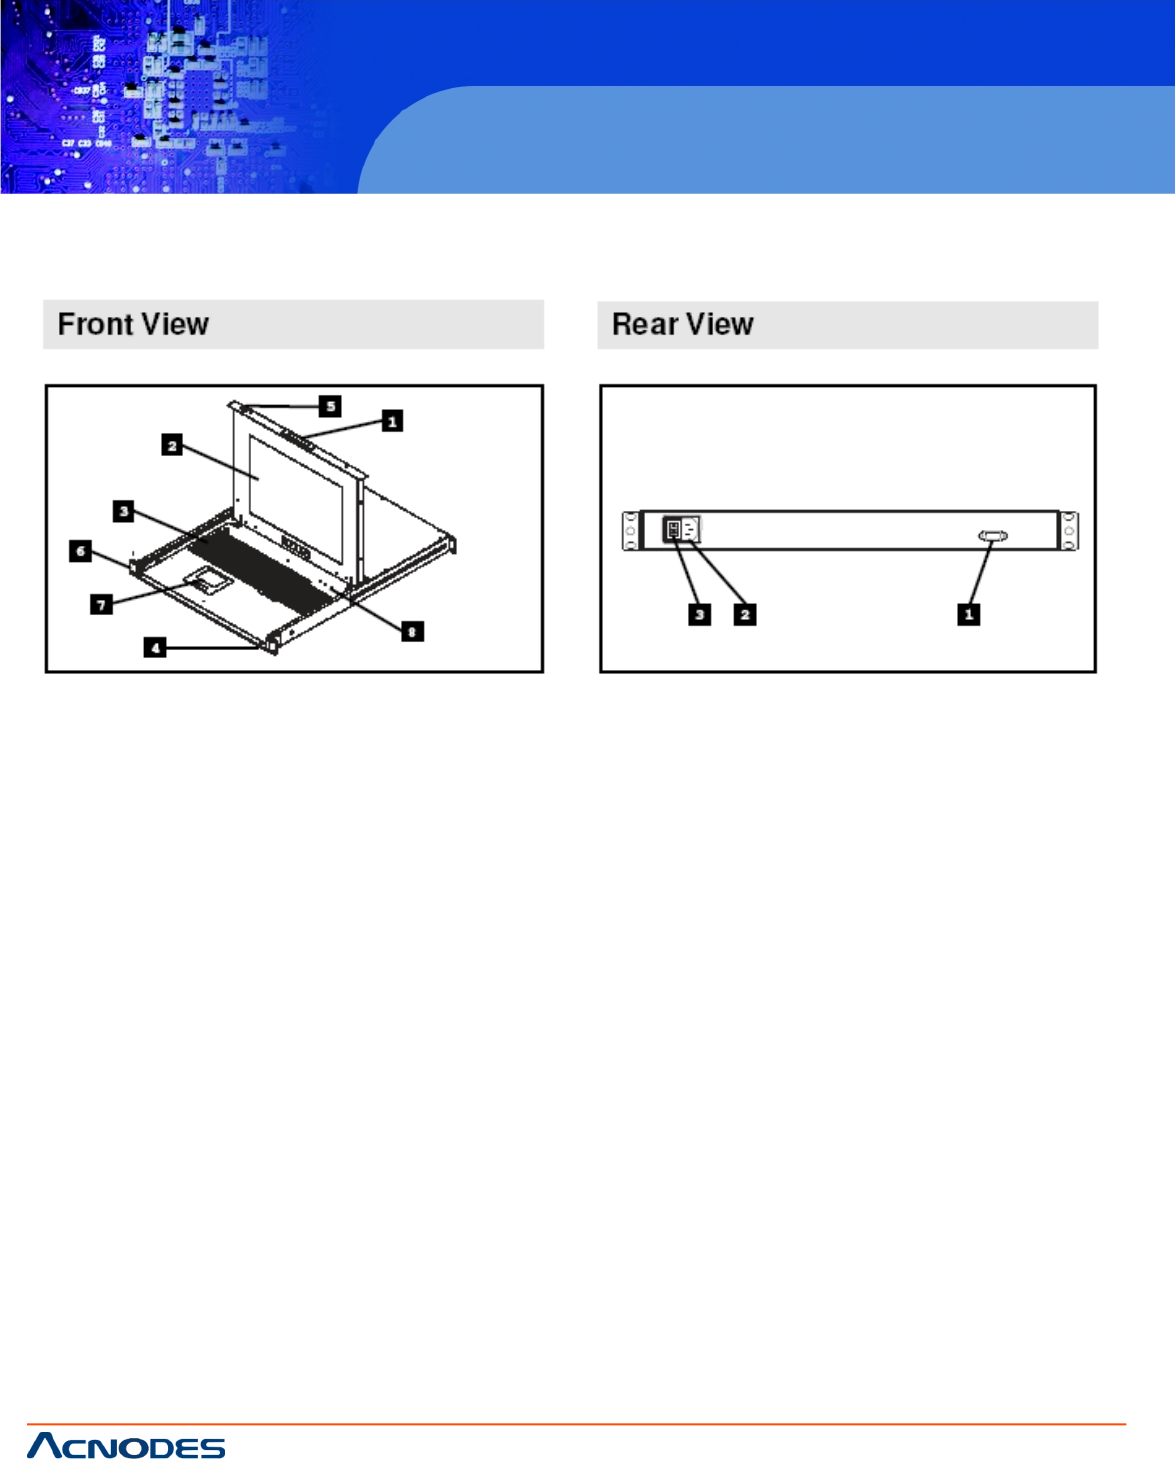
Introduction
1. Handle: Pull to slide the module out; push to slide the
module in.
2. LCD Monitor: After sliding the module out, flip up the cover
to access the LCD monitor, keyboard and touch pad.
3. Keyboard
4. Power LED: Lights BLUE to indicate that the unit is
receiving power.
5. Slide Release: Mechanism to lock the drawer closed
when the console is not in use. Prevent it from accidentally
sliding open. To sile the console out, you must first release
it by mocing this tab sideways.
6. Rack mount Brackets: There are rack mount brackets to
secure the chassis to a system rack located at each corner
of the unit. See P.6 for rack mount details.
7. Touchpad
8. LCD Display Controls: The LCD OSD controls located
here include LCD ODS on/off buttons as well as buttons to
control the position and picture settings of the LCD display.
See the LCD OSD Configuration on P.5 for details.
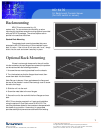
1. Console Port Section: The KVM cable kits for PS/2 or USB
to connect the console to your server or KVM switch plugs in
here. A console cable has been provided to connect to these
ports.
2. Power Socket: The power cord to the AC source plugs in
here.
3. Power Switch: On/Off rocker switch