2
FastStor Barcode Reader Module Installation
The Barcode Reader module is installed by connecting it to the interface connector on the inside top panel of your FastStor. This
location prevents you from using data cartridge storage slot # 1. Whenever the Barcode Reader module is installed the capacity of
your FastStor is reduced to six data cartridge storage slots. The front storage slots are still numbered 1 through 5, but the FastStor
menu functions and the application software cannot select or use slot 1. This is best illustrated by observing that whenever the Barcode
Reader module is installed the LOAD SLOT function of the FastStor menu will use storage slots 2 and 3 as the cartridge source
locations to load slots 6 and 7. Without the Barcode Reader module installed, the LOAD SLOT function uses storage slots 1 and 2 as
the source locations.
✔
Remove the Barcode Reader module and trim panel from packaging and check that the reader is securely attached to the
mounting bracket.
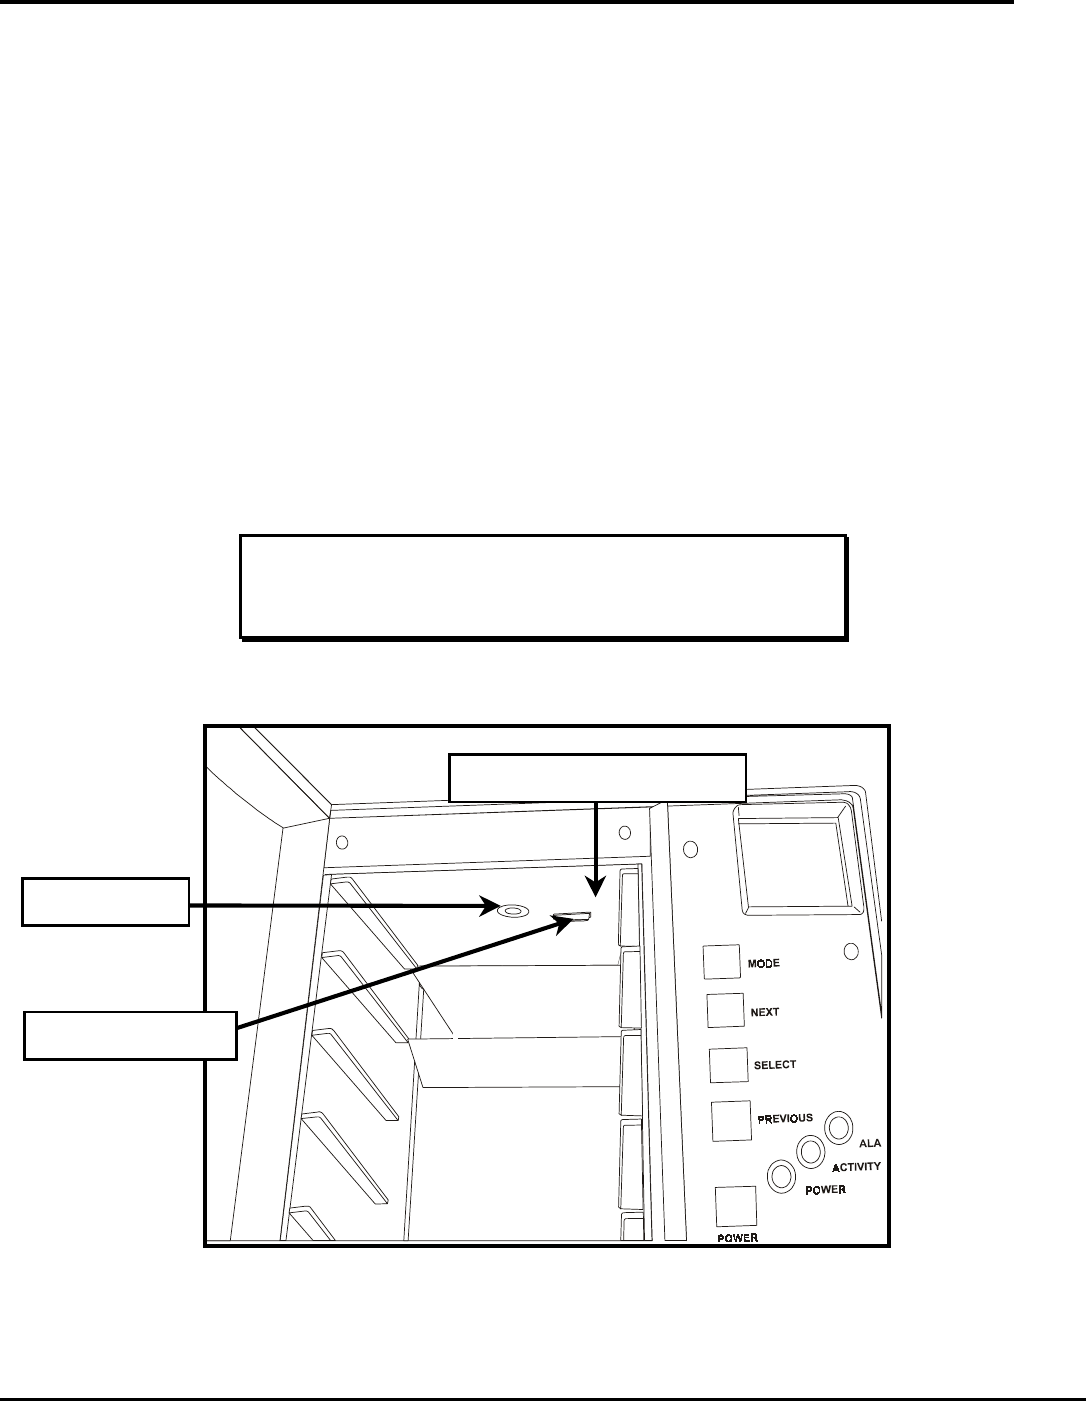
No tools are needed to install the Barcode Reader module in your FastStor. A thumbscrew and interface connector on the mounting
bracket secure it to the inside top panel of your FastStor directly above data cartridge storage slot 1. The trim panel is installed by
pressing it into place in front of the Barcode Reader module. Follow the installation instructions below to install the optional barcode
reader module and trim panel.
1. Power down your FastStor.
2. Remove the FastStor AC line cord from the AC source outlet.
3.
Open the front door of your FastStor.
4. Remove all data cartridges from your FastStor.
Note
Whenever the Barcode Reader module is installed there are only six
cartridge storage slots available.
5. Locate the interface connector and mounting hole on the inside top panel of your FastStor directly above data cartridge
storage slot 1.
Barcode Reader Module Mounting Location
Mounting Hole
Data Cartridge Storage Slot 1
Interface Connector
