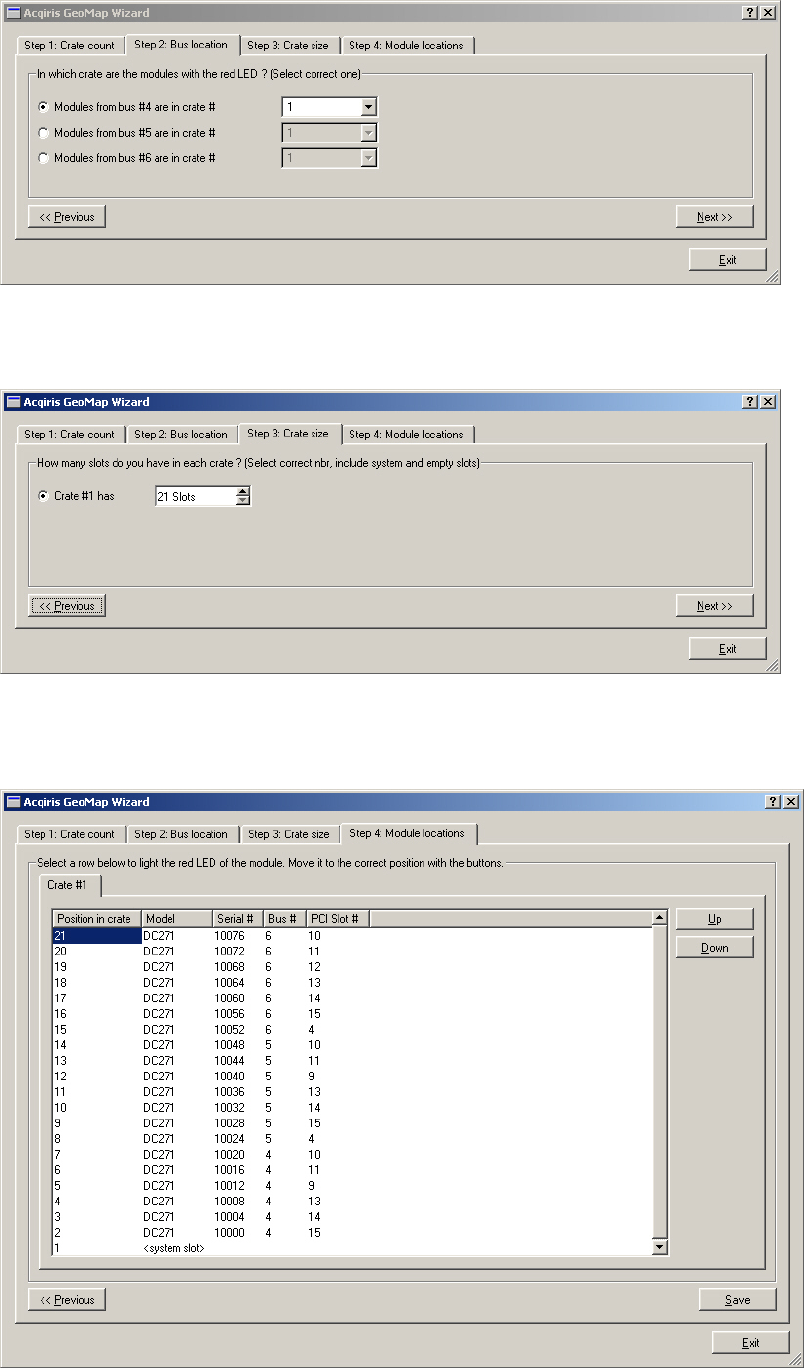
Selecting a row will cause all of the LED's of modules in that Bus to be turned on RED. This should make it easy to
identify which crate the modules are in.
The third step is to specify the number of slots in each crate. This is shown below:
The 4
th
step consists of arranging the modules of each crate into the correct order. The menu shown below is one in
which all of this work has been done for the modules of a fully populated CC121. Selecting a position will cause a
module to have its red LED turned on. Then the Up and Down buttons will allow you to move the module in
question to the desired "Position in crate".
The final step is to actuate the Save button so that the final configuration will be memorized and made available to
the driver.
User Manual: Family of 10-bit Digitizers Page 51 of 55


