


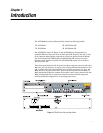

Installation
4
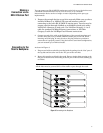
Stacking Hubs on
a Flat Surface
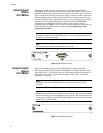
The hub can be stacked on a secure table or desktop.
1. Attach the self-adhesive rubber foot pads (that come with this package) on each
of the 4 concave spaces located on the bottom of the first hub.
2. Place the first hub on a firm flat surface where you want to install the stack.
3. Repeat Step 1 for each hub before stacking them. The rubber foot pads cushion
the hub against shock/vibrations and provide space between each hub for
ventilation.
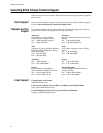
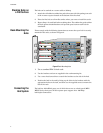
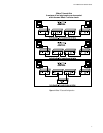
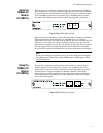
Rack-Mounting the
Hubs
Please comply with the following instructions to ensure that your hub is securely
mounted in the rack, as shown in Figure 2.
Figure 2
Rack-Mounting Hubs
1. Use a standard EIA 19-inch rack.
2. Use the brackets and screws supplied in the rack mounting kit.
3. Use a cross-head screwdriver to attach the brackets to the side of the hub.
4. Position the hub in the rack by lining up the holes in the brackets with the
appropriate holes on the rack, and then use the supplied screws to mount the
hub in the rack.
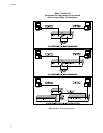
Connecting the
Hub System
The hub has 12/24 RJ-45 ports, one of which also serves as a dual-speed (MDI/
MDI-X) daisy-chain port. All the repeater ports support 10 or 100 Mbps
half-duplex connections.