


Installation and Safety Guide 7
613-000313 Rev D
Installing an Optional PIC
If you purchased an optional PIC, install it now by following the Port Interface Card
Quick Install Guide. The PIC Quick Install Guide can be found with the PIC, on the
Documentation and Tools CD-ROM, or can be downloaded from
www.alliedtelesis.com/support/documentation/
Installing the Router in a Rack
1. Gather additional items. You will need:
• the rack-mount kit (in your router package, or ordered from your authorised
Allied Telesis distributor or reseller)
• a Phillips #1 screwdriver
• screws and cage nuts to attach the brackets to your rack
2. Check the rack.
Ensure that the rack is safely secured and that it will not tip over. Devices in a
rack should be installed starting at the bottom, with the heavier devices near the
bottom of the rack.
Ensure the rack has sufficient space for the router and its associated cables. The
router is 1U high.
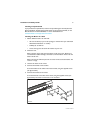
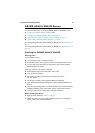
3. Unscrew the feet from the router.
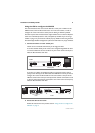
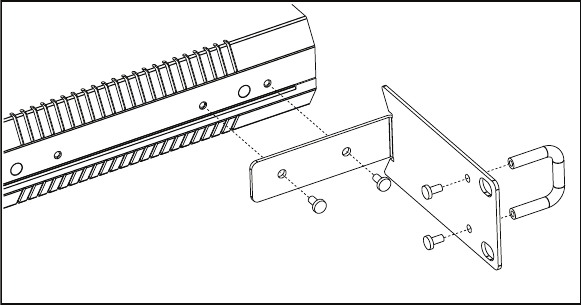
4. Connect the handles to the brackets.
Screw the handles to the wider side of each bracket, using the supplied screws
(see figure below).
5. Connect the brackets to the router.
Screw the brackets to the sides of the router, using the supplied screws (see
figure below). The router can be front or rear mounted.
Rmount