


10
Hardware Installation (for Enclosure purchase only) cont.
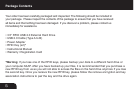
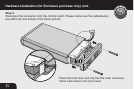
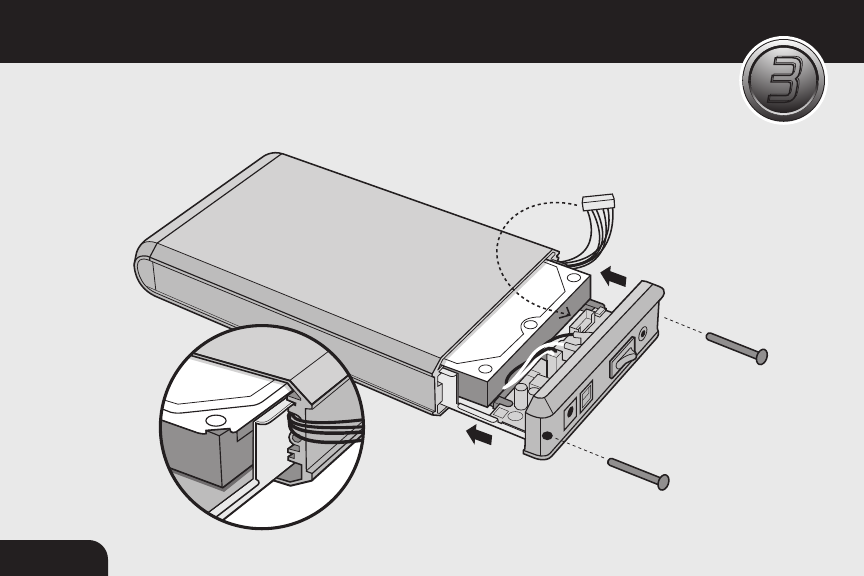
Step 3:
Reconnect the connector onto the control board. Please make sure the cables/wires
are within the slot shown in the below picture.
Place the hard drive end cap into the main enclosure
frame and screw in the (2) screws.
3
3