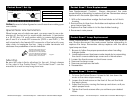
Pocket Scan™ Set Up
©American DJ Supply® - www.americandj.com - Pocket Scan™ Instruction Manual Page 6
Notice: Be sure to follow gures two and three when making your
own cables.
Special Note: Line Termination.
When longer runs of cable are used, you may need to use a ter-
minator on the last unit to avoid erratic behavior. A terminator
is a 90-120 ohm 1/4 watt resistor which is connected between
pins 2 and 3 of a male XLR connector (DATA + and DATA -). This
unit is inserted in the female XLR connector of the last unit in your
daisy chain to terminate the line. Using a cable terminator will
decrease the possibilities of erratic behavior.
1
2
3
1
2
3
DMX +
DMX -
COMMON
DMX512 IN
(X-CALIBUR)
CONNECTOR
3 PIN
DMX512 OUT
CONTROLLER
CONNECTOR
3 PIN
1
2
3
Termination reduces signal errors and
avoids signal transmission problems
and interference. It is always advisable
to connect a DMX terminal, (Resistance
120 Ohm 1/4 W) between PIN 2 (DMX-)
and PIN 3 (DMX +) of the last fixture.
SOUND
REMOTE
CONTROL
INPUT
POWER
INPUT OUTPUT
SOUND
REMOTE
CONTROL
INPUT
POWER
INPUT OUTPUT
SOUND
REMOTE
CONTROL
INPUT
POWER
INPUT OUTPUT
DMX512
DMX+,DMX-,COMMON
Figure 4
1 Ground
1 Ground
XLR Male Socket
XLR Pin Conguration
3 Hot
2 Cold
2 Cold
3 Hot
XLR Female Socket
Pin 3 = Data True (positive)
Pin 2 = Data Compliment (negative)
Pin 1 = Shield
Mounting.
Be sure the yoke is rmly attached to the unit. Attach clamps
to the yoke of the Pocket Scan.™ The Pocket Scan™ can be
mounted to a wall or may hung from truss.
©American DJ Supply® - www.americandj.com - Pocket Scan™ Instruction Manual Page 11
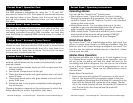
Fuse Replacement: Caution! Always disconnect the main
power before attempting to replace the fuse. Remember always
replace with the same type lamp and fuse.
1. With a flat screwdriver wedge the fuse holder out of the its
housing
2. Remove the old fuse from the holder and replace with the
exact same type fuse.
3. Replace the fuse holder in to the fuse holder housing.
4. Reconnect main power.
Pocket Scan™ Fuse Replacement
Pocket Scan™ Lamp Replacement
Lamp Replacement: Caution! Never open the unit when in
use. Always disconnect the main power before attempting to
replace the lamp. Remember always replace with the same
type lamp and fuse.
1. Be sure to follow the proper procedures when handling
halogen bulbs.
2. Lamp replacement has been made simple by incorporating
the use of a removable lamp cover and a thumb screw.
3. Loosen the thumb screw on front lower cover.
4. Remove the lamp cover.
5. Remove and replace the bulb.
6. Reassemble.
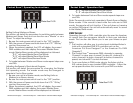
Pocket Scan™ Focusing
1. To focus the Pocket Scan
TM
it is best to first turn down the
music so the mirror stops moving.
2. Loosen the thumb screw on the front of the unit that hold
the lens in place.
3. Adjust the focus by moving the lens up and down, until you
reach proper focus.
4. Tighten the thumb screws after you achieve your desired
focus.


