


Rack Mount Installation
To mount the MasterSwitch
™
in a NetShelter
™
(or other 19-inch
NEMA rack):
1. Peel the rubber feet from the bottom of the MasterSwitch
™
.
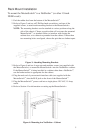
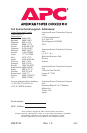
2. Refer to Figure 3 and use a #2 Phillips-head screwdriver, and two of the
supplied screws, to attach each mounting bracket to the MasterSwitch
™
.
NOTE: The mounting brackets can be attached at various positions along the
side of the chassis. Choose a position that will not cause the mounted
MasterSwitch
™
, or attached cables, to interfere with closing the
cabinet door, or to otherwise protrude from the cabinet. If more than
two mounting holes are aligned, choose the pair that are farthest apart.
Figure 3: Attaching Mounting Brackets
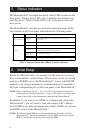
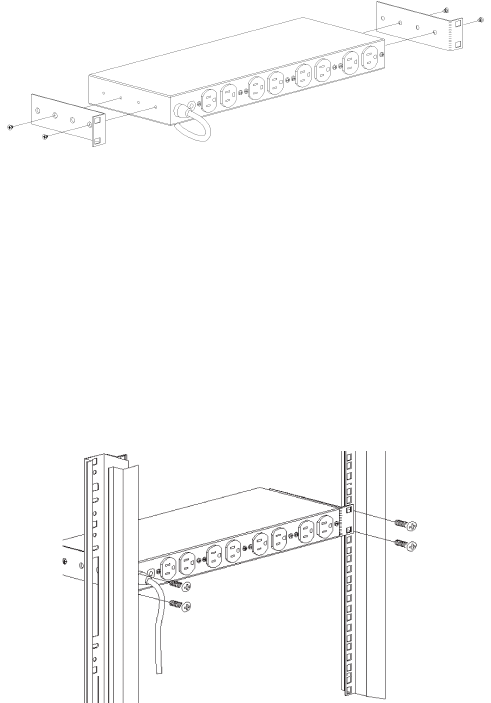
3. Refer to Figure 4 and use 4 cage nuts and machine screws (not supplied with
the MasterSwitch
™
) to mount the MasterSwitch
™
into the NetShelter
™
cabinet.
If the MasterSwitch
™
is being installed in a cabinet other than a NetShelter
™
,
use the hardware that is appropriate for the cabinet.
4. Plug the male end of your network interface cable (not supplied with the
MasterSwitch
™
) into the RJ45 jack on the front of the MasterSwitch
™
.
5. Plug the MasterSwitch
™
power cord into a single-phase 120-VAC, 15-Amp
outlet.
6. Refer to Section 4 for information on setting up the MasterSwitch
™
.
Figure 4: Mounting in a NetShelter
™
Cabinet
5