


Button Labelling
38
Novara ControlPads & KeyPads
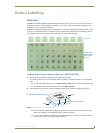
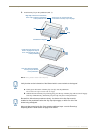
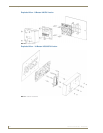
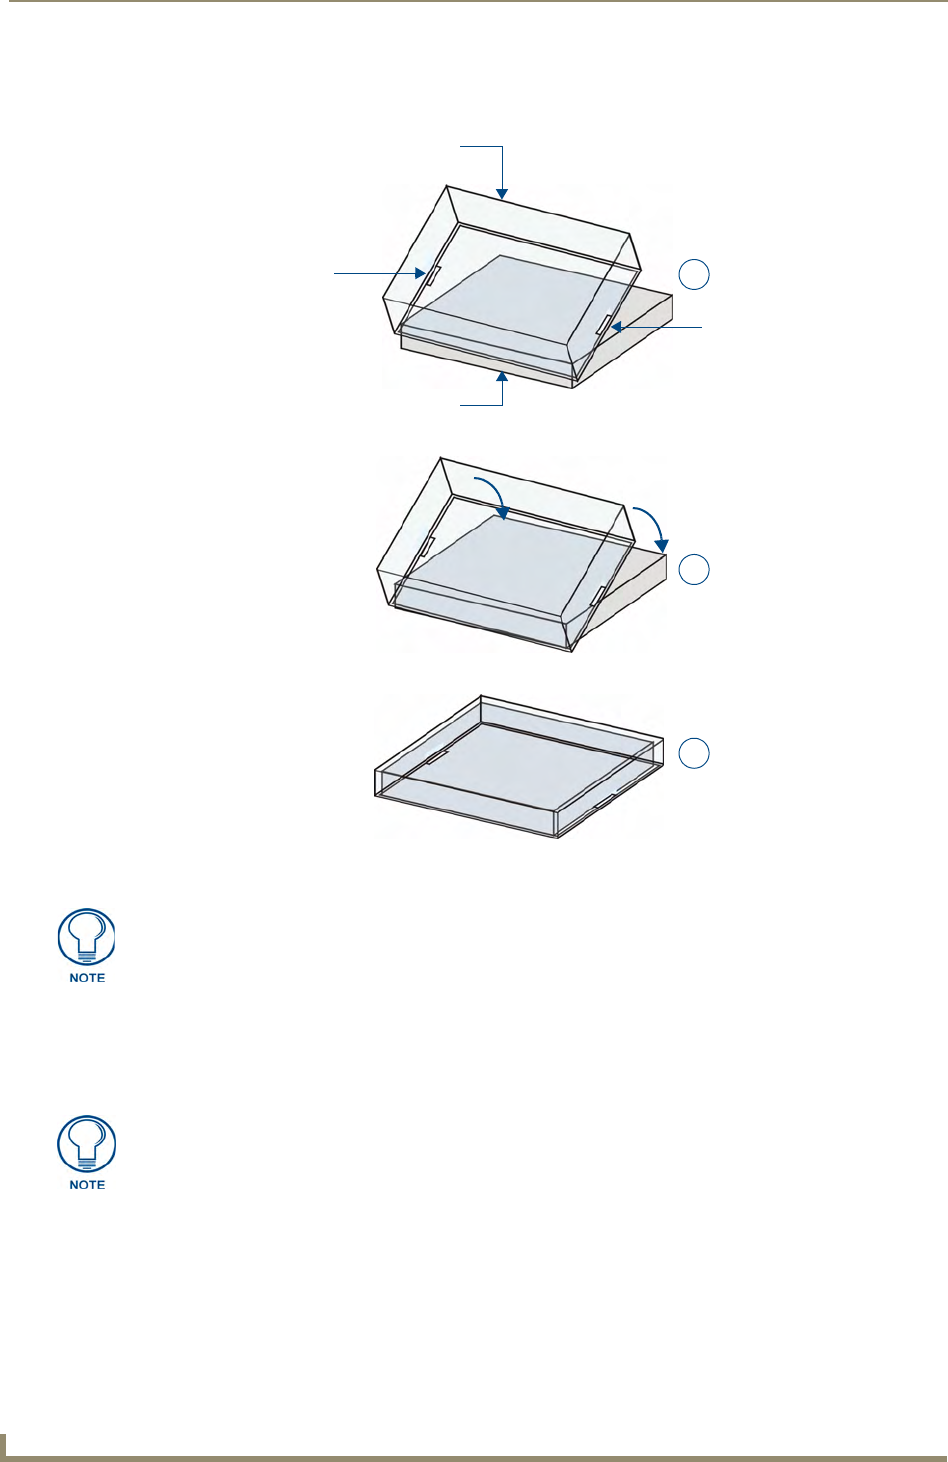
3. Install the Key Cap on the pushbutton (FIG. 3):
a. Gently press the bottom of the Key Cap (no clip) onto the pushbutton.
Do not allow the clips on either side to engage.
b. With the bottom of the Key Cap secured, gently press the top of the Key Cap. This action will engage
both clips simultaneously, and the Key Cap will snap into place on the push button.
FIG. 3 Placing a Button Label inside a Key Cap
Clip
Clip
Pushbutton on keypad
Key Cap - tilted so that the bottom
of the Cap is placed on the bottom
of the pushbutton first
At this point, do not allow the clips
on the sides of the Key Cap to engage
Press the top of the Key Cap
down to engage both clips at
once, securing the Key Cap
to the pushbutton
Once the clips are engaged,
the Key Cap is secured
to the pushbutton
1
2
3
Verify that the vertical orientation of the Button Label is correct relative to the keypad.
Be careful to follow these procedures closely - the bottom of the Key Cap must be
installed on the pushbutton before the Key Cap clips engage, or there is a risk of the
button being misaligned.
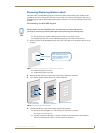
Also note that removing the Key Caps requires additional steps - see the Removing/
Replacing Button Labels section on page 39 for details.