


5
2.3
CP
S
ERIES
P
OWER
S
UPPLY
M
OUNT
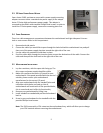
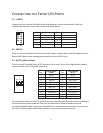
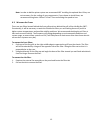
Your Antec P193 enclosure
comes with a power supply mounting
adapter to mount either a standard-size power supply or the unique
Antec CP Series high-performance power supply. This adapter is
mounted to the chassis with standard Phillips-head screws. In order to
install the CP Series power supply, remove the mounting plate first.
2.4
C
ABLE
O
RGANIZERS
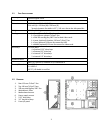
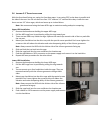
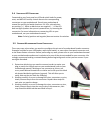
There is a cable management compartment between the motherboard and right side panel. You can
tuck or route excess cables in this compartment.
1. Remove both side panels.
2. Choose the cables you would like to pass through the holes behind the motherboard tray and pull
them out of the power supply chamber toward the right side of the case.
3. Use the cable ties provided to hold them in place.
4. Feed the cables back through the insertion point nearest the destination of the cable. Connect the
cable and then pull the slack back to the right side of the case.
2.5
M
OTHERBOARD
I
NSTALLATION
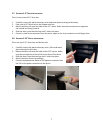
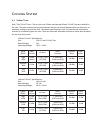
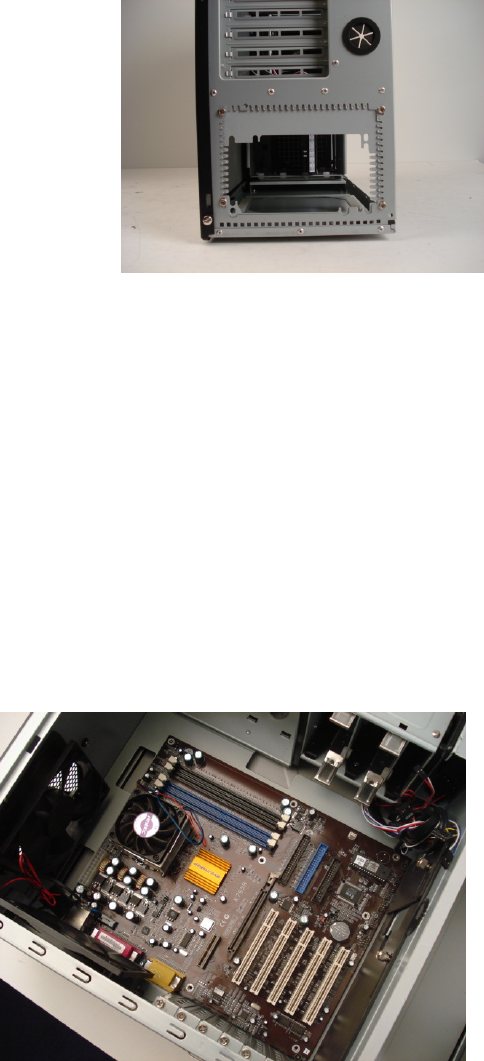
1. Lay the case down, with the open side facing up. The
drive cages and power supply should be visible.
2. Make sure you have the correct I/O panel for your
motherboard. If the panel provided with the case isn’t
suitable, please contact your motherboard
manufacturer for the correct I/O panel.
3. Align your motherboard with the standoff holes and
remember which holes are lined up. Not all
motherboards will match with all the provided holes;
this is normal and won’t affect its functionality.
4. Remove your motherboard by lifting it up.
5. Install standoffs as needed and put the motherboard
back in.
6. Screw in your motherboard to the standoffs with the
provided Phillips-head screws.
Note: The P183 comes with a CPU cutout on the motherboard tray, which will allow you to change
your CPU heatsink without removing the motherboard.