


5.
Slide the HDD cage back into the case and fasten it with thumbscrews.
6.
Connect the appropriate connector(s) from the power supply
to the devi
ce(s). Leave some slack in the connections so that
you can easily access the fan filters for cleaning.
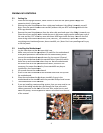
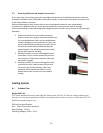
7. There is a 120 mm fan pre-
installed into each cage. Connect
the 4-
pin connector to the power supply.
Note
: There is a middle fan bracket pre
the HDD cages. Remove it from the cage if you decide to
mount your hard drives into this cage.
2.6
External 5.25” Device Installation
Note
: The HDD cages each occupy three consecutive drive bays, and will block
installation of larger devices
such as optical drives, so please plan ahead before
installing your drives.
1.
Remove both side panels per the instructions in
2.
Remove the screws fastening the appropriate metal
the sides of the case.
3. Remove the cover(s).
4.
If necessary, please remove the HDD cage that is
pre-installed in the bay.
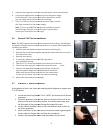
5.
Slide the 5.25” device into the bay from the front of
6.
Fasten the drive using the screws that came with your
7. Connect the
appropriate power and interface connectors
from the power supply and motherboard to the device.
Make sure that you leave some slack in the connections
so that you can easily access the fan filters for cleaning.
8.
Mount the other devices accordingly.
2.7
Internal 2.5” Device Installation
At the bottom of your case, there are mounting holes designed to support one
2.5” SSD device.
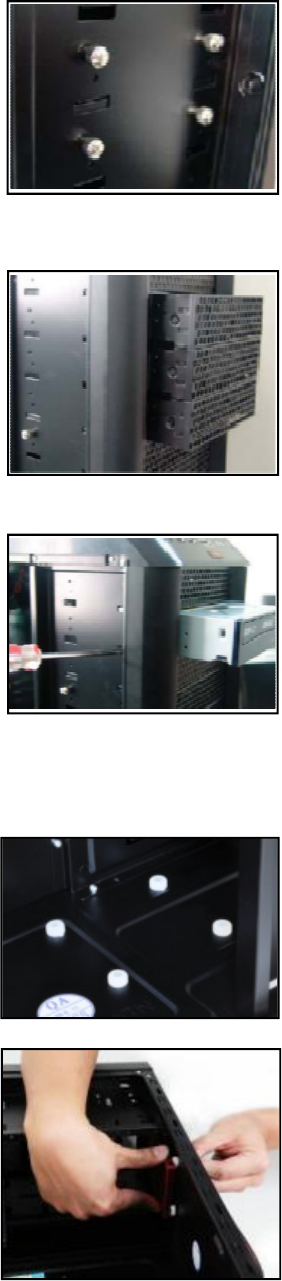
1.
Locate the plastic bag labeled “For 2.5 HDD” and remove the 4 silicone
grommets.
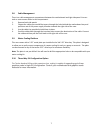
2.
Install the grommets into the
bottom of the drive bay area as shown. You should install them with
the thick part of the grommets facing the inside of the case.
3. Lay the
Twelve Hundred V3
top of the grommets.
4.
Secure the device to the case with the screws provided, tightening the
screws with your fingers first, and then the screwdriver.
5.
Connect the appropriate power and data cables to your device
6
Slide the HDD cage back into the case and fasten it with thumbscrews.
Connect the appropriate connector(s) from the power supply
ce(s). Leave some slack in the connections so that
you can easily access the fan filters for cleaning.
installed into each cage. Connect
pin connector to the power supply.
: There is a middle fan bracket pre
-installed on one of
the HDD cages. Remove it from the cage if you decide to
mount your hard drives into this cage.
External 5.25” Device Installation
: The HDD cages each occupy three consecutive drive bays, and will block
such as optical drives, so please plan ahead before
Remove both side panels per the instructions in
Setting Up.
Remove the screws fastening the appropriate metal
drive bay cover(s) to
If necessary, please remove the HDD cage that is
Slide the 5.25” device into the bay from the front of
the case.
Fasten the drive using the screws that came with your
drive.
appropriate power and interface connectors
from the power supply and motherboard to the device.
Make sure that you leave some slack in the connections
so that you can easily access the fan filters for cleaning.
Mount the other devices accordingly.
Internal 2.5” Device Installation
At the bottom of your case, there are mounting holes designed to support one
Locate the plastic bag labeled “For 2.5 HDD” and remove the 4 silicone
Install the grommets into the
four holes at the base of the case at the
bottom of the drive bay area as shown. You should install them with
the thick part of the grommets facing the inside of the case.
Twelve Hundred V3
on its side, and hold the drive in place on
Secure the device to the case with the screws provided, tightening the
screws with your fingers first, and then the screwdriver.
Connect the appropriate power and data cables to your device