


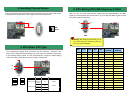
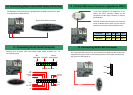
There is one jumper cap over pin1 and pin2 of JP4 for internal buzzer. If you want to
use external case-
mounted speaker instead of internal buzzer, please remove jumper
cap to short pin2 and pin3.
The JP3/JP3X allows you to enable or disable the on-
board SCSI Channel A and B
terminator control function. The SCSI Channel A is controlled by JP3; the Channel B
is
controlled by JP3X.
14. Select Buzzer or Ext. Speaker
15. SCSI Channel Terminator Control (DX34 Plus only)
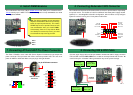
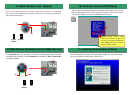
17. Installing Onboard Sound Driver
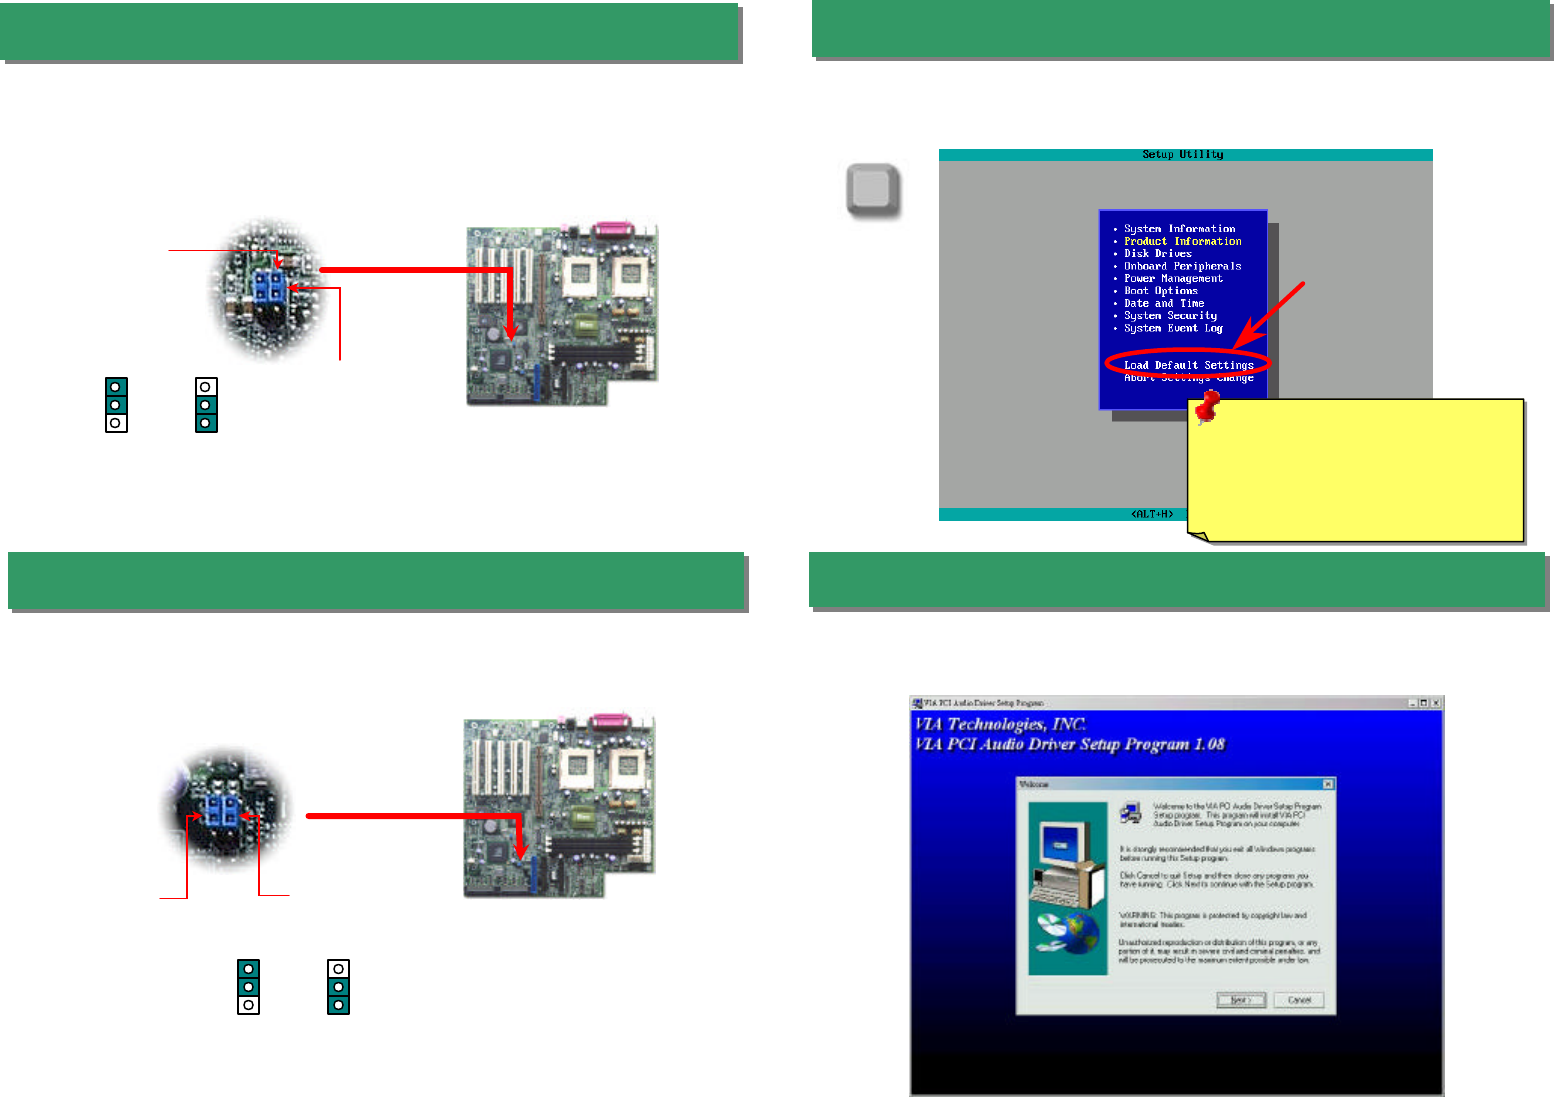
16. Power-On and Load BIOS Setup
After you finish the setting of jumpers and connect correct cables. Power on and
enter the BIOS Setup, press <Del> during POST (Power On Self Test). Choose
"Load Default Setting" for recommended optimal performance.
Del
Warning:
Please avoid of using
"Load Turbo Defaults", unless you
are sure your system components
(CPU, DRAM, HDD, etc.) are good
enough for turbo setting.
This motherboard comes with an AD 1885 AC97 CODEC. You can find the audio
driver from the Bonus Pack CD disc autorun menu.
JP4
1
1
1
Buzzer
(Default)
Speaker
1
1
ON
(Default)
OFF
JP3X
JP3