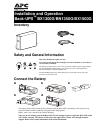
Installation and Operation Back-UPS BX1300G/BN1350G/BX1500G4
Operation
Power-Saving feature
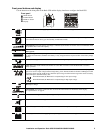
This Back-UPS is equipped with power saving outlets that conserve electricity. Configure the Back-
UPS to recognize a Master device, such as a computer or an A/V receiver, and controlled peripheral
devices, such as a printer, speakers, or a scanner. When the Master device goes into Standby or
Hibernation mode, or is turned off, the controlled device(s) will be turned off as well.
The Back-UPS ships with this Power-Saving feature
DISABLED. To configure this feature, follow the instructions
below or use PowerChute software.
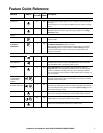
Enable the Power-Saving Controlled outlets. Press and hold
MUTE and DISPLAY buttons simultaneously for two
seconds. The Back-UPS will beep to indicate the feature is enabled. The leaf icon on the display will illuminate.
Disable the Power-Saving Controlled outlets. Press and hold
MUTE and DISPLAY buttons simultaneously for two
seconds. The Back-UPS will beep to indicate the feature is disabled. The leaf icon on the display will extinguish.
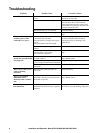
Setting the threshold. The amount of power used by a device in Standby or Hibernation mode varies dependant on
the connected device. If the Controlled outlets do not turn off when the Master device is in Standby or Hibernation
mode, it may be necessary to adjust the threshold at which the
MASTER outlet signals the CONTROLLED outlets to
shut down.
1. Be sure a master device is connected to the
MASTER outlet. Place that device into Standby or Hibernation
mode, or turn it off.
2. Press
MUTE and DISPLAY buttons simultaneously and hold for six seconds, until the leaf icon flashes three
times and the Back-UPS beeps three times.
3. The Back-UPS will now recognize and save the threshold level as the new threshold setting for the master
device.
Power-Saving LCD screen
The display interface can be configured to remain continuously illuminated or to extinguish after a period of
inactivity to save electricity.
1. Continuous Illumination mode: Press and hold
DISPLAY button for two seconds. The display will
illuminate and the
Back-UPS will beep to confirm Continuous Illumination mode is activated.
2. Power-Saving mode: Press and hold
DISPLAY button for two seconds. The display will extinguish and the
Back-UPS will beep to confirm Power-Saving mode is activated. While in Power-Saving mode, the
display will illuminate if a button is pressed, it will extinguish after 60 seconds of inactivity.
Back-UPS sensitivity settings
The Back-UPS detects and reacts to line voltage distortions by transferring to battery backup power to protect
connected equipment. In situations where either the Back-UPS or the connected equipment is too sensitive for the
input voltage level it is necessary to adjust the transfer voltage.
1. Connect the Back-UPS to an AC power source. Be sure the Back-UPS is turned off.
2. Press and hold the
POWER button for six seconds. The load capacity bar will flash on and off, to indicate
the Back-UPS is in Program mode.
3. Press
the POWER button again to scroll through the menu options. The Back-UPS will beep to confirm the
selection. Refer to the table for an explanation of the transfer voltage sensitivity levels.
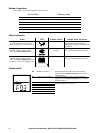
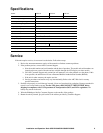
Generator Sensitivity Default Sensitive Loads
Low sensitivity Medium sensitivity (Default) High sensitivity
78-142 Vac 88-139 Vac 88-136 Vac
Use this setting with equipment that is
less sensitive to fluctuations in voltage
or waveform distortions.
Use this setting under normal operating
conditions.
Use this setting when connected equipment
is sensitive to any minor fluctuations in
voltage or waveform distortions.


