


Power Mac G4 ATA Hard Drive -
4
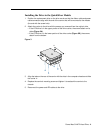
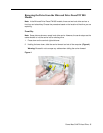
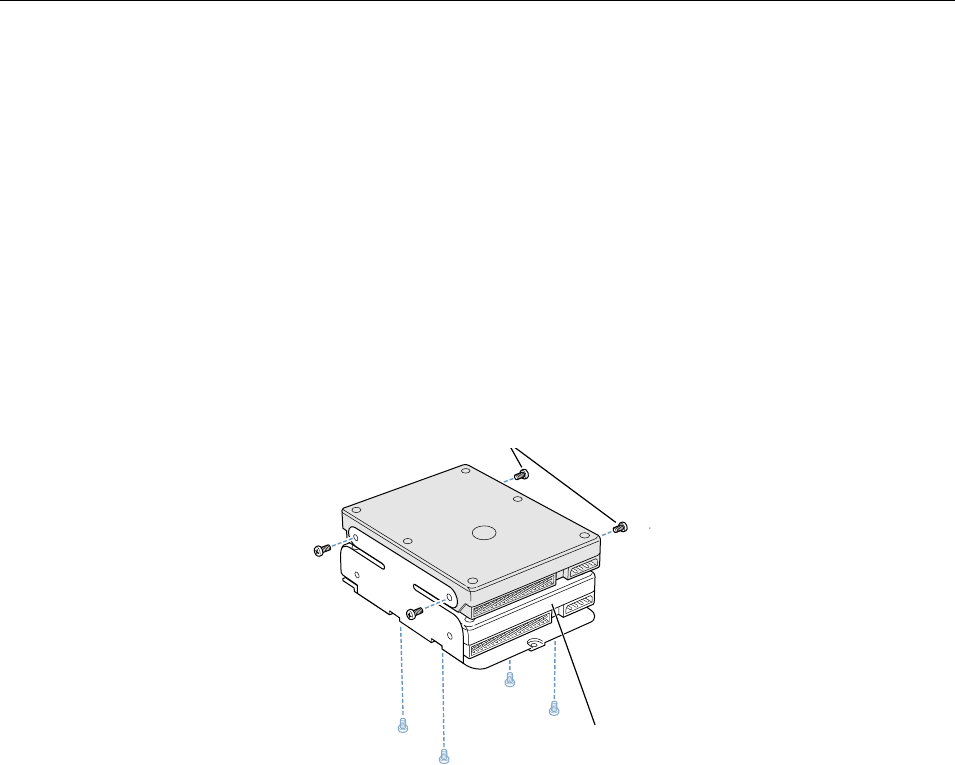
Installing the Drive in the QuickSilver Models
1. Position the replacement drive on the drive carrier so that the ribbon cable and power
cable connectors align with the end of the carrier that will be mounted to the chassis
(the end with the screw hole).
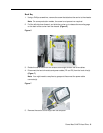
2. Attach the carrier to the drive with the screws you removed from the original drive.
• If the ATA drive is in the upper portion of the drive carrier, the screws attach on its
sides
(Figure 3A)
.
• If the ATA drive is in the lower portion of the drive carrier
(Figure 3B)
, the screws
attach from the bottom.
Figure 3
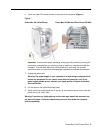
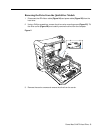
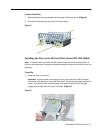
3 Align the tabs on the rear of the carrier with the slots in the computer chassis and slide
the carrier in.
4. Replace the carrier’s mounting screw and tighten it to reattach the carrier to the
chassis.
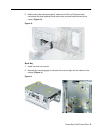
5. Reconnect the power and ATA cables to the drive.
A
B