3
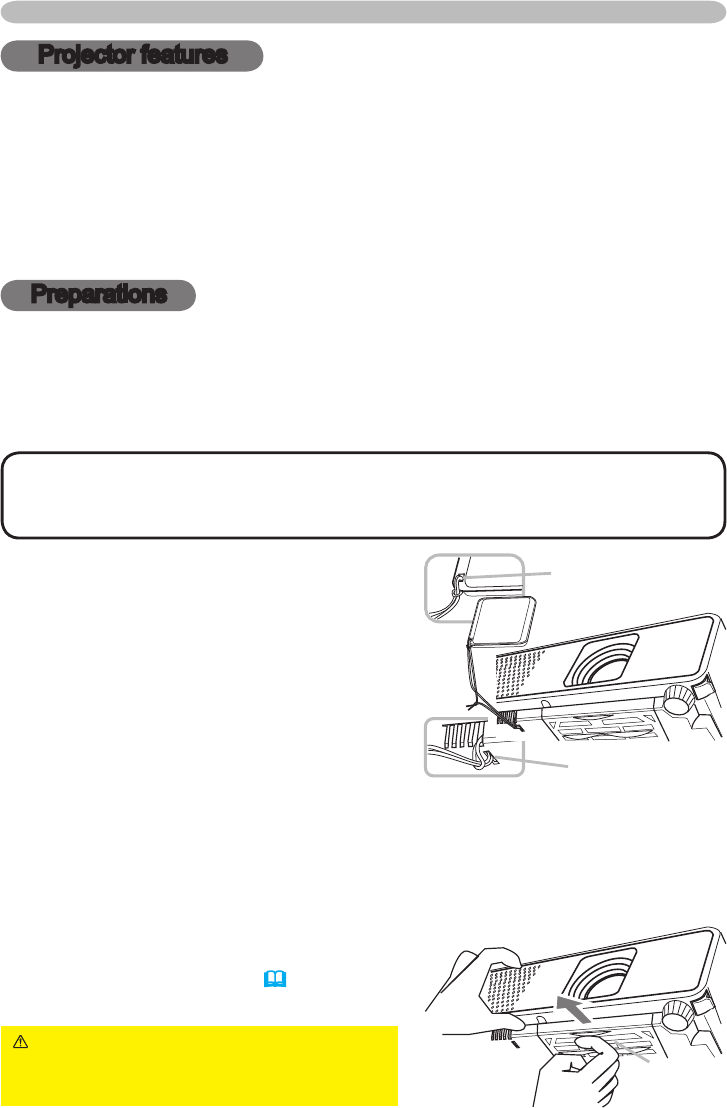
Fastening the lens cover
To avoid losing the lens cover, please fasten the
lens cover to the projector using the enclosed strap.
1.
Fix the strap to the strap hole of the lens cover.
Thread one end of the strap through the strap
hole of the lens cover and make the loop at the end,
and let the other end of the strap through the loop.
Not have a knot in the strap at either end.
2.
Fix the strap to the strap hole of the projector.
Thread the other end of the strap through the strap hole of the projector and make
the loop there. Let the lens cover with the one end of strap though the loop.
Projector features / Preparations
Projector features
This projector has a capability to project various picture signals onto a screen.
This projector requires only a minimal amount of space for installation and can
produce a large projected image from even a short distance.
This projector also can give a benet to mobile users and others by offering a
special function named “PC less presentation”. Even without PC, this projector
realizes the display on screen, getting JPEG, MPEG and Motion-JPEG pictures
from USB storage media.
Preparations
Contents of package
Please see the “Contents of package” in the “User’s Manual (concise)” which
is a book. Your projector should come with the items shown there. Contact
immediately your dealer if anything is missing.
NOTE • Keep the original packing materials, for future reshipment. Be sure
to use the original packing materials when moving the projector. Use special
caution for the lens.
Replacing the lter cover for bottom-up use
For the projector installed bottom-up, please replace the lter cover with the
enclosed lter cover for bottom-up use, to keep
necessary ventilation space.
Please refer to the “Air lter” (
59) for how to
detach and attach a lter cover.
WARNING ►Consult with your dealer
before a special installation such as
suspending from a ceiling.
Strap hole
Strap hole
Filter cover


