


1-281-28
1-281-28
1-28
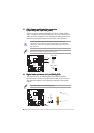
Chapter 1: Product introductionChapter 1: Product introduction
Chapter 1: Product introductionChapter 1: Product introduction
Chapter 1: Product introduction
4.4.
4.4.
4.
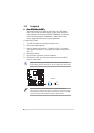
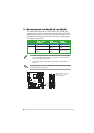
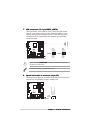
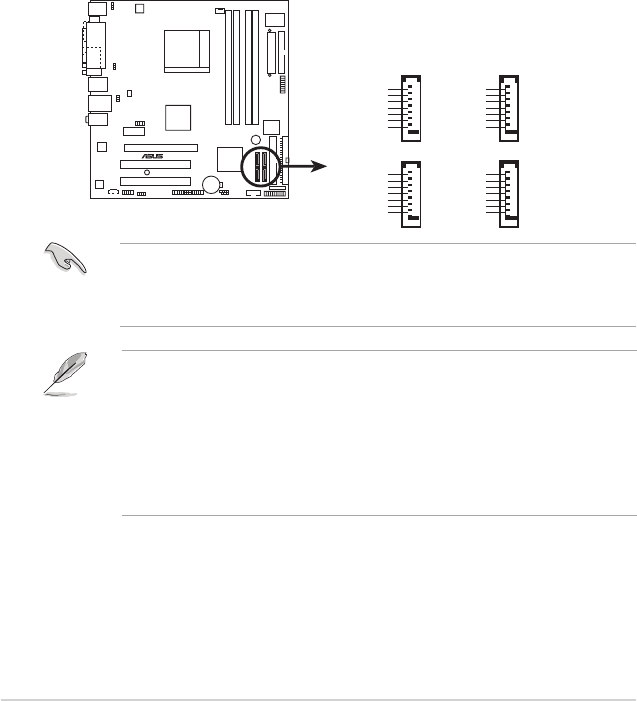
Serial ATA connectorsSerial ATA connectors
Serial ATA connectorsSerial ATA connectors
Serial ATA connectors
(7-pin SATA1, SATA2, SATA3, SATA4)(7-pin SATA1, SATA2, SATA3, SATA4)
(7-pin SATA1, SATA2, SATA3, SATA4)(7-pin SATA1, SATA2, SATA3, SATA4)
(7-pin SATA1, SATA2, SATA3, SATA4)
These connectors are for the Serial ATA signal cables for Serial ATA
3.0 Gb/s hard disk and optical disk drives. The Serial ATA 3 Gb/s is
backward compatible with Serial ATA 1.5Gb/s specification.
The current Serial ATA I interface allows up to 150 MB/s data transfer
rate while Serial ATA II allows up to 300 MB/s data transfer rate,
faster than the standard parallel ATA with 133 MB/s (Ultra DMA133).
If you install Serial ATA hard disk drives, you can create a RAID 0,
RAID 1, RAID 0+1, RAID 5, and JBOD configuration through the
onboard NVIDIA
®
MediaShield™ controller.
M2NPV-MX
®
M2NPV-MX SATA connectors
GND
RSATA_TXP1
RSATA_TXN1
GND
RSATA_RXP1
RSATA_RXN1
GND
SATA1
GND
RSATA_TXP2
RSATA_TXN2
GND
RSATA_RXP2
RSATA_RXN2
GND
SATA
2
GND
RSATA_TXP4
RSATA_TXN4
GND
RSATA_RXP4
RSATA_RXN4
GND
SATA
4
GND
RSATA_TXP3
RSATA_TXN3
GND
RSATA_RXP3
RSATA_RXN3
GND
SATA3
Important note on Serial ATAImportant note on Serial ATA
Important note on Serial ATAImportant note on Serial ATA
Important note on Serial ATA
Install the Windows
®
2000 Service Pack 4 or the Windows
®
XP Service
Pack1 before using Serial ATA.
• For detailed instructions on how to configure RAID 0, 1, 0+1, 5,and
JBOD, refer to the RAID manual in the support CD.
• The RAID function of these connectors is set to [Disabled] by
default. If you intend to create a Serial ATA RAID set using these
connectors, enable the
RAID EnabledRAID Enabled
RAID EnabledRAID Enabled
RAID Enabled item in the NVRAID
Configuration sub-menu in the BIOS. See section “2.4.6 Onboard
Device Configuration” for details.