More Settings
3.1 General Settings
In General Settings, you can change the destination folder for recorded files, edit recording time and
file size, assign the number of image you want to capture, and reset the Windows power options, etc.
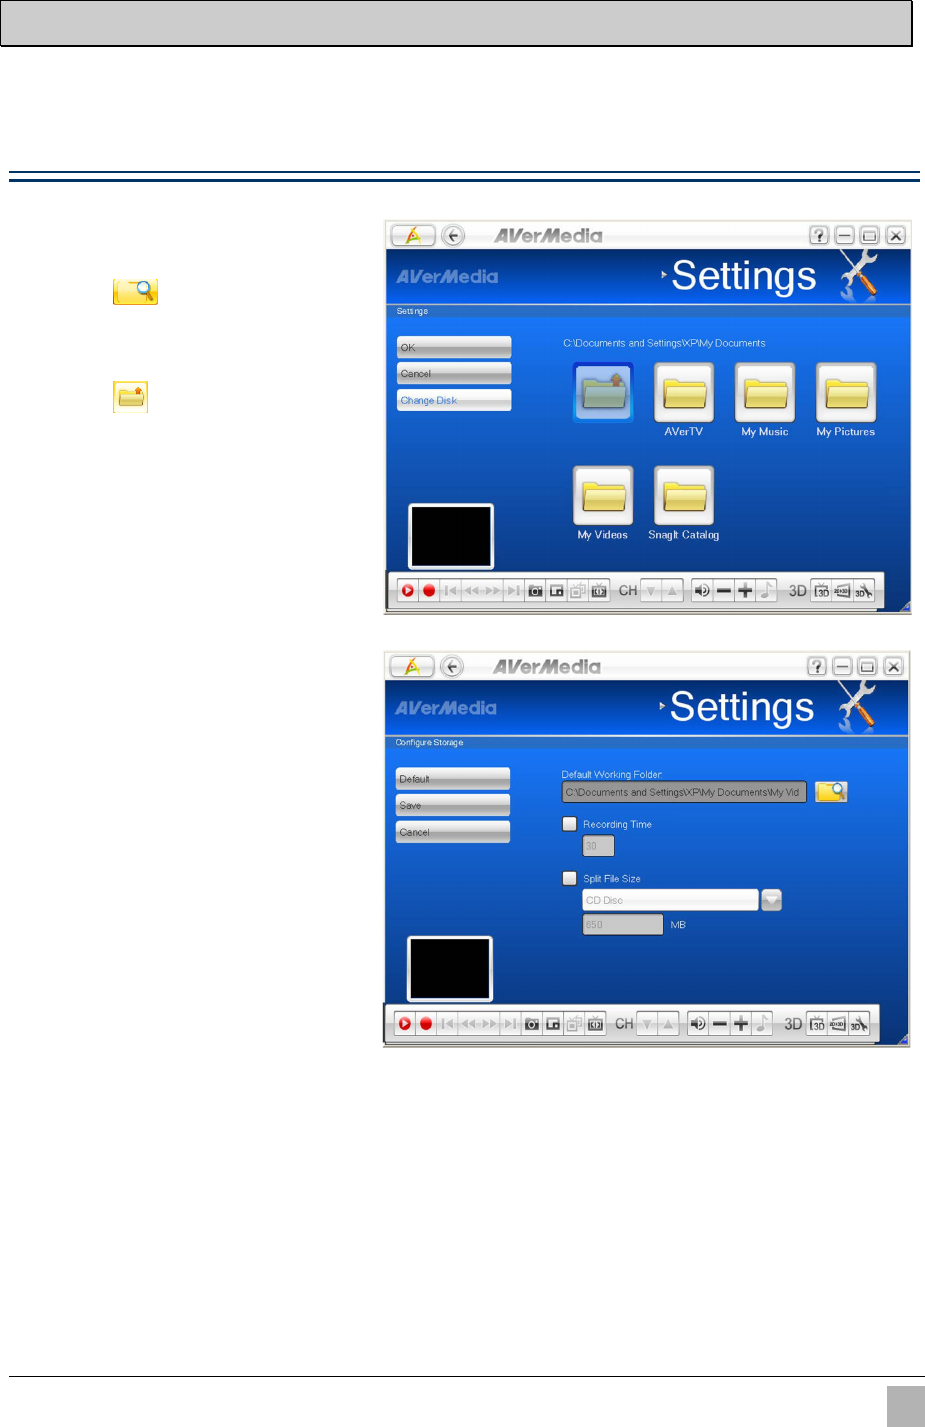
Configure Recording
1
.
Go to “Settings” “General”
“Configure Recording”.
2
2
.
.
Click to locate a preferable
folder for recorded files as
desired.
3
3
.
.
Click to go back to the
previous level or Click Change
Disk on the left menu to relocate
from hard drives.
4
4
.
.
Click OK to confirm the selection.
5
.
Enter the desired length of
recording time, or the recording
continues until the hard drive of
recording storage folder reaches
its maximum capacity.
6
6
.
.
AVer MediaCenter 3D allows you
to divide the recorded files in
segments for burning onto CD
(650 MB) and DVD (4096 MB).
Check Split File Size and select
the appropriate video file size
from the drop-down menu so that
CD/ DVD burning doesn’t fail due
to over-sized files. Or you can
click Customize to assign the file
size you want.
7
7
.
.
Click Save to save the settings or
click Cancel to abort without
saving. To change back to factory
default settings, click Default.
