


Page 8 AXIS P7214/P7210 Installation Guide
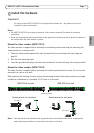
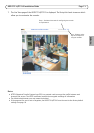
Mounting on wall
1. Position the video encoder against the wall with the brackets attached, and mark the four
mounting holes for each bracket (see image above).
2. Drill the four mounting holes.
3. Attach the video encoder to the wall using appropriate screws.
Connect the cables
1. Connect the encoder to the network using shielded network cables. If using PoE see note below.
2. Optionally connect external input/output devices, e.g. alarm devices. See page 15 for
information on the terminal connector pins.
3. Optionally connect active speakers and/or external microphones.
4. Connect the cameras to the video inputs.
5. If powering the unit with DC input, connect the supplied indoor power adapter or an external
power supply. See note below.
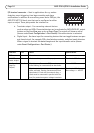
6. Check that the indicator LEDs indicate the correct conditions. See the table on page 17 for
further details.
Note:
The unit can be powered using either the DC power input or PoE.
If powering the unit using DC power, connect the power supply to the power connector at the rear of
the unit.
If powering the unit using PoE, connect a PoE network cable. For AXIS P7210, connect 4 PoE network
cables (one for each group).