


INSTALLATION
9
Step-by-Step Installation Guide
This section provides complete instructions for the hardware setup of a
single E Series KVM Switch. (F1DB102P or F1DB104P)
Important Note:
Before attempting to connect anything to the E Series KVM Switch or to
any computer, make sure that everything is powered off. Plugging and
unplugging cables while computers are powered on can cause irreversible
damage to your computers and/or KVM switch. Belkin Components will
not be responsible for damage caused by these actions.
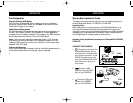
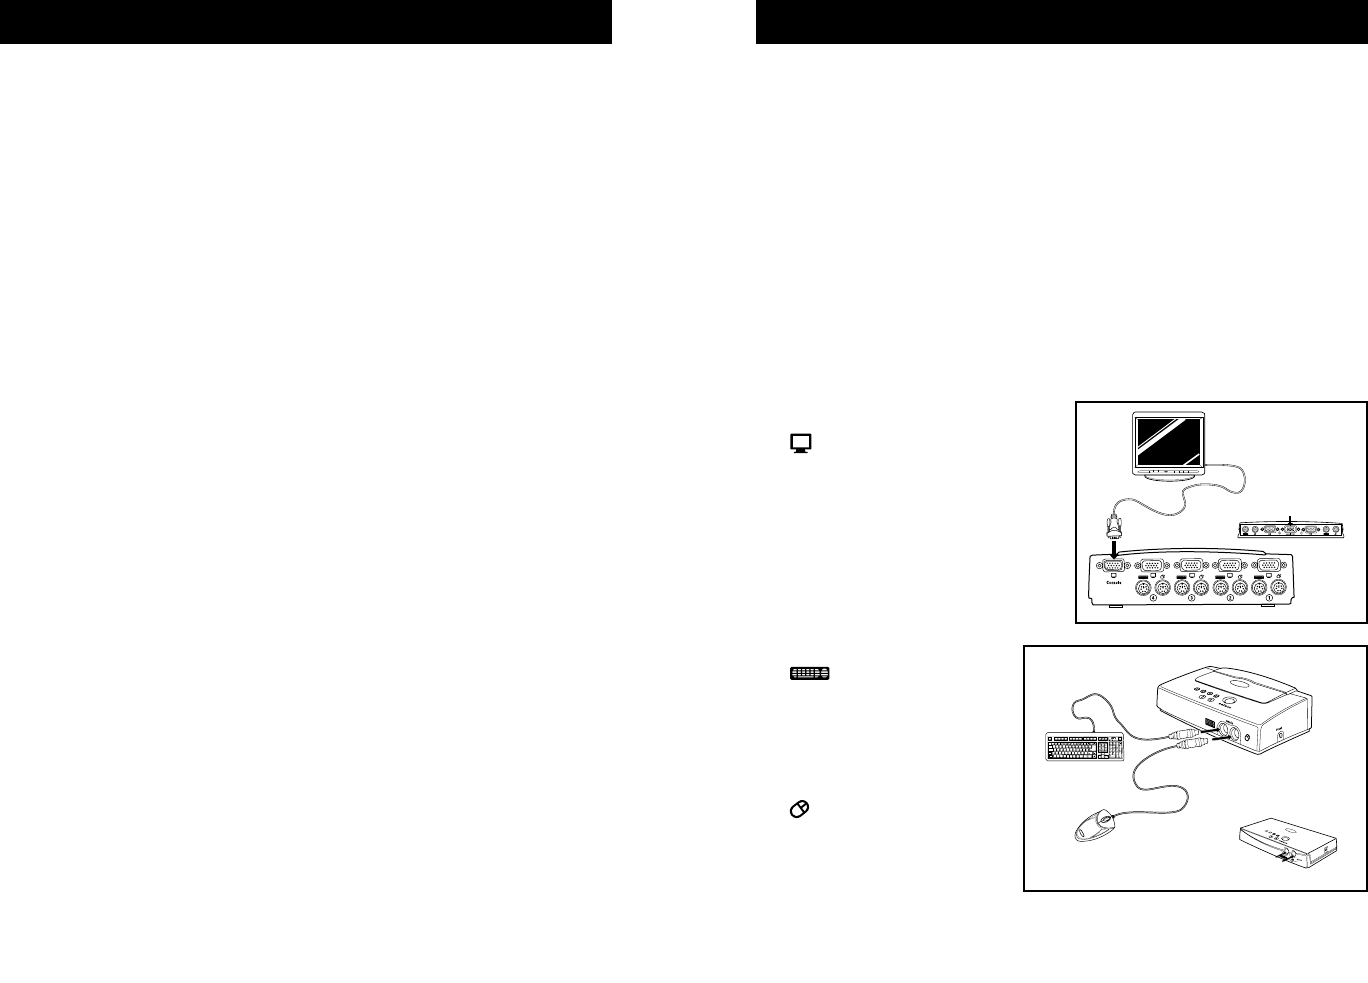
Keyboard, Video, and Mouse Connections for E Series KVM F1DB102P,
F1DB104P
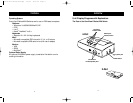
CONNECT THE CONSOLE:
1. Connect the monitor to the
E Series KVM Switch. Using
the cable that is included with
your monitor, connect it to the
HDDB15 female port on the
top of the E Series KVM Switch
with the monitor symbol on
the console.
2. Connect a PS/2
keyboard to the PURPLE
port on the CONSOLE.
3. Connect a PS/2-type
mouse to the GREEN
port on the CONSOLE.
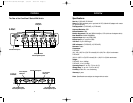
4-Port
2-Port
4-Port
2-Port
8
INSTALLATION
Pre-Configuration
Where to Place the KVM Switch:
The OmniView E Series KVM Switch is designed to sit on the desktop.
Where you place the KVM Switch will be based on the location of your
CPUs and the length of your cables.
Cable Distance Requirements:
For PS/2 computers: VGA signals are best retained when transmitted up to
25 feet (7.5m). Beyond 25 feet (7.5m), probability of video degradation
increases with an increase in distance. For this reason, your PS/2 computer
should be placed within 25 feet (7.5m) of the KVM Switch.
Note: If your computer needs to be more than 25 feet (7.5m) from the
KVM switch, you can use the Belkin CAT5 Extender to extend your PS/2
keyboard, PS/2 mouse, and monitor up to 500 feet (152.4m) away using
standard CAT5 UTP cable.
Cautions and Warnings:
Avoid having cables near fluorescent lights, air conditioning equipment, or
machines that create electrical noise (e.g., vacuum cleaners).
π
P73775-A-E Series-man.qxd 3/5/02 4:53 PM Page 8