


41
TROUBLESHOOTING
I’ve daisy-chained multiple Switches; now I want to add another console. What
do I need to do to get it running?
• If you want to add your console to a Switch that is already in your daisy-chain
with its DIP switches set from 00 through 01, you simply have to connect your
monitor, keyboard, and mouse.
• Connect the Switch to the computers following the same procedure that you would
for a standalone Switch. Before you power-on the BANK, connect the daisy-chain
cable to it and one of the Switches on the end of the chain (be sure to use the IN
port on one BANK and the OUT port on the other). Turn on the Switch. Bring up
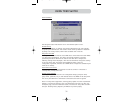
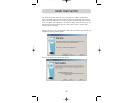
the OSD on one of the other consoles, and enter Setup Mode. Go to the Passwords
page and click the “Broadcast Passwords” button. The new console is ready to use
and is synchronized with the remainder of your daisy-chain.
• Connect the Switch to the computers following the same procedure that you
would for a standalone Switch. Before you power-on the BANK, connect the
daisy-chain cable to it and one of the Switches on the end of the chain (be sure
to use the IN port on one BANK and the OUT port on the other). Turn on the
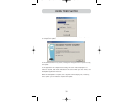
Switch. Bring up the OSD, on one of the other consoles, and enter Setup Mode.
Go to the Passwords page and click the “Broadcast Passwords” button. The new
console is synchronized with the remainder of your daisy-chain and ready to use.
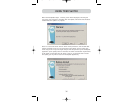
Note: By creating a copy of “Eject this disk” application on your desktop, you can
easily map the “Eject this disk” function to the keyboard map. To copy the “Eject
this disk” application from within Sherlock, hold down the “Option” key on the
keyboard (“Alt” key on PC keyboard) and drag the application from the search
result box to your desktop.
P74342_F1DWXXXC_man.qxd 12/5/03 3:14 PM Page 41