


24
Windows
®
95 / 98 and NT
®
(continued)
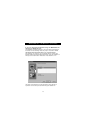
If no printers are installed
If no printers are installed, the Settings type (see step 7) for each device must
be set either for Mass Storage Device (if the device adds a drive letter to your
system), or Scanner (for all other types of devices).
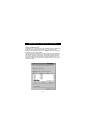
The Bitronics software may not function properly in some systems if there is no
Default Printer set. To do this, add a printer using the Add Printer Wizard
(click Start, select Settings, double-click on Printers), and just use the
Generic/Text Only driver. Remember to use Local Printer and LPT1 when the
wizard asks you. This will then be set as your default printer, so that the
Bitronics software can work properly.
Removing and Adding the Bitronics Switch Icon from
the System Tray
• To remove the icon, simply right click on it, and answer Yes to
the prompt.
• To reload the icon back into the system tray, click on Start, select
Programs, select Belkin Bitronics Switch and select
AutoSwitch-Multi PCs.
ADVANCED USER TIP:
If you are using devices with pass-through ports (like Zip
®
Drives and
Scanners), you can connect a printer to the pass-through port and use the
other device port on the Bitronics switch to connect to another device. Just be
sure that the printer driver has its Port set to the correct device port. For
example, if you wish to share 2 printers, 1 Zip
®
Drive and 1 scanner between 2
computers, connect the Zip
®
Drive to Port A, the Scanner to Port B, the first
printer to the pass-through of the Zip
®
Drive, and the second printer to the
pass-through of the scanner. In the Bitronics software, set Port A to Mass
Storage Device, and Port B to Scanner. Then in the Printer Properties/ details,
set the Print to the following Port to LPx1- PA (auto switch) for the first printer,
and LPx1- PB (auto switch) for the second printer. In general, only printers can
be connected to pass-through ports.