10
Overview
Replacing the batteries in the remote control
Caution with batteries
Avoid leaving the remote control and batteries in an excessive heat or humid environment like the
kitchen, bathroom, sauna, sunroom, or in a closed car.
Take care to align the polarities when installing the batteries. Be aware that there is the possibility of an
explosion if the batteries are incorrectly fitted.
Replace batteries only with the same or equivalent type as recommended by the battery manufacturer.
Dispose of used batteries according to the battery manufacturer’s instructions and local environment
regulations for your region.
If the remote control will not be used for an extended period of time, remove the batteries to avoid
damage to the control from possible battery leakage.
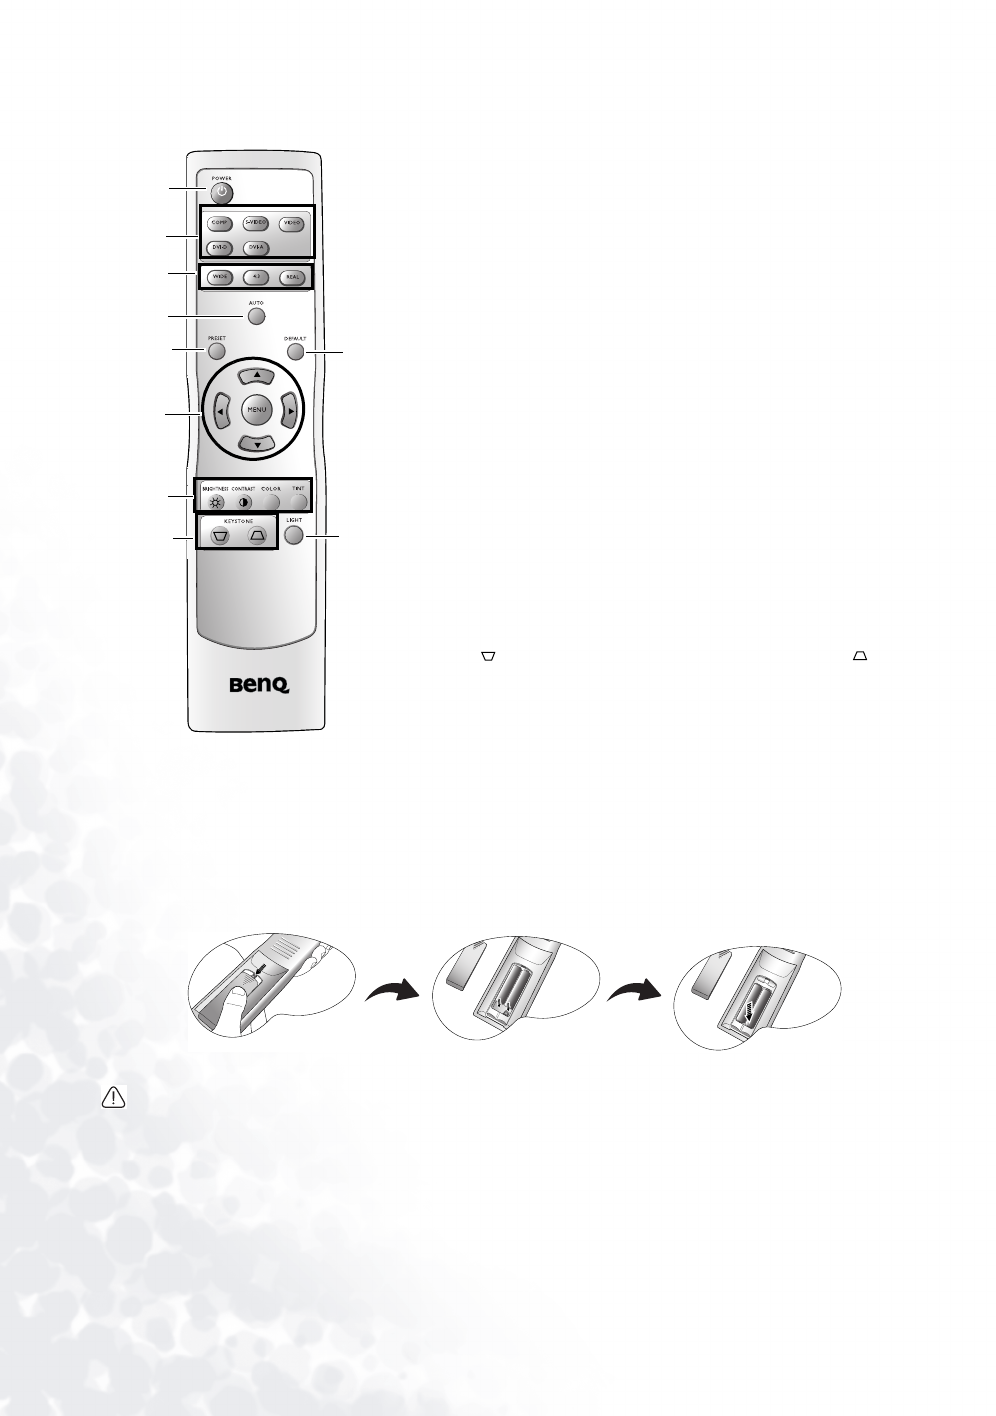
1.
Power (Refer to pages 15 and 18 for more information.)
Hold this button down for one second to turn the projector
on. Press this button twice to turn the projector off.
2.
Source buttons (Refer to page 15 for more information.)
Selects an input signal to display on the projector.
3. Aspect buttons
Selects an image aspect ratio to suit the input signal.
4. Auto (Refer to page 16 for more information.)
Automatically determines the best picture timings for the
displayed image.
5. Preset (Refer to page 17 for more information.)
Selects one of the preset modes to suit your program type.
6.
Menu and directional buttons (c/e/d/f) (Refer to page
19 for more information.)
Press Menu to turn the on-screen menu on.
Press directional buttons to select the desired menu items and
make adjustments.
Exit and saves menu settings by pressing Menu again.
7.
Picture quality adjustment buttons (Refer to 20 for more
information.)
8. Keystone buttons (Refer to 16 for more information.)
Press to reduce the upper portion of the image. Press
to reduce the lower portion of the image.
9. Default
Returns all settings to the factory preset values.
10.
Light
Turns the remote control’s backlight on or off.
1. Push and open the battery
compartment lid in the
direction shown.
2. Install batteries as
indicated by the
diagram inside the
compartment.
3. Insert the lid hinge into
the compartment end
and close the lid.
C
T
1
2
3
4
5
6
7
8
10
9


