


28
COMPUTER INPUT
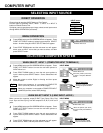
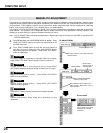
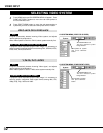
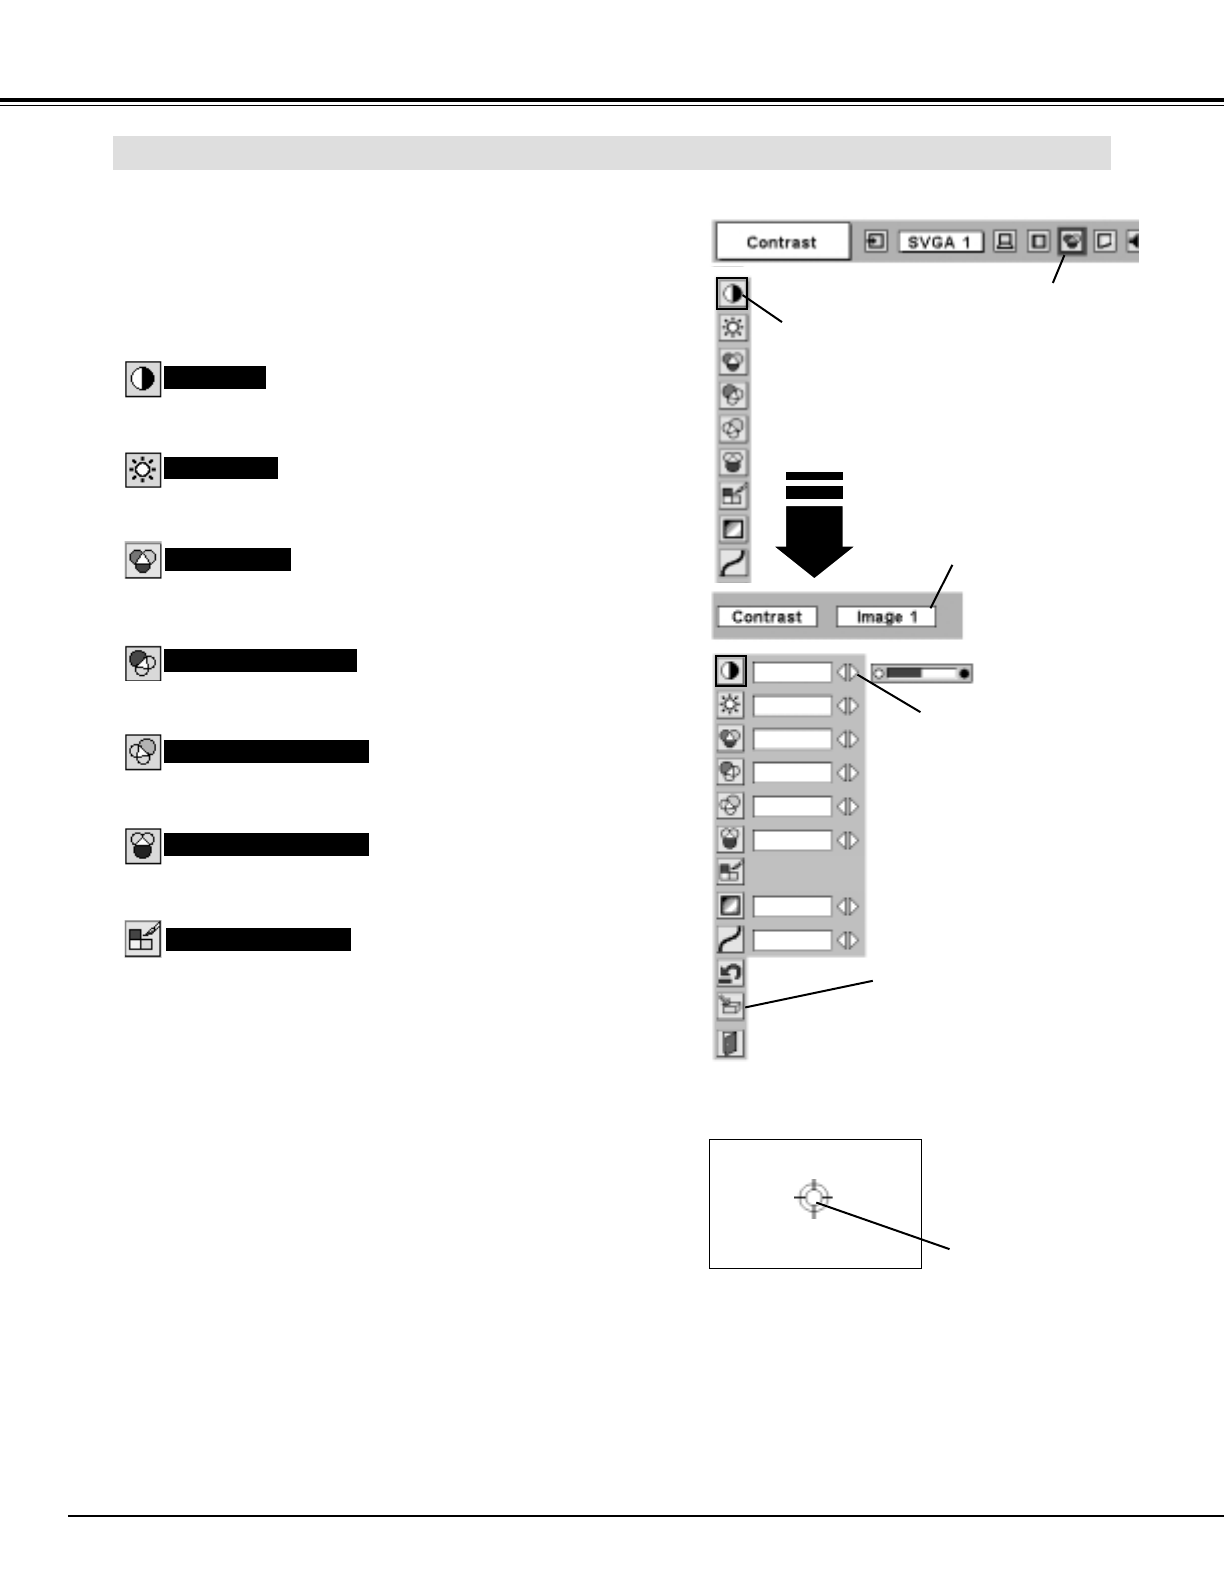
Press MENU button and ON-SCREEN MENU will appear. Press
POINT LEFT/RIGHT buttons to move the red frame pointer to
IMAGE ADJUST Menu icon.
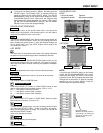
1
2
Press POINT DOWN button to move the red frame pointer to
item that you want to adjust and then press SELECT button.
Level of each item is displayed. Adjust each level by pressing
POINT LEFT/RIGHT button(s).
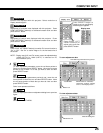
Move the red frame pointer to
item to be selected and then
press SELECT button.
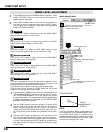
IMAGE ADJUST MENU
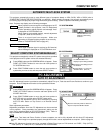
IMAGE LEVEL ADJUSTMENT
Press POINT LEFT button to decrease contrast, and POINT RIGHT
button to increase contrast. (From 0 to 63.)
Press POINT LEFT button to adjust image darker, and POINT
RIGHT button to adjust brighter. (From 0 to 63.)
Contrast
Brightness
IMAGE ADJUST
Menu icon
Press POINT LEFT button to lighten red tone and POINT RIGHT
button to deeper tone. (From 0 to 63.)
White balance (Red)
Press POINT LEFT button to lighten green tone and POINT RIGHT
button to deeper tone. (From 0 to 63.)
White balance (Green)
Press POINT LEFT button to lighten blue tone and POINT RIGHT
button to deeper tone. (From 0 to 63.)
White balance (Blue)
Selected Image level
Color temp.
Color Management
32
32
32
32
L1
Store icon
Press SELECT button at this icon to
store adjustment.
Press POINT LEFT/RIGHT buttons
to adjust value.
Mid
32
8
Press either POINT LEFT button or POINT RIGHT button to Color
temp. level that you want to select. (XLow, Low, Mid or High)
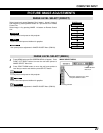
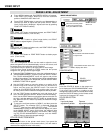
The Color management function can be used to adjust the level,
phase and gamma of the selected display colors on the screen, and
to replace these colors with other colors if required.
The projector lets you replace up to eight colors for each image.
There are four preset images for VIDEO mode and four preset
images for PC, giving a total of eight images.
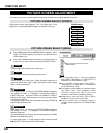
1
Press the POINT DOWN button to move the red frame pointer to
"COLOR MANAGEMENT", and then press the SELECT button.
The COLOR MANAGEMENT menu will appear and pointer
mode will be enabled. The image that was being projected when
the button was pressed will be paused, and the COLOR MAN-
AGEMENT POINTER will appear.
Use the POINT buttons to move the pointer to a section of the
paused image that contains the color that you would like to
adjust, and then press the SELECT button. The mode will
change to COLOR SELECTION mode, and the color in the cen-
ter of the pointer will be selected and adjustment will be possi-
ble.
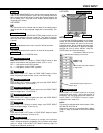
2
Press the COLOR M. button on the remote con-
trol to display the COLOR MANAGEMENT menu.
If you would like to check or re-adjust a color
management setting that has already been made,
press the COLOR M. button on the remote control
once more to change to LIST mode.
Use the POINT buttons to adjust the level and phase of the
color, and then press the SELECT button to confirm the setting.
Next, use the POINT buttons to adjust the gamma correction for
the color, and then press the SELECT button to accept the set-
ting. When the SELECT button is pressed, the mode will change
to LIST mode.
3
NOTE;
COLOR
MANAGEMENT
POINTER
POINTER MODE