5
Setting Up
the Machine
Windows
®
Mac OS
®
9.1 - 9.2
Mac OS
®
X
6
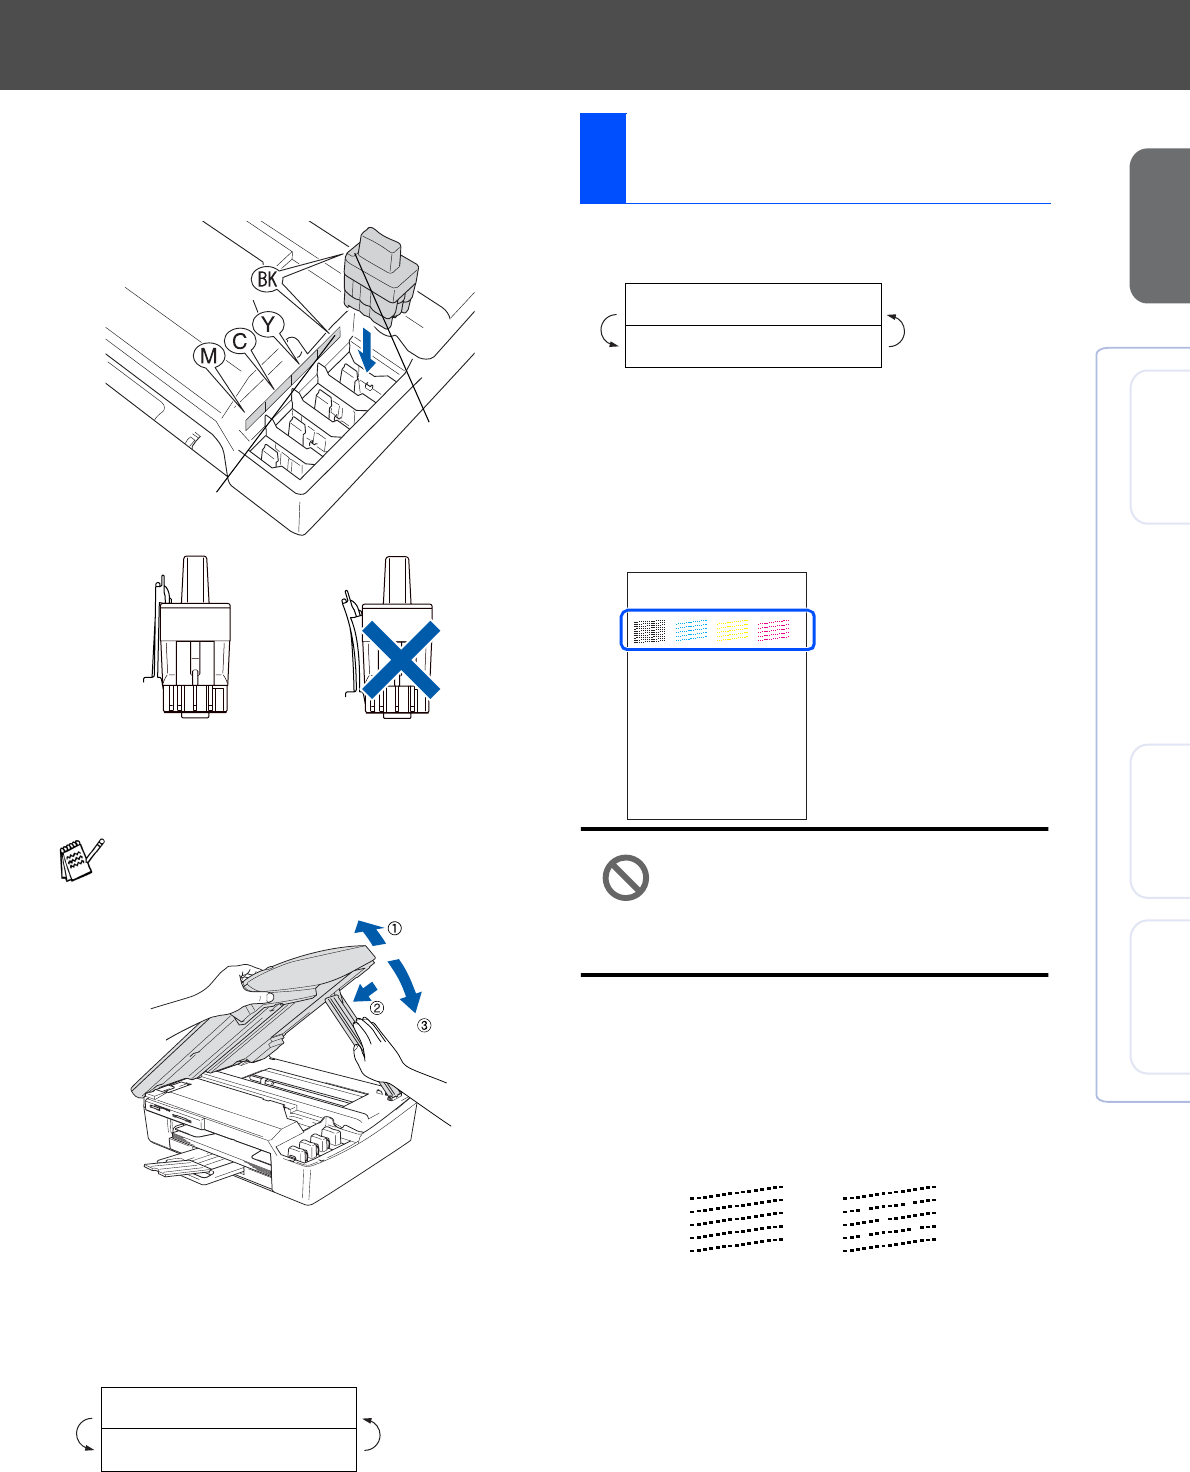
Press down on the ink cartridge until the
hook snaps over it, taking care to match the
slot colour (A) with the cartridge colour (B),
as shown in the diagram below.
7
Lift the scanner cover to release the lock.
Gently push the scanner cover support
down and close the scanner cover.
The machine will clean the ink tube system
for use for the first time. This process will
occur only once, the first time ink cartridges
are installed. The cleaning process will last
approximately four minutes.
The LCD shows:
1
After the cleaning cycle is finished, the LCD
shows:
2
Make sure the paper is loaded in the paper
tray.
Press Colour Start.
3
The machine starts printing the PRINT
QUALITY CHECK SHEET (only during
initial ink cartridge installation).
Avoid touching the printed surface
of the paper immediately after
printing, the surface may not be
completely dry and may stain your
fingers.
4
If all lines are clear and visible, the quality is
acceptable. Press
▲
(
Yes
). If you can see
missing short lines, press
▼
(
No
) to begin
the color cleaning process and then follow
prompts on the LCD.
5
After cleaning is finished, press
Colour Start
. The machine starts printing
the PRINT QUALITY CHECK SHEET again
and goes back to step
3
.
If Install shows on the LCD after you
install the ink cartridges, check to make sure
the ink cartridges are installed correctly.
Preparing System
Approx 4 Minutes
(B)
(A)
OK
OK
7
Print Quality Check
Set Paper and
Press Start
Print Quality Check
1. Check the quality of the four-co lor blocks formed by th e short lines.
2. If all th e short lines are clear an d visible, the quality is acceptable. the quality is acc eptable.
Select (Yes). If you can see missing short li nes, select (No) to begin t he color cleaning process
and follo w the promp ts on the LCD.
OK
Poor


