Chapter 8
70
Restoring all settings to the
factory settings 8
You can restore the PhotoCapture settings
that you have changed, to the factory
settings, such as Print Quality,
Paper Type, Paper Size, Print Size,
Auto Correct, Brightness, Contrast,
Color Enhance, Cropping, Borderless
and Print Date.
a Open the media slot cover.
b Put the memory card or USB Flash
memory drive in the correct slot.
c Press Photo.
d Swipe left or right to display
View Photos.
e Press View Photos.
Press OK.
f Swipe left or right, or press d or c to
display each photo. When the photo you
want is displayed, press it and then
press OK.
g Press OK.
h Press Print Settings.
i Swipe up or down, or press a or b to
display Factory Reset.
j Press Factory Reset.
k The Touchscreen asks you to confirm to
change back to the factory settings.
Press Yes to confirm.
l Press .
Scan to a memory card
or USB Flash memory
drive
8
Auto Crop 8
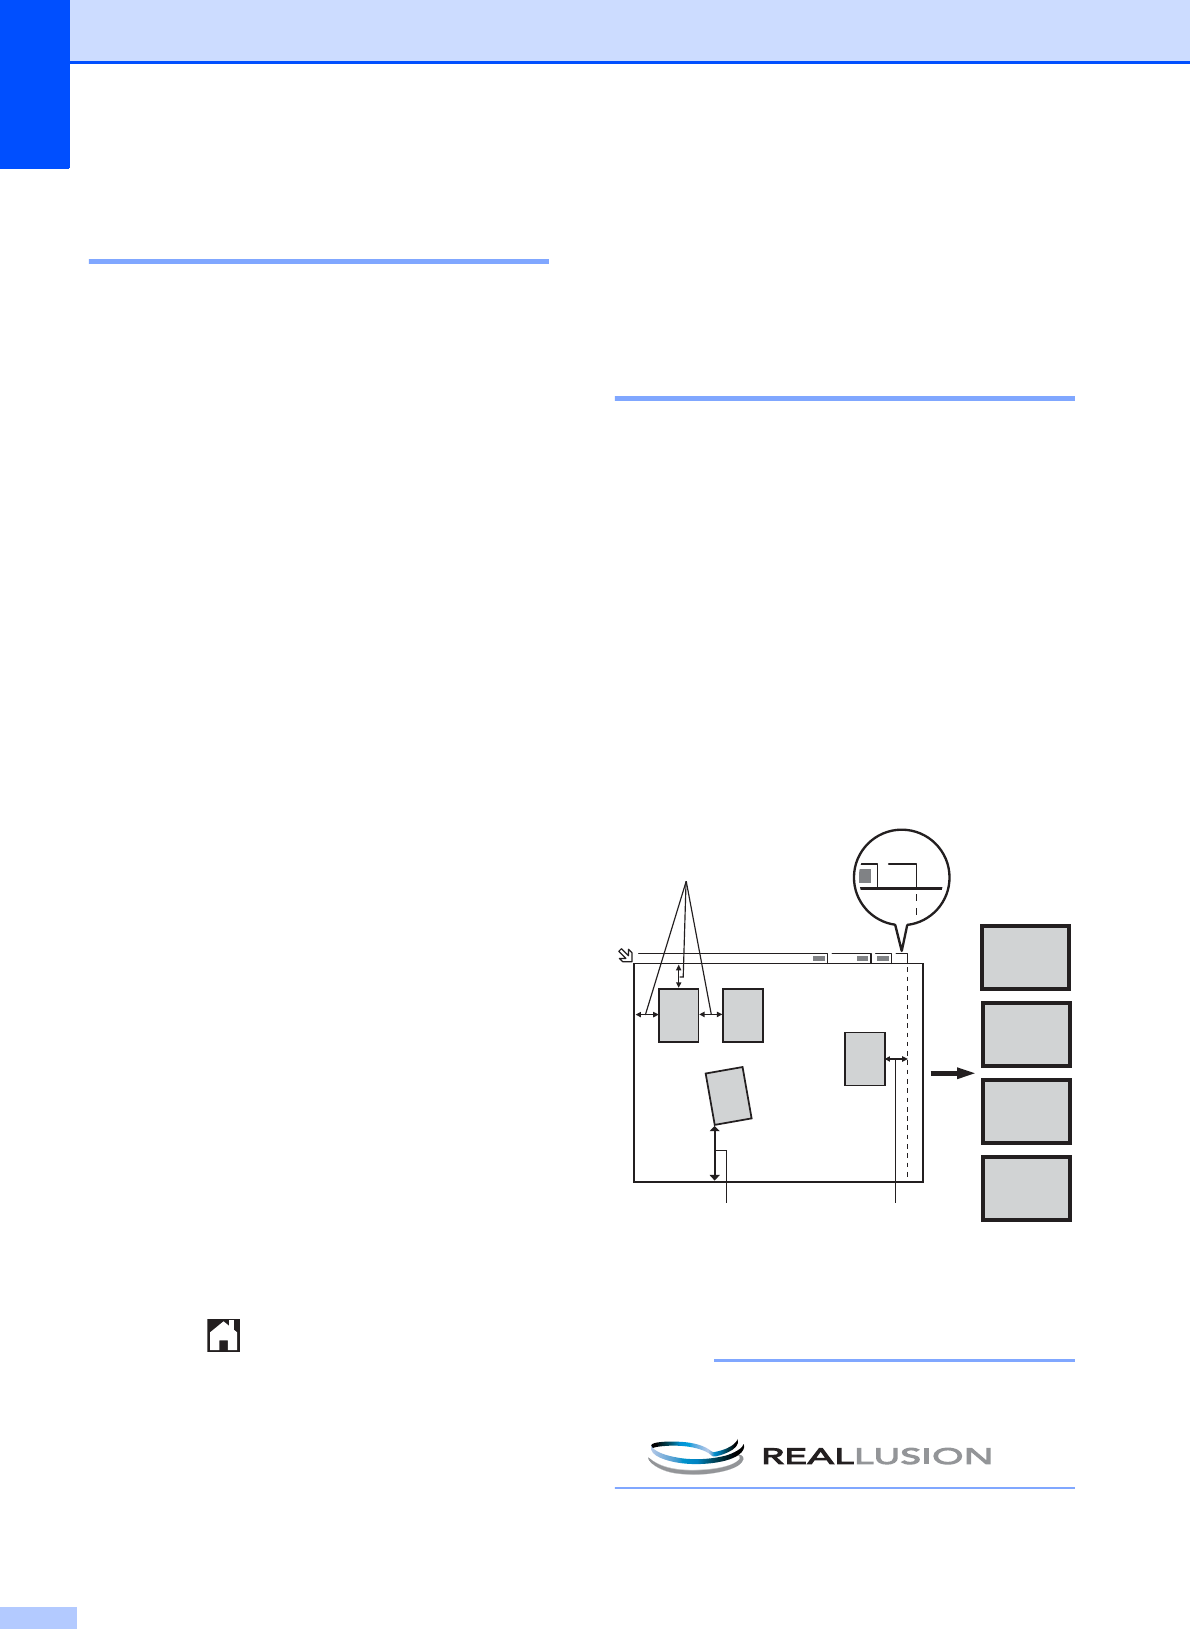
You can scan multiple documents placed on
the scanner glass. An individual document
can be previewed on the Touchscreen before
you save it. When you choose Auto Crop,
the machine will scan each document and
create separate files. For example, if you
place three documents on the scanner glass,
the machine will scan and create three
separate files. If you want to create a three-
page file, choose PDF or TIFF for
File Type.
(If you choose JPEG, the three documents
are created as three separate files.)
1 0.4 in. (10 mm) or greater (top, left, right)
2 0.8 in. (20 mm) or greater (bottom)
NOTE
Auto Crop is supported by technology
from Reallusion, Inc.
a Open the media slot cover.
A4
1
2
3
4
1
24 3
A4
1
21


